Sync Made Easy allows you to get your products to the market and sell faster with features such as:
Legacy Data Imports To Consolidate Salesforce Platform Data.
An Eloquent, Lucid User Interface.
Real-time Synchronization of Records.
Concurrent and Efficient Inventory Management.
A Single, Comprehensive App to Manage all eCommerce objects.
Breezy, No-code installation, and Dynamic Field Mapping for non-IT users.
System Requirements
The app requires that you have Salesforce AppExchange installed on your system to be operational.
a. Salesforce account : You may visit www.salesforce.com for account creation if you don’t have an account or Log in to your existing account.
b. Shopify store account : New users should log in to www.shopify.com to locate their business store and proceed as per the instructions in further manual sections.
c. Enable Order Object : Users must enable the Order Object on their Salesforce org to continue with the installation of the package.
Installation
In subsequent sections of the handbook, we give you a walkthrough of all the installation steps. Be sure to follow along with them in sequence for a breezy, error-free install experience.
Installation Setup At the Salesforce Platform
We shall begin the Installation process by logging into Salesforce.com where the app is downloaded and configured for functionality.
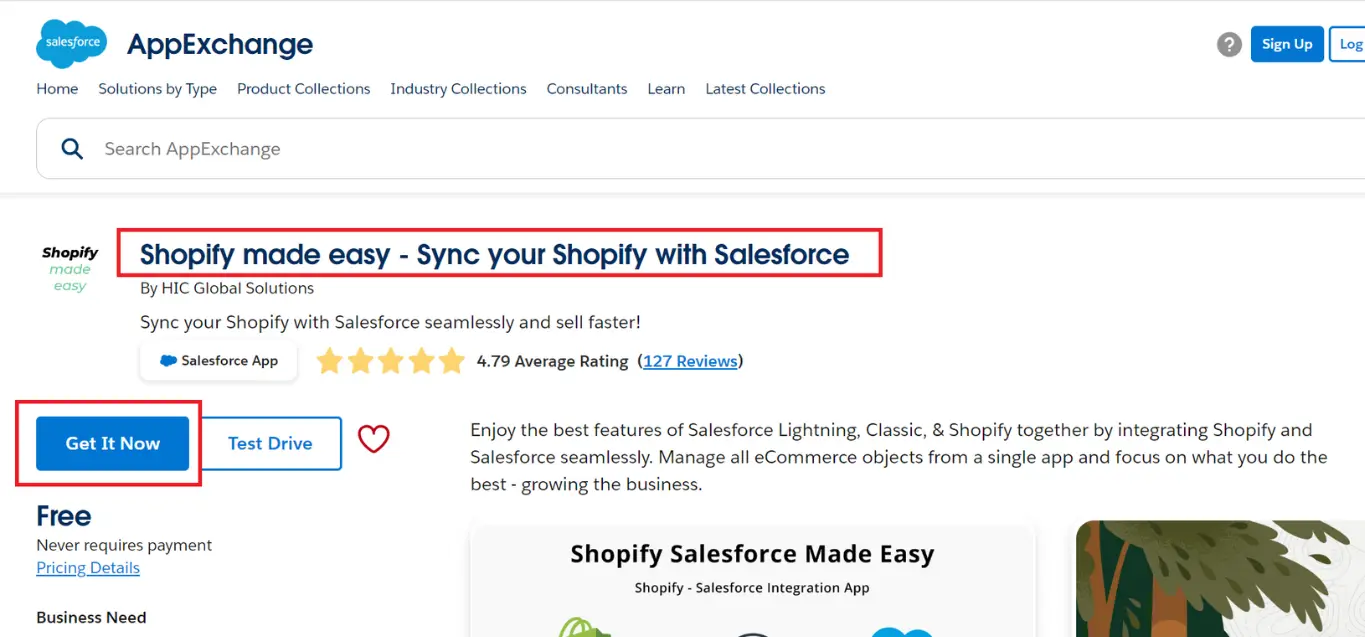
Select Sync Made Easy and click on Get It Now to install the app.
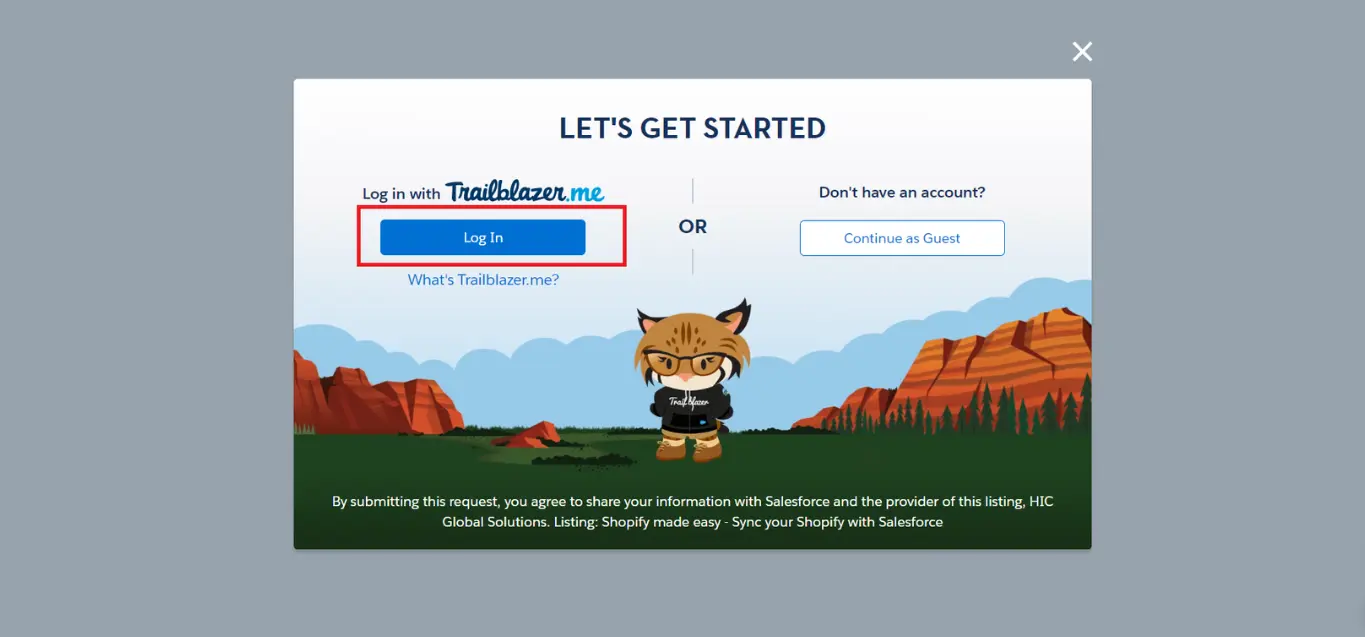
Please note that to install the Sync Made Easy app, you should Log in to Trailblazer.me using Salesforce account credentials.
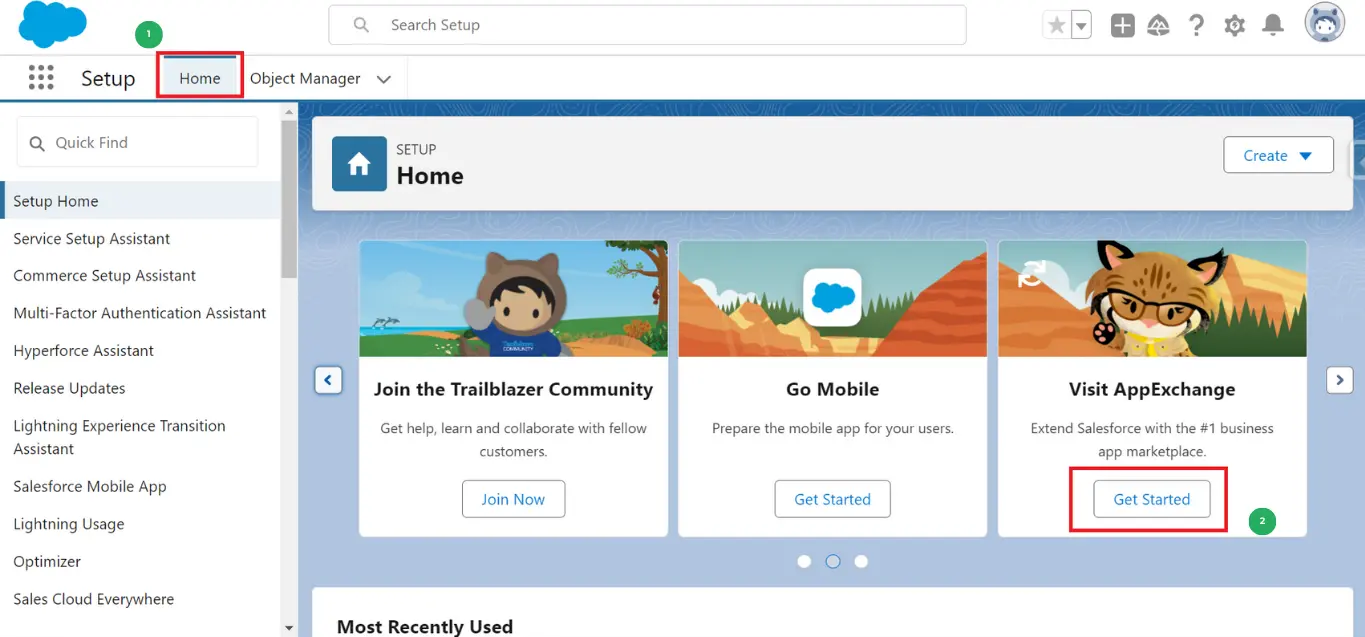
Or Alternately, you can Log into your Salesforce org. Go to Home find Visit AppExchange from the slide bar and click on Get Started. See the below figure for reference.
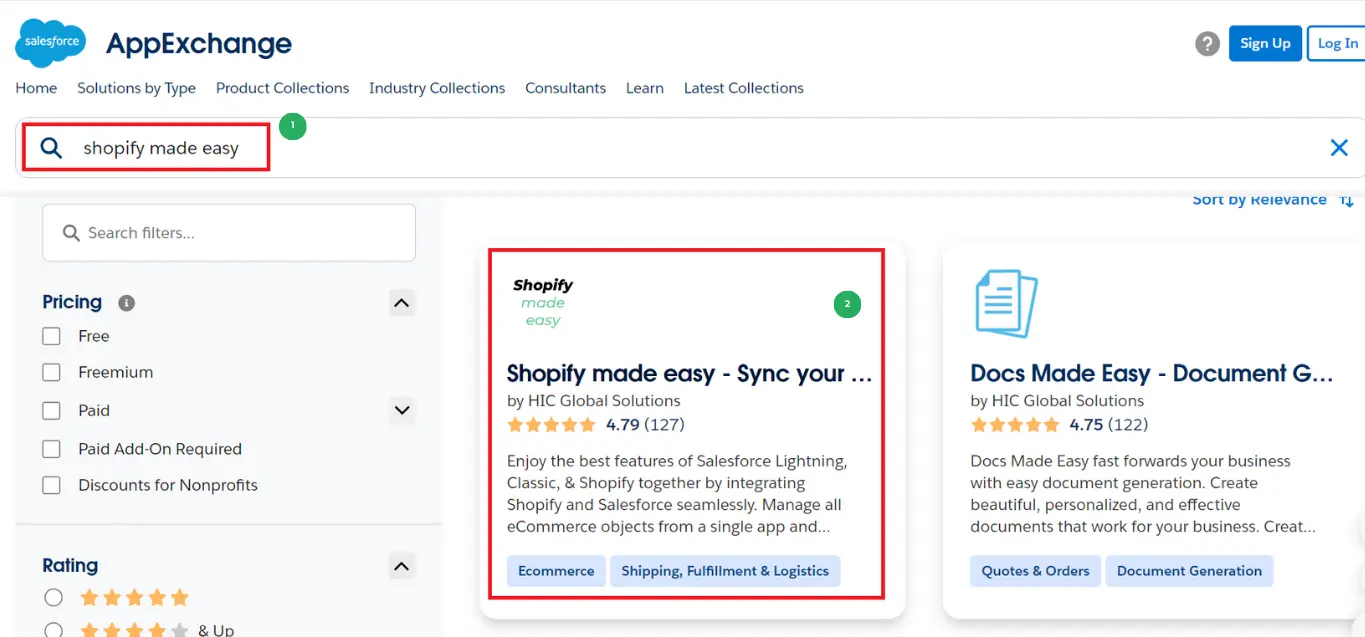
Now type Sync Made Easy in the search bar and then click on the app as shown in Figure 2.
Now Click on Get It now
Now you will have to login to Salesforce AppExchange. To do so, click on Open Login Screen. See Figure 04
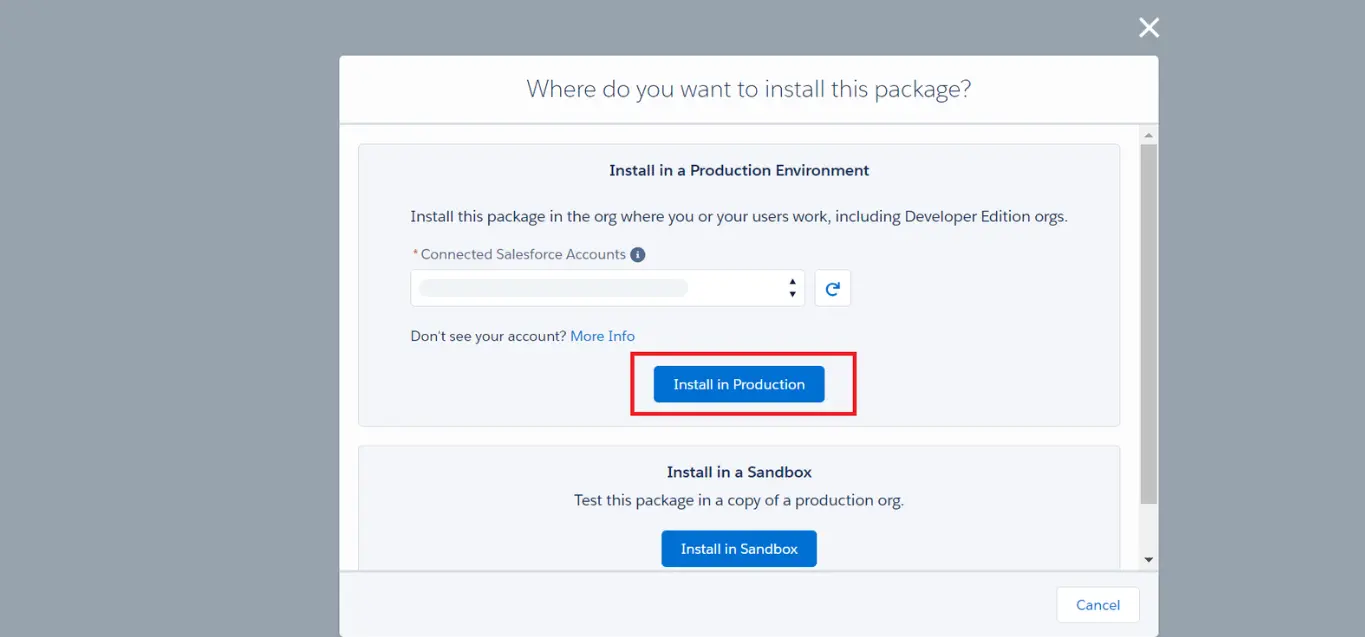
After logging in you will be asked to confirm where you want to install the package. We recommend installing it in Production. So choose- Install in this Org and Click on Install Here. See Figure 5 for reference.
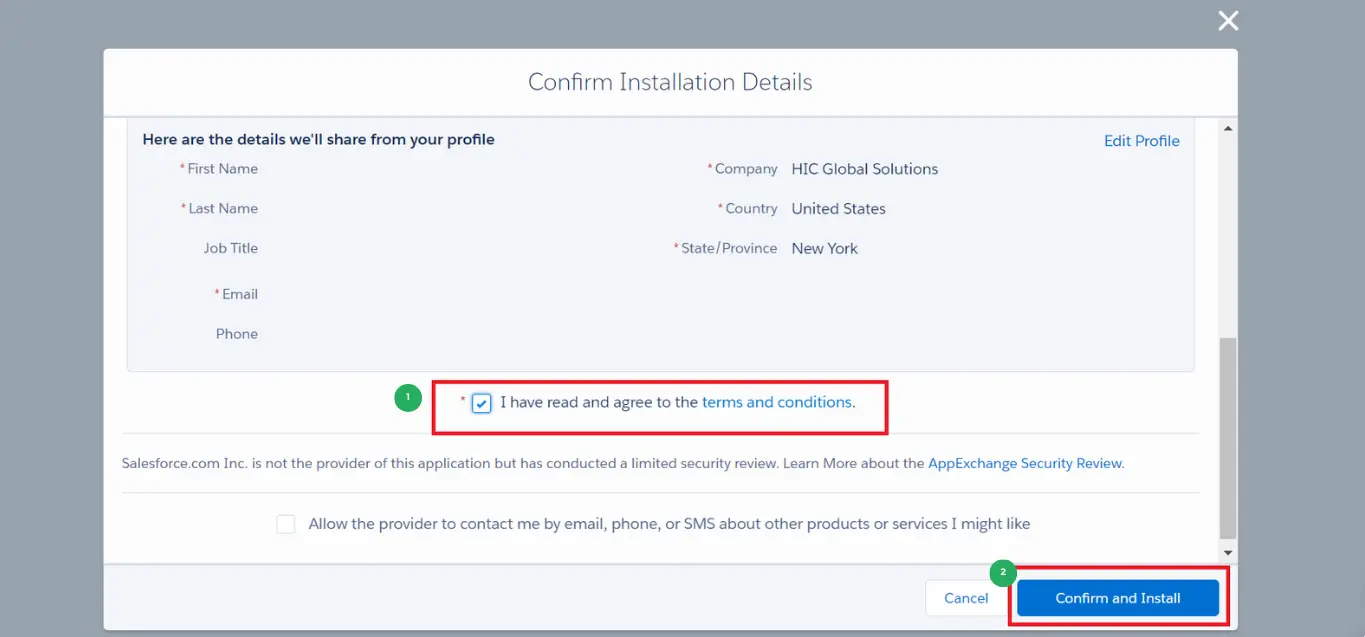
You should be now on the web page to confirm installation details.
Check the box that needs you to agree to the term and conditions.
Then, Click on ‘Confirm and Install” as seen in figure 06
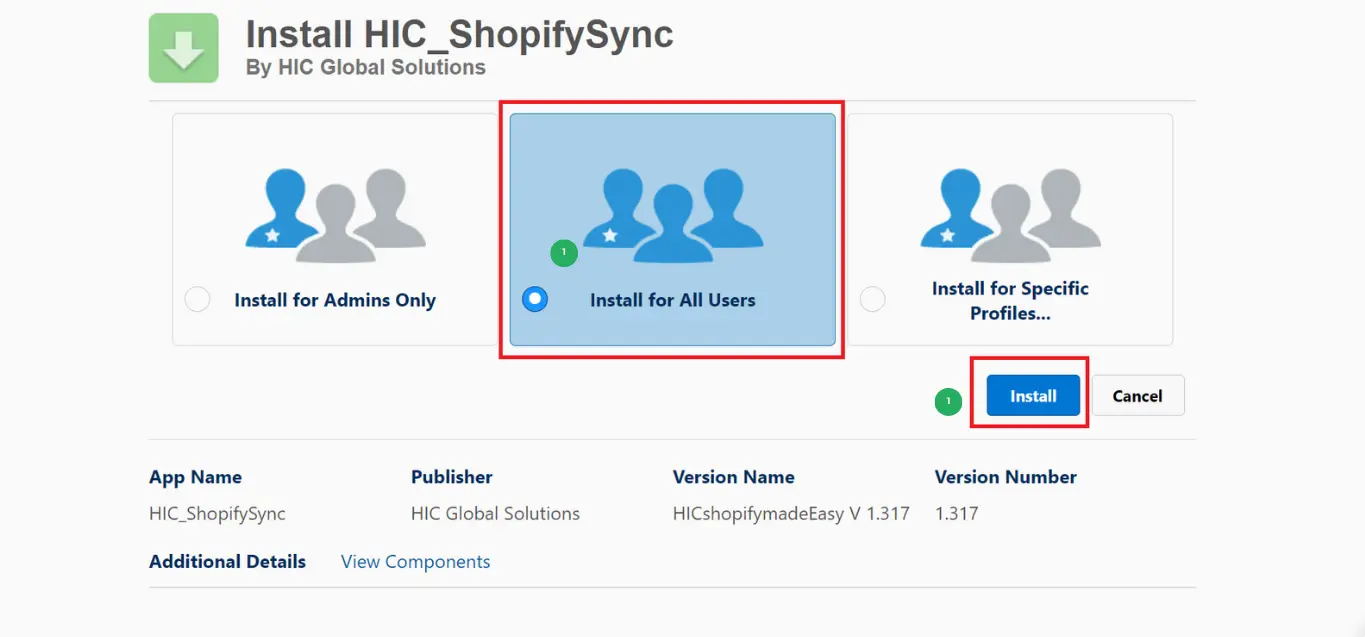
Here, Install for All Users is chosen by default as we recommend. So, Click on ‘Install’ to complete the installation process. Figure 07
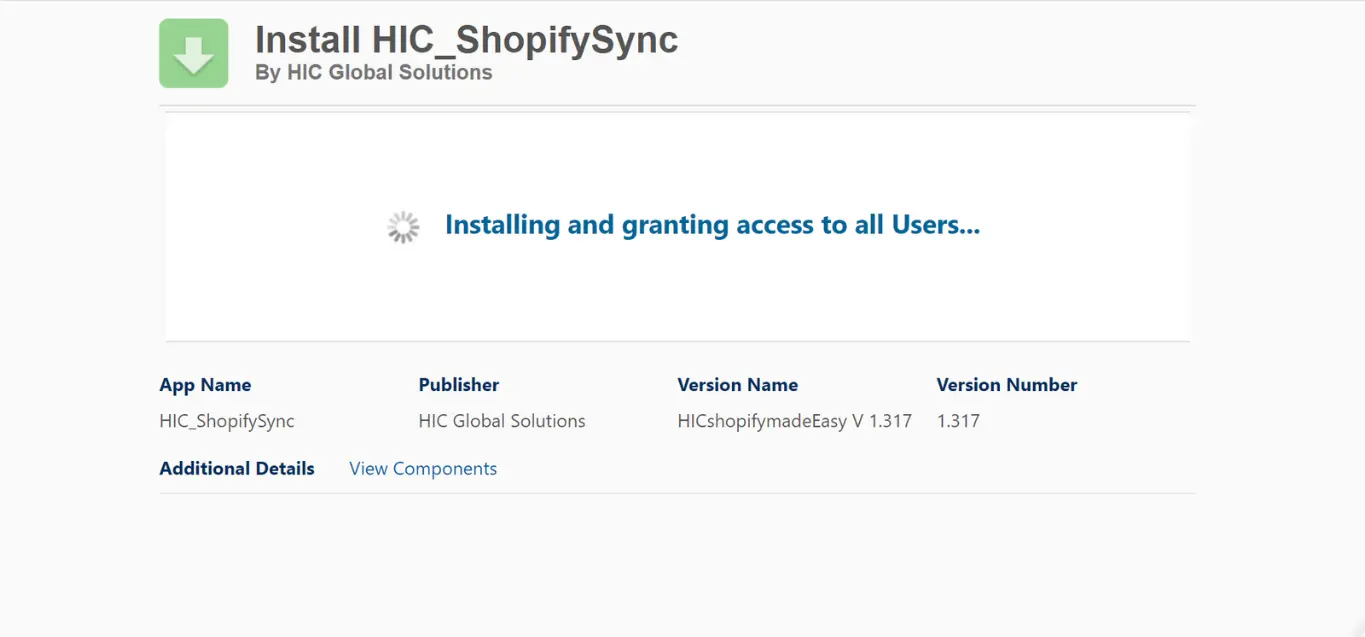
The installation screen should now read “Installing and granting access” as seen in Figure 08
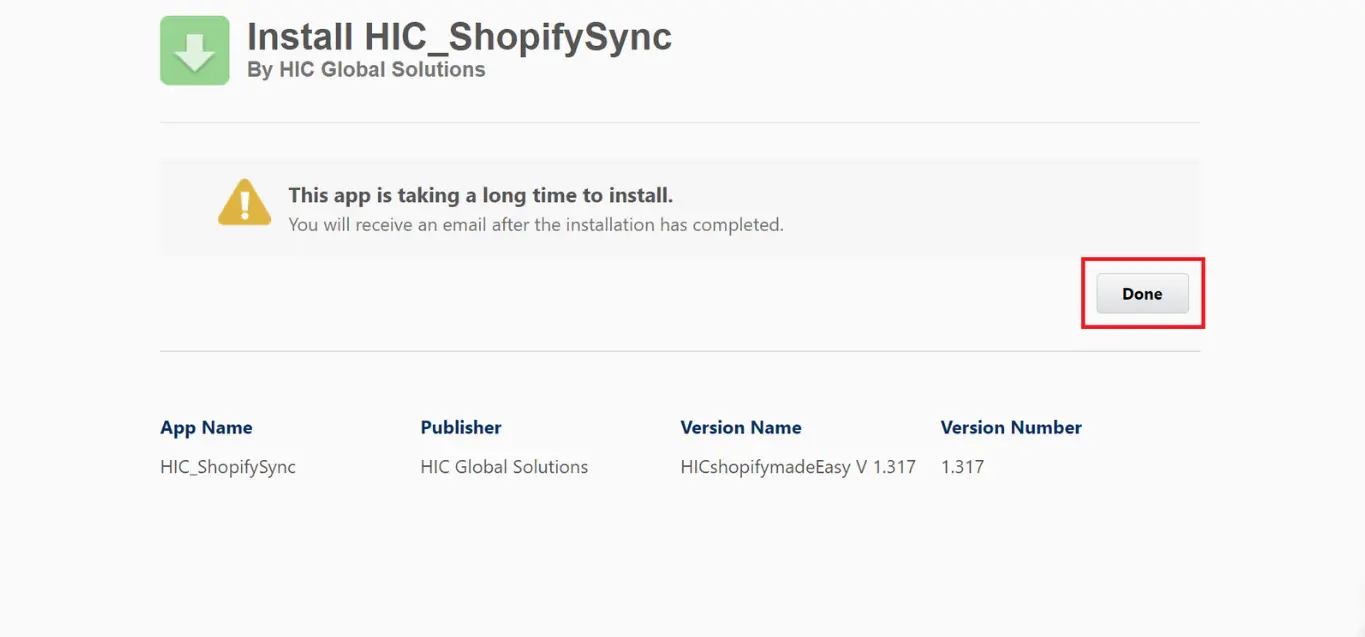
This process takes time and you will be notified when the installation is over. Click on Done as shown in Figure 09
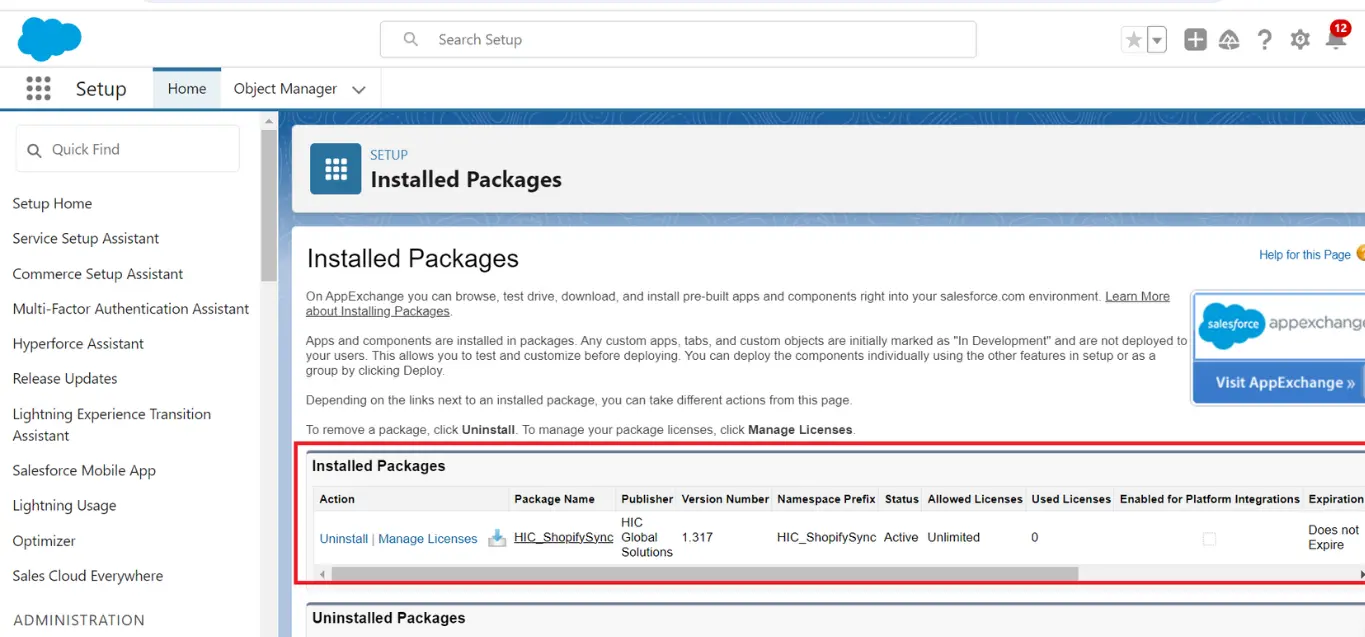
After the package is installed, you will be able to view the package on your Salesforce Set Up page as shown in Figure 10
Prerequisite Salesforce Configurations
Here onwards, you’ll need to configure the installation from the Salesforce Org to make it work.
We will configure the installations in 6 steps.
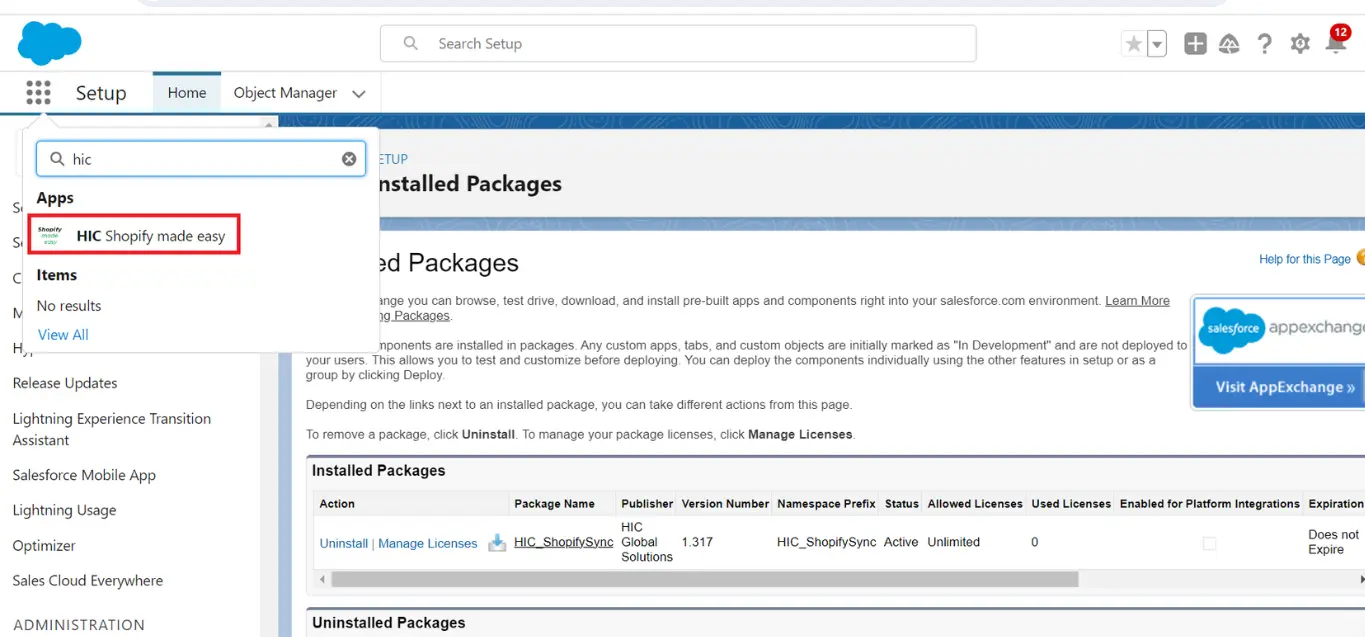
From the same page, Go to App launcher | Type HIC Sync Made Easy in the search bar| Click on HIC Sync Made Easy. See Figure 11 for reference.
Next, Go to Salesforce Shopify Sync Settings.
This brings you to Step 1 of the configuration process.
In Step 1, we will register your site, create a remote setting, and generate a self-signed certificate.
Creating A Site URL for your Org
We will begin by creating a new site.
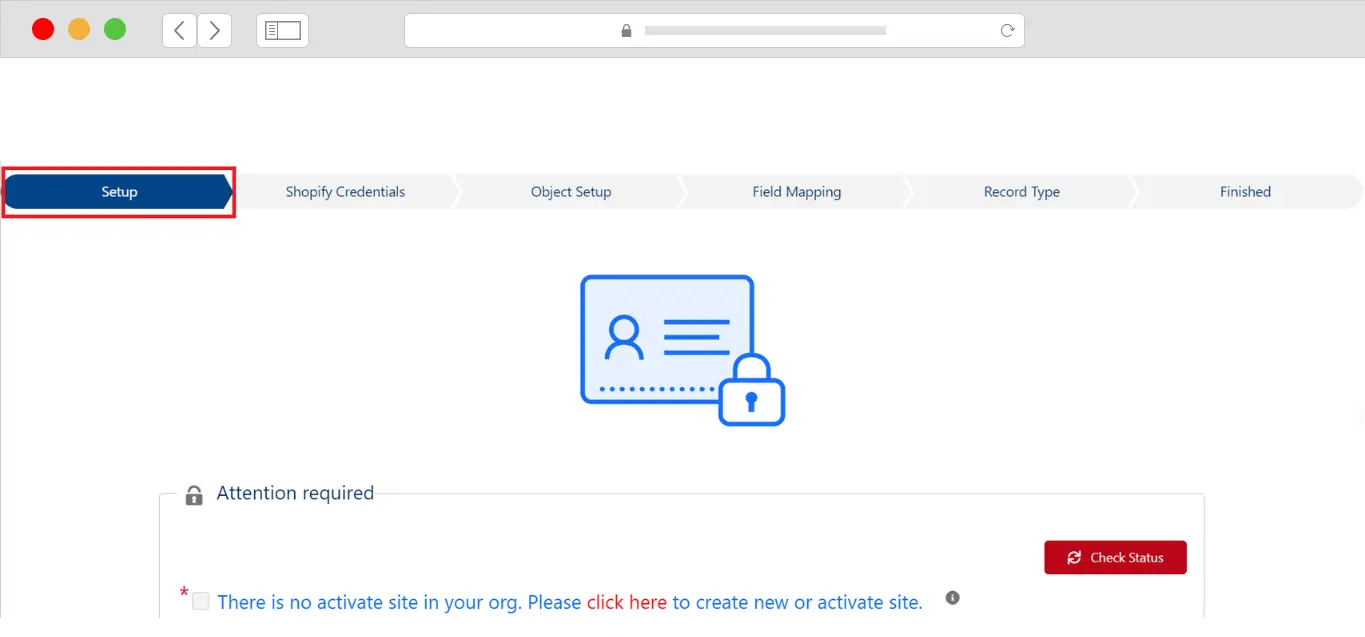
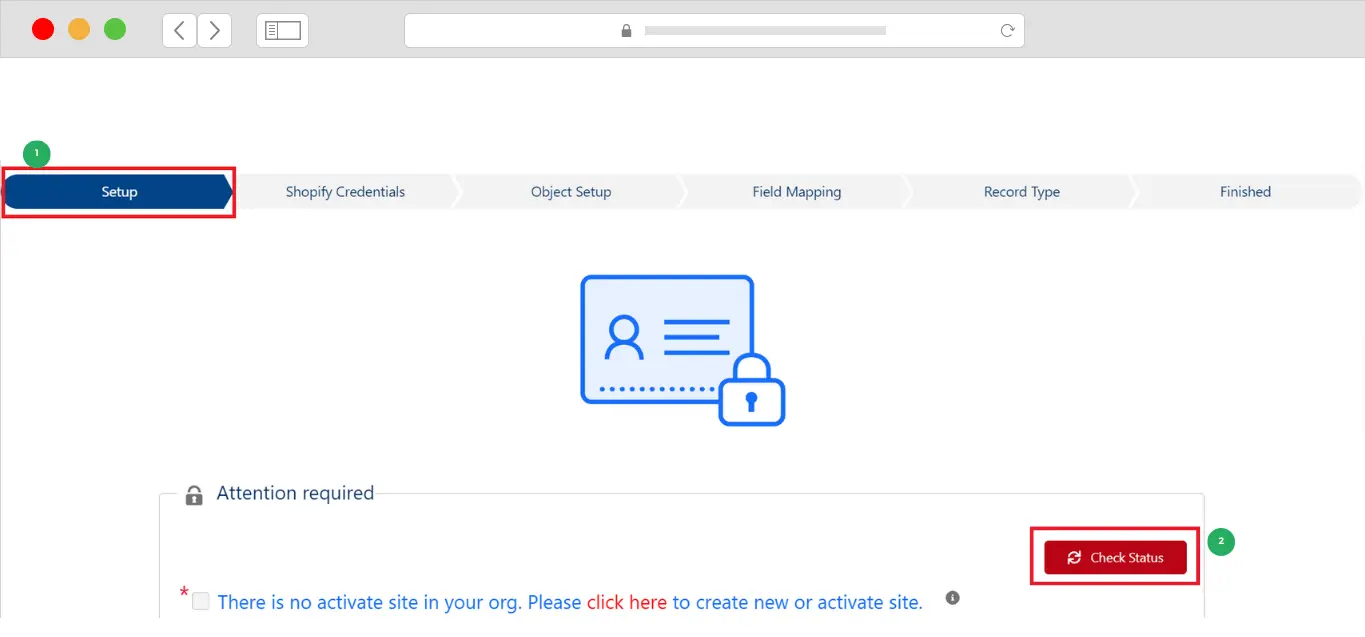
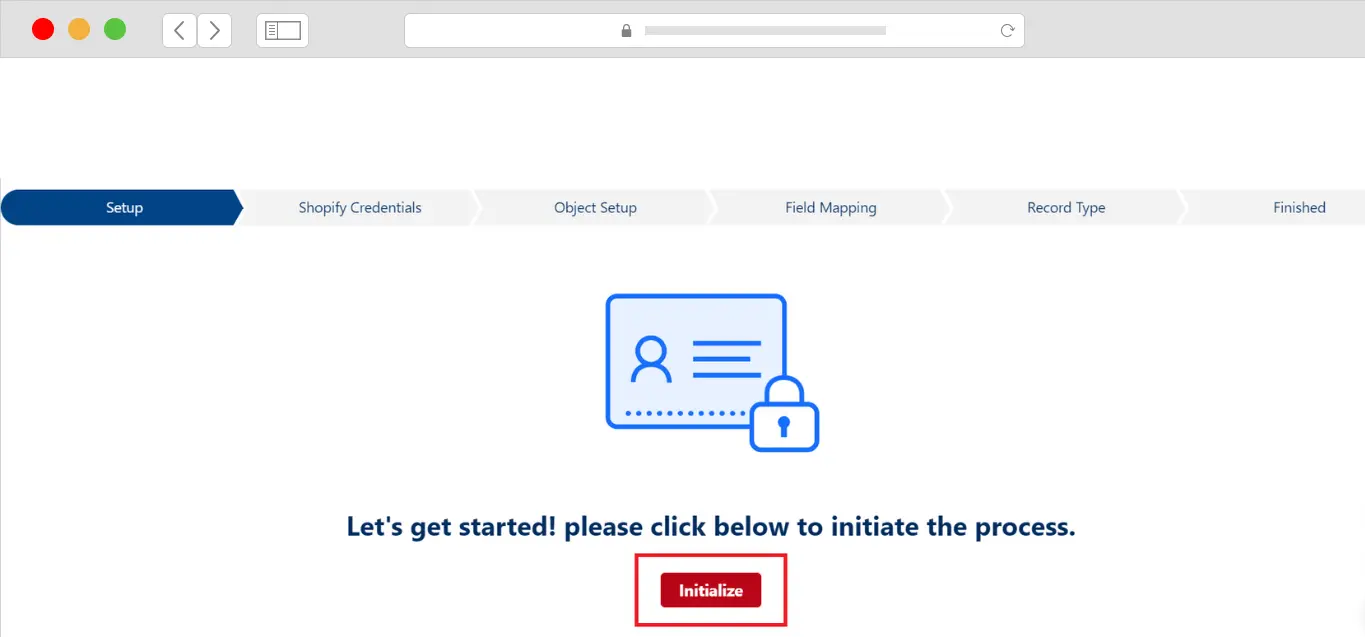
The first page is setup, click on the “Setup” as shown in figure 13.
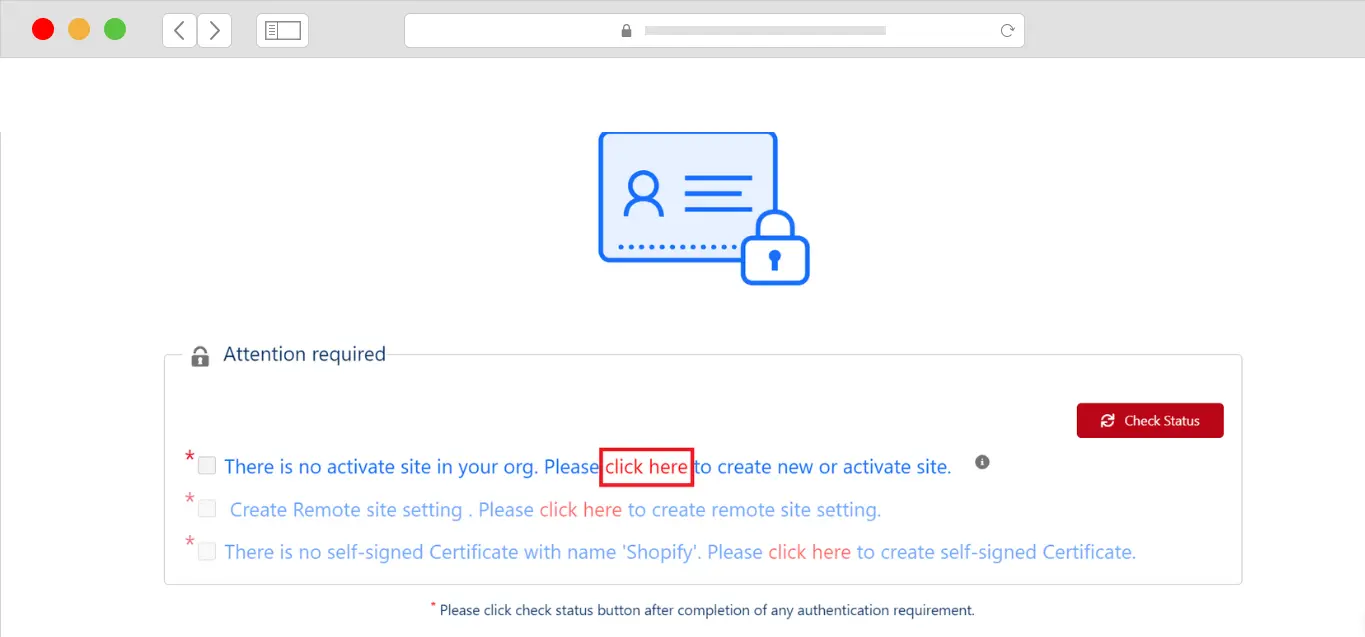
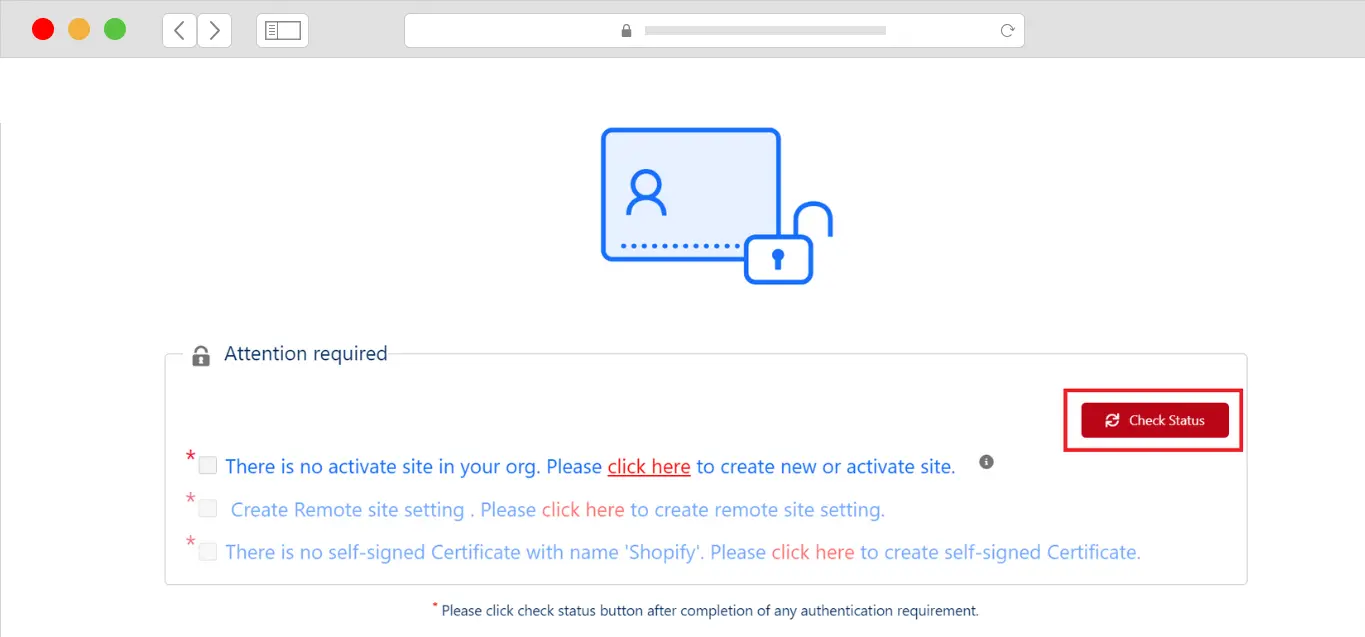
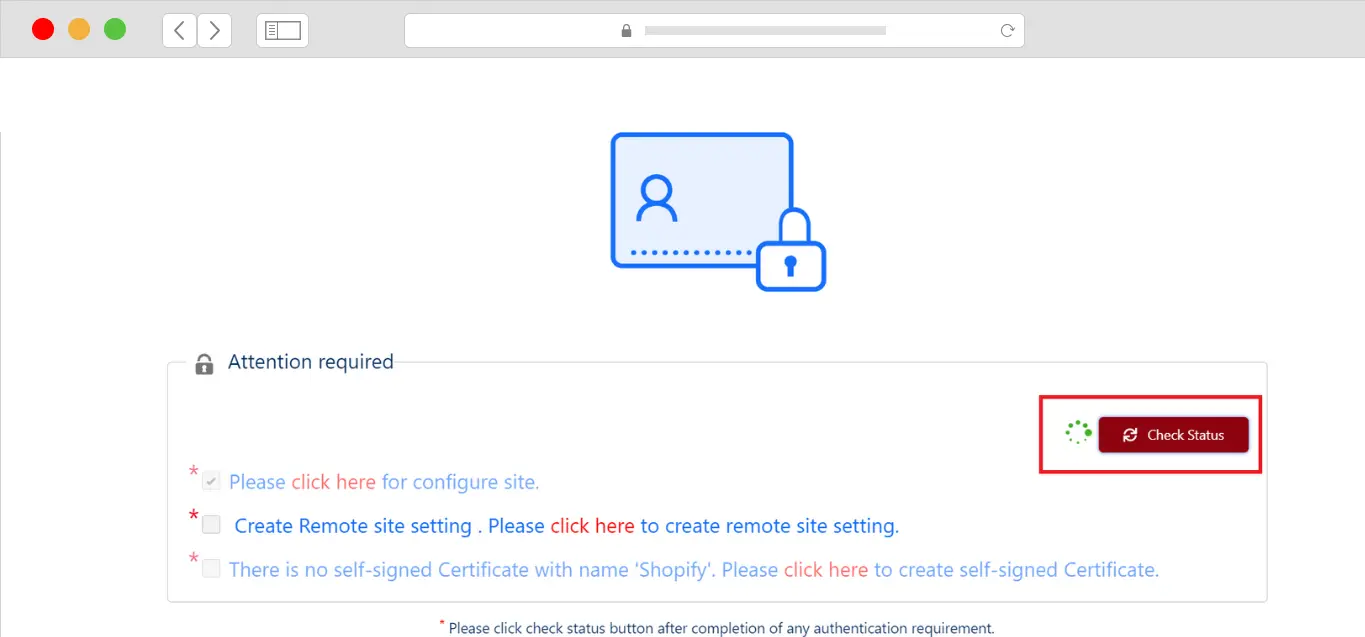
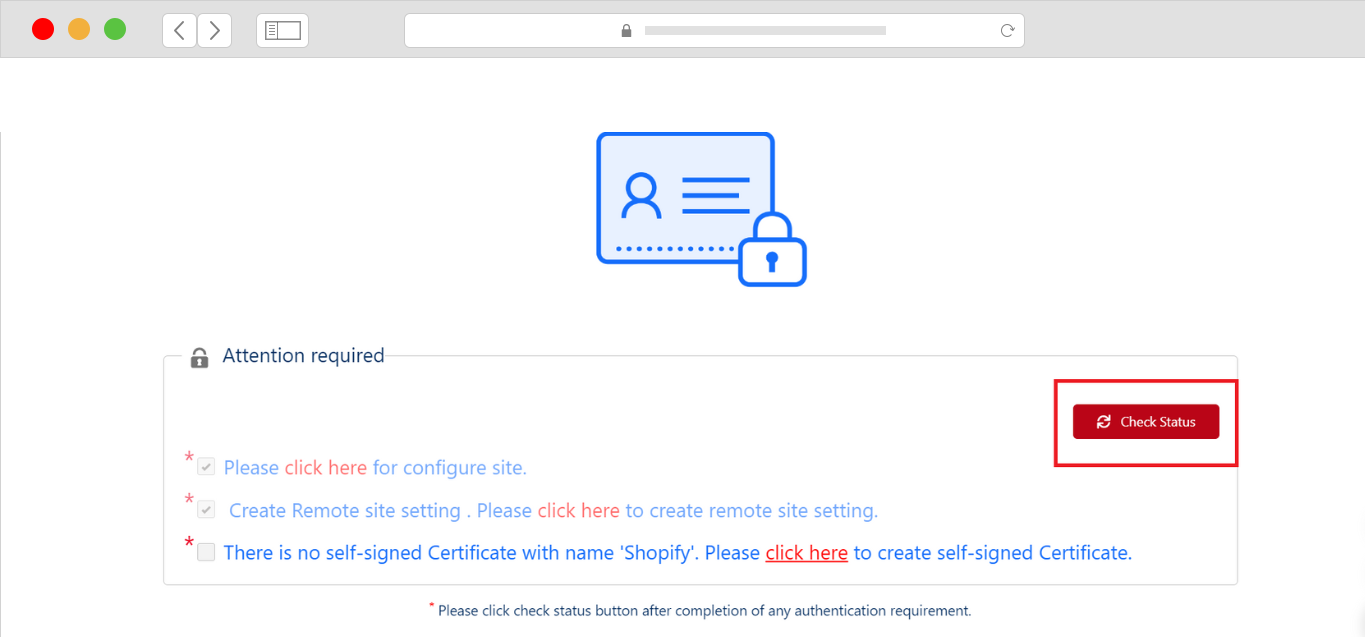
Here on this webpage, there are three mandatory tasks to carry out. So, the first one is to create a new active site.
You may check the status of your site by clicking the Check Status button as shown in Figure 14.
We recommend checking the status after completing every step on the page.
Now, Tap on Click here as shown in Figure 15
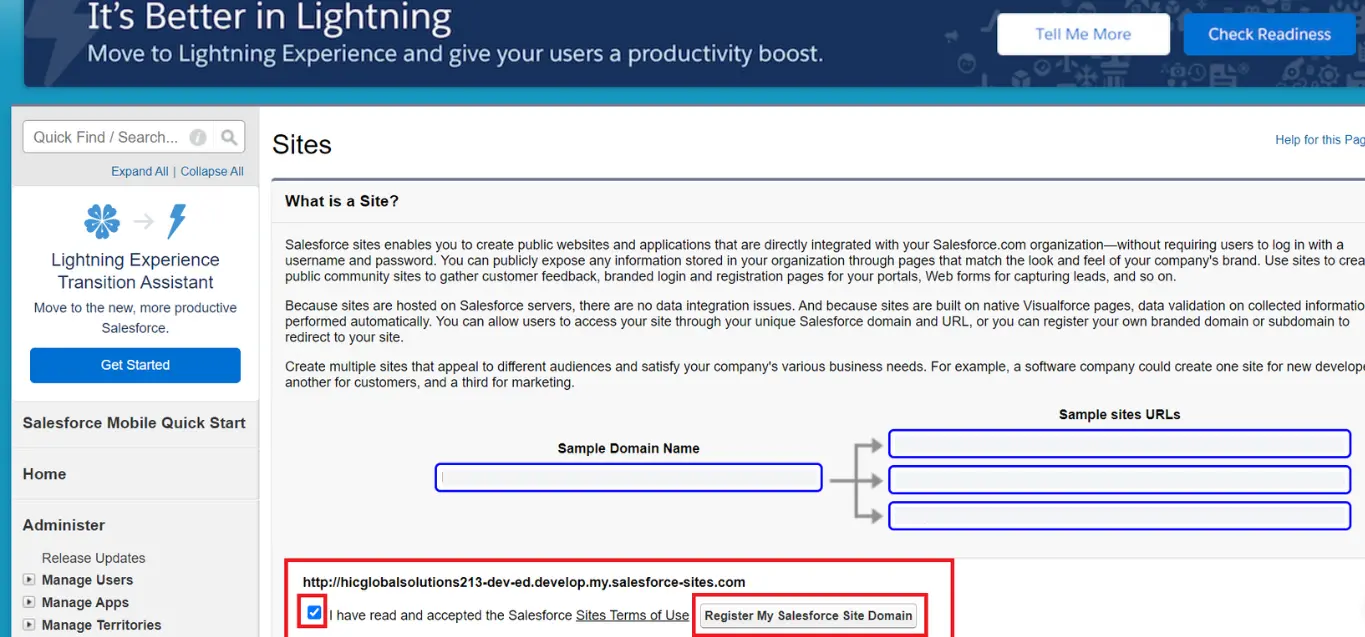
This will take you to a webpage as shown in Figure 16.
Here, enter a unique Domain Name for your Salesforce Site.
WARNING : The Domain Name for your Salesforce Site will be immutable once registered and must be chosen carefully before proceeding any further.
Check the box next to I have read and accepted the Salesforce Sites Terms and conditions.
Then, go to Register My Salesforce Site Domain to finish registration.
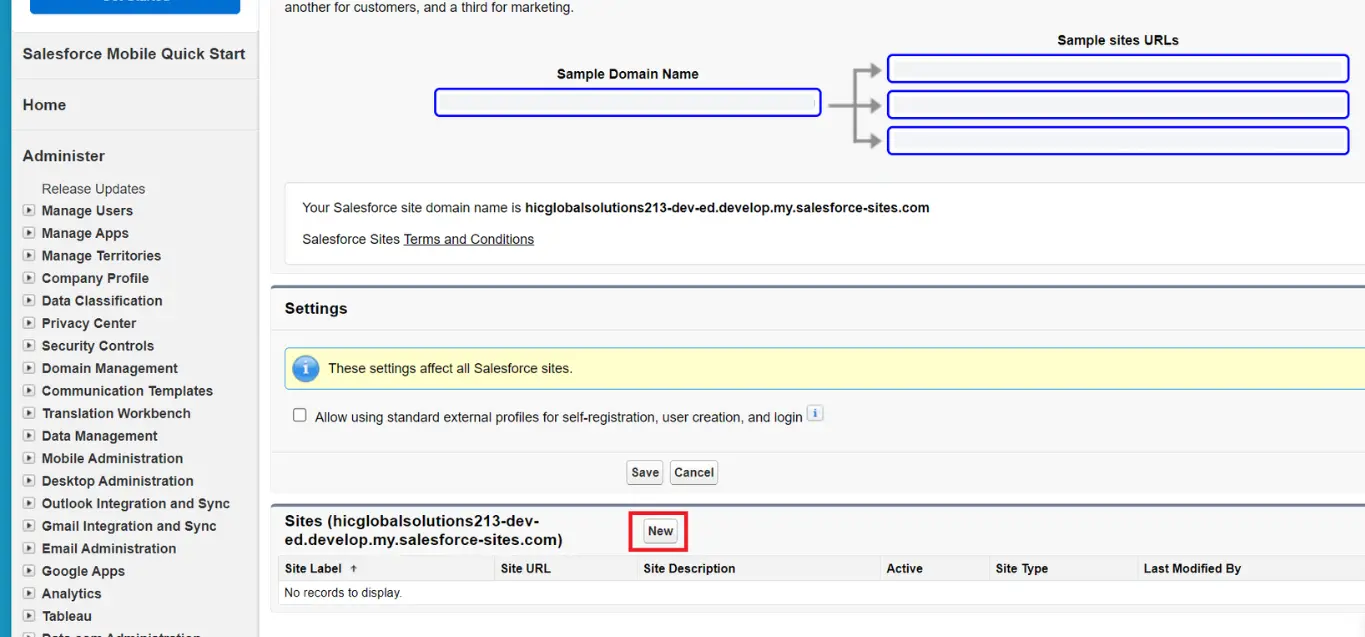
In a while, refreshing the page should display your Salesforce Site Domain Name as depicted in Figure 17. Click on “New” to create a new site.
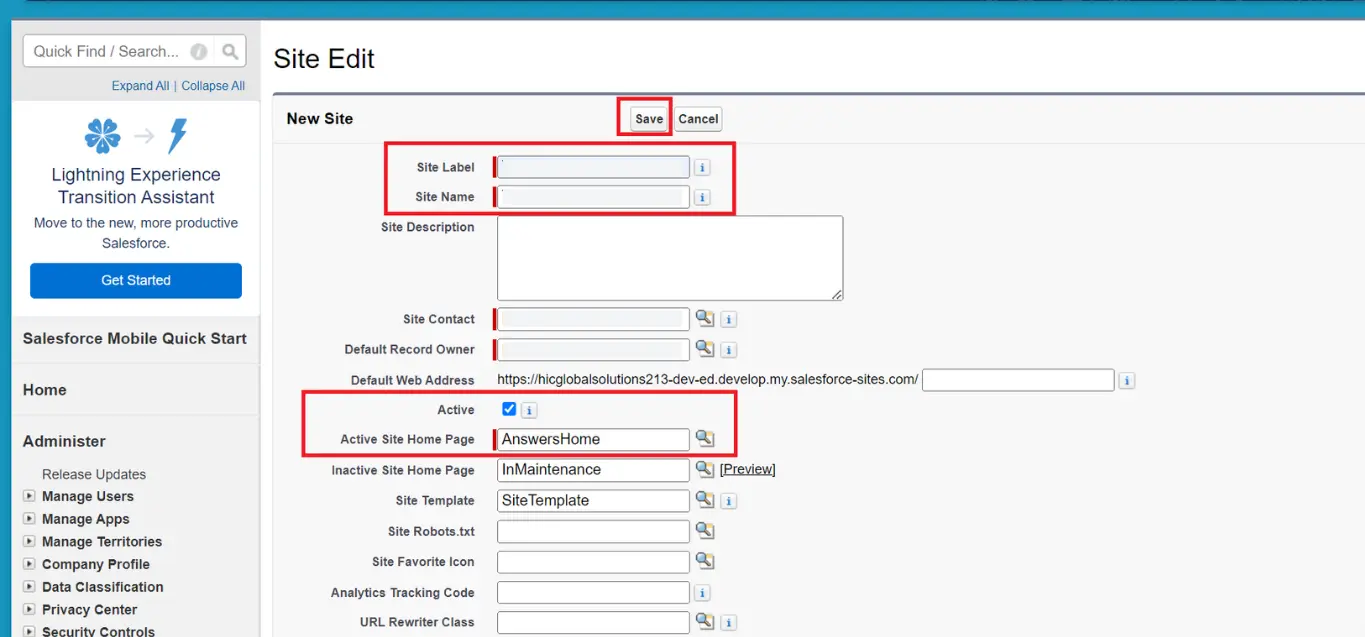
From here, you will be taken to The Site edit page where you will need to create Your Site label and Site Name.
Now on the Site Edit Page, fill in mandatory fields marked in red and mark the checkbox next to ‘Active’ to activate the site as seen in Figure 18.
You only need to enter the Site Label and Site Name. And do not forget to put a tick on Active Site Checkbox.
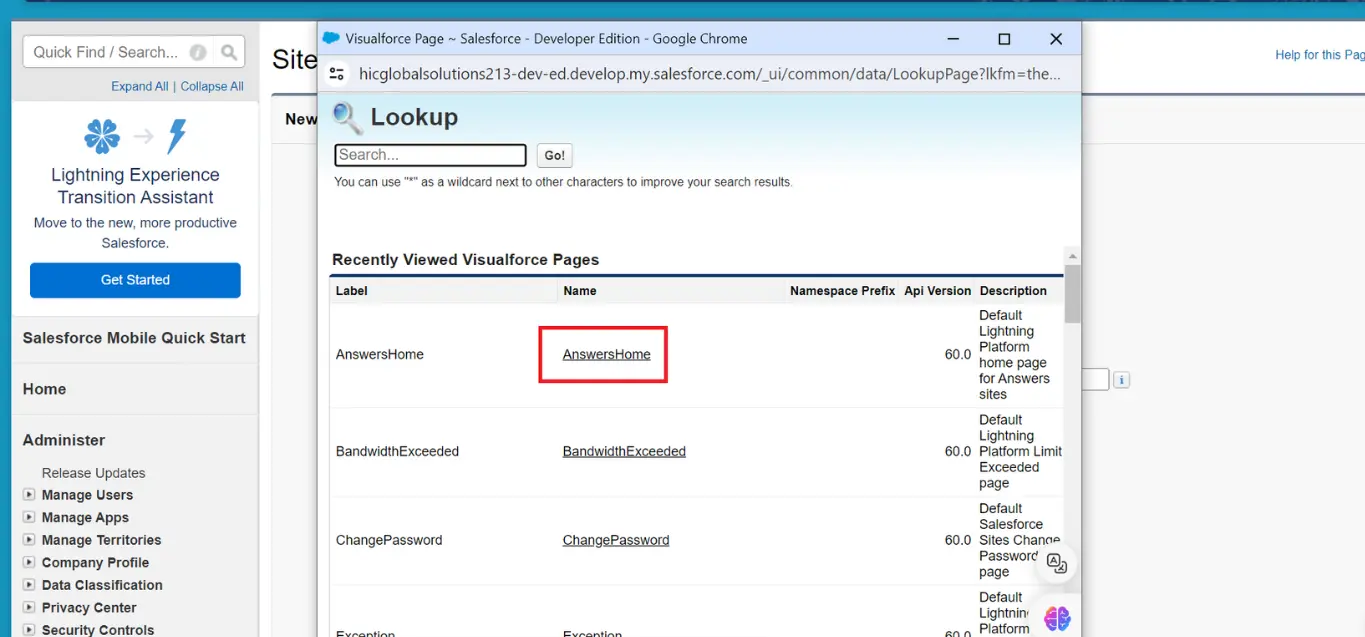
Fill in the Active Site Home Page field by opening the lookup next to it, and pick one of the values in the list of Recently Viewed Visualforce pages as shown in Figure 19
This populates the rest of the mandatory fields with appropriate values.
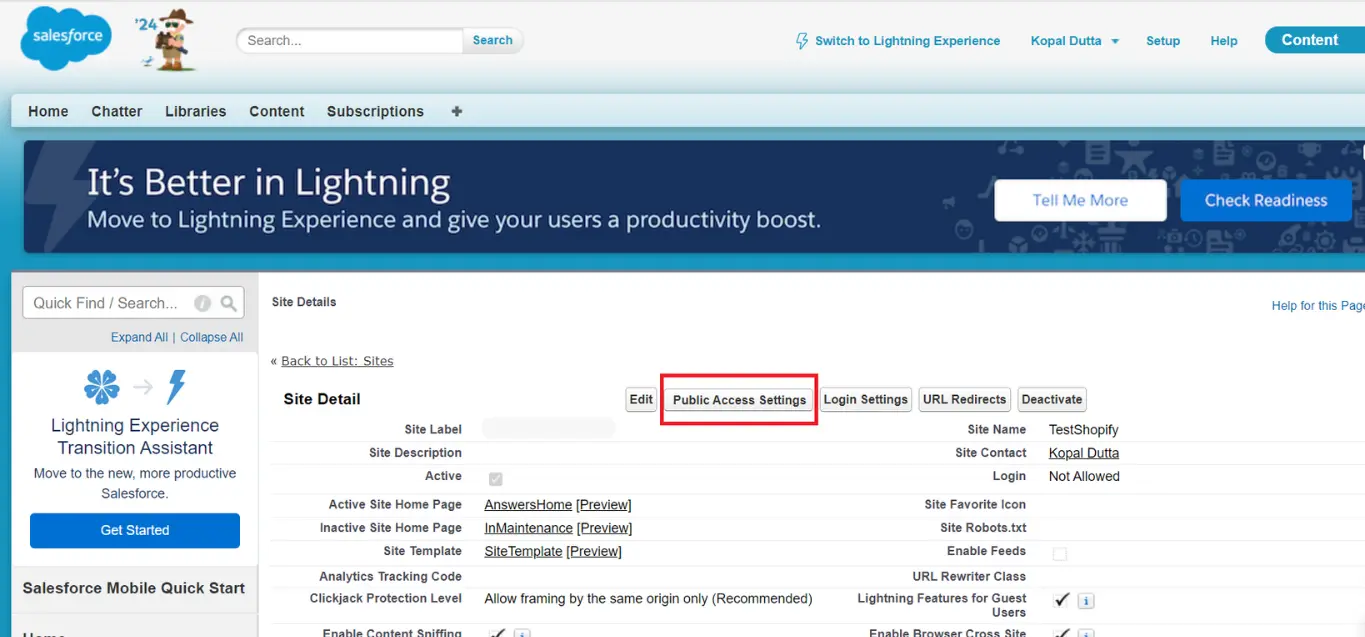
Now, click Save and finish creating the site.
On the following page, you should be able to see the site detail. Click on Public Access Settings as seen in figure 20
This brings you to the Profile page.
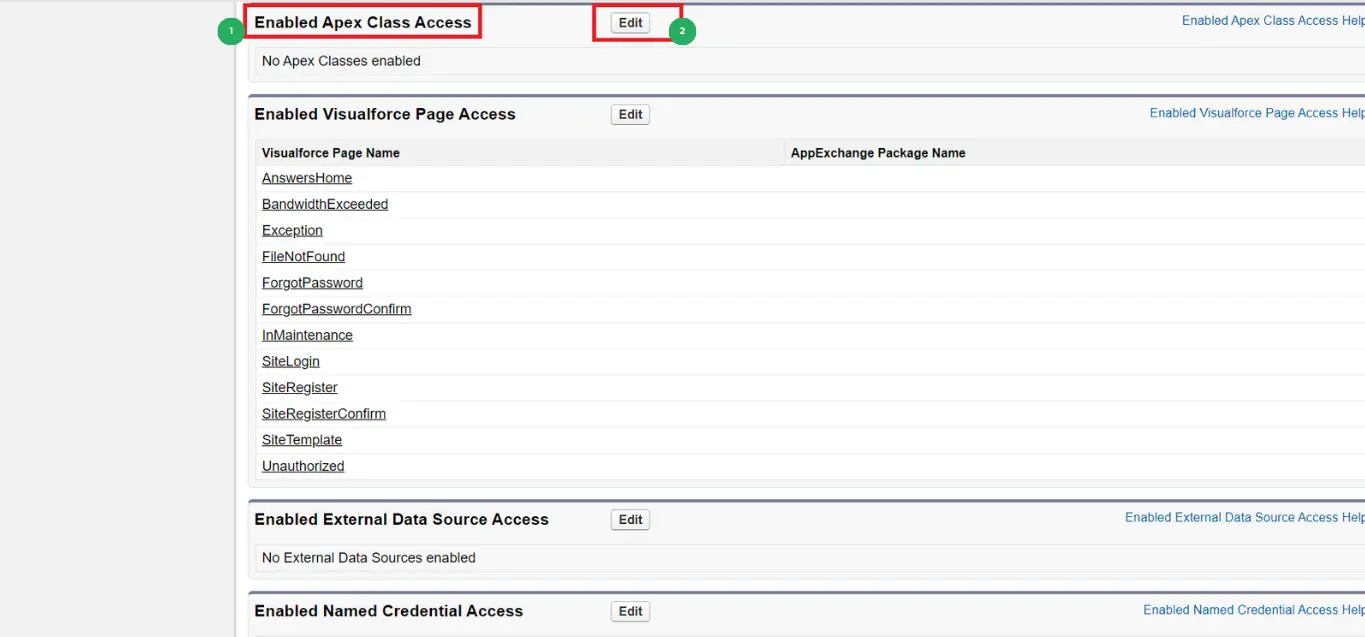
Here, Click on “Enabled Apex Class Access” as shown in Figure 21. Then click ‘Edit’.
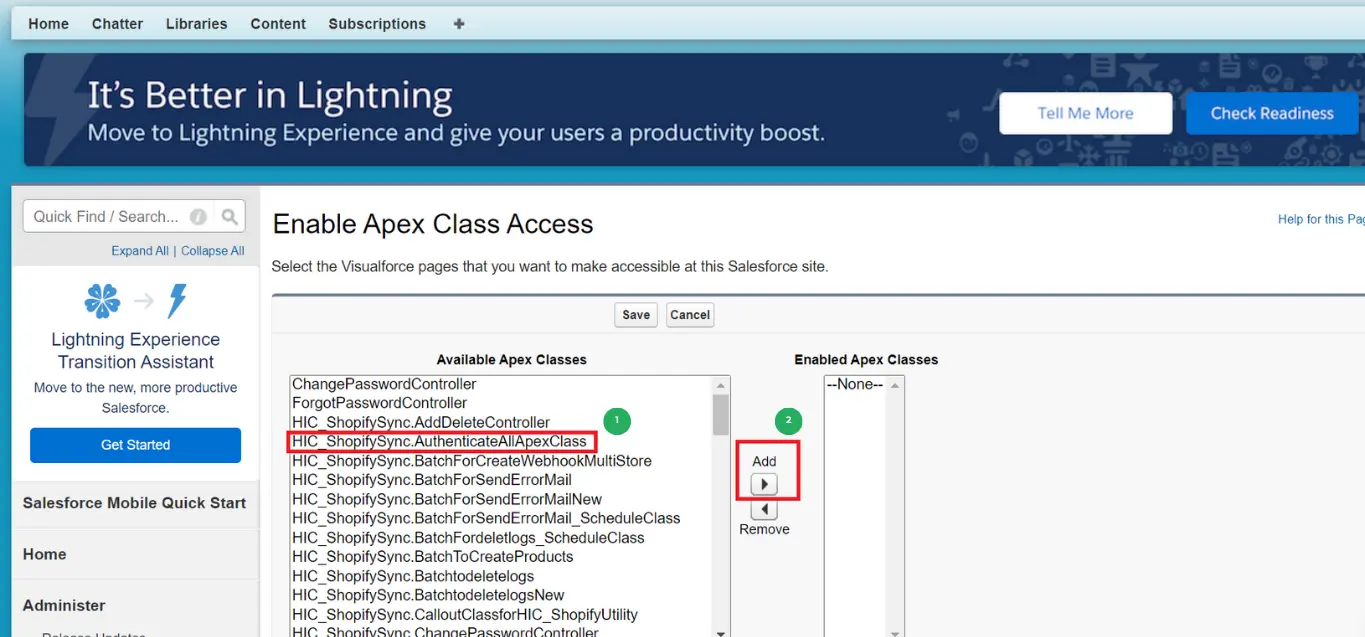
You should be on Enable Apex Class access page,
Here, select ‘HIC_ShopifySync.Authenticate all apex classes and click on ADD. Refer figure 22
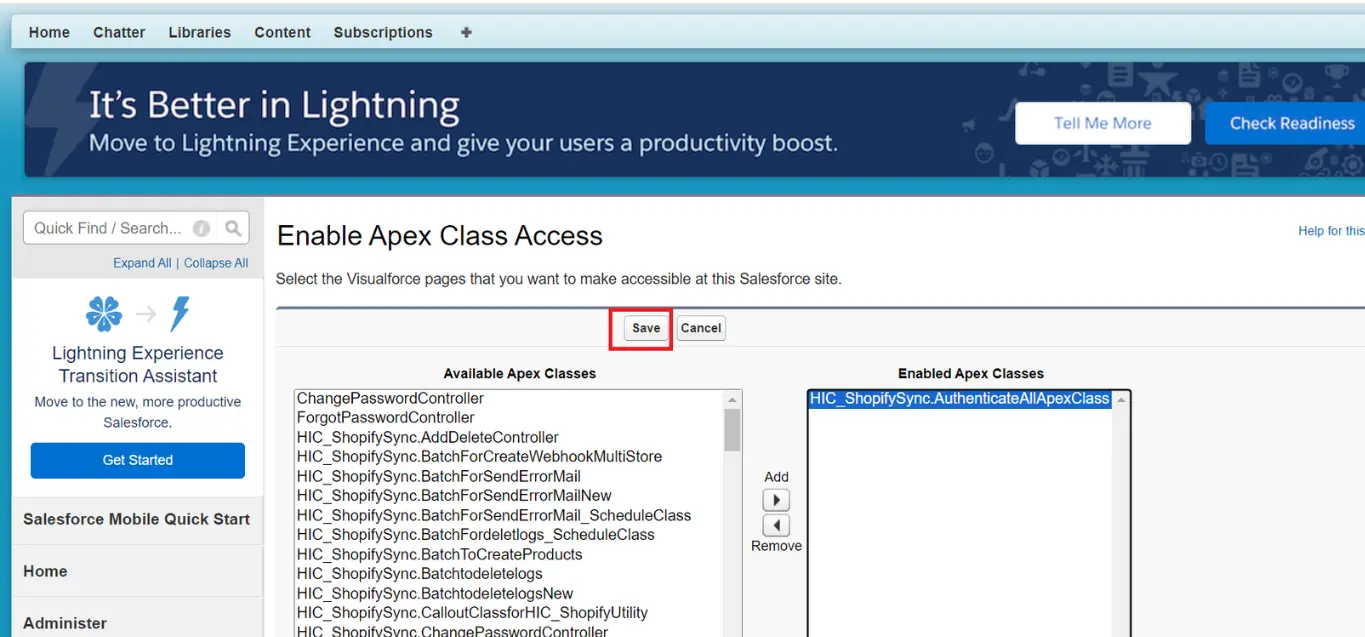
Now Click on Save. Figure 23
Activate the site created
Go to the Set up of the Salesforce sync Settings page and click on Check Status. See Figure 24 for reference
After the site is activated, it’s time to configure your site.
Configure the Site
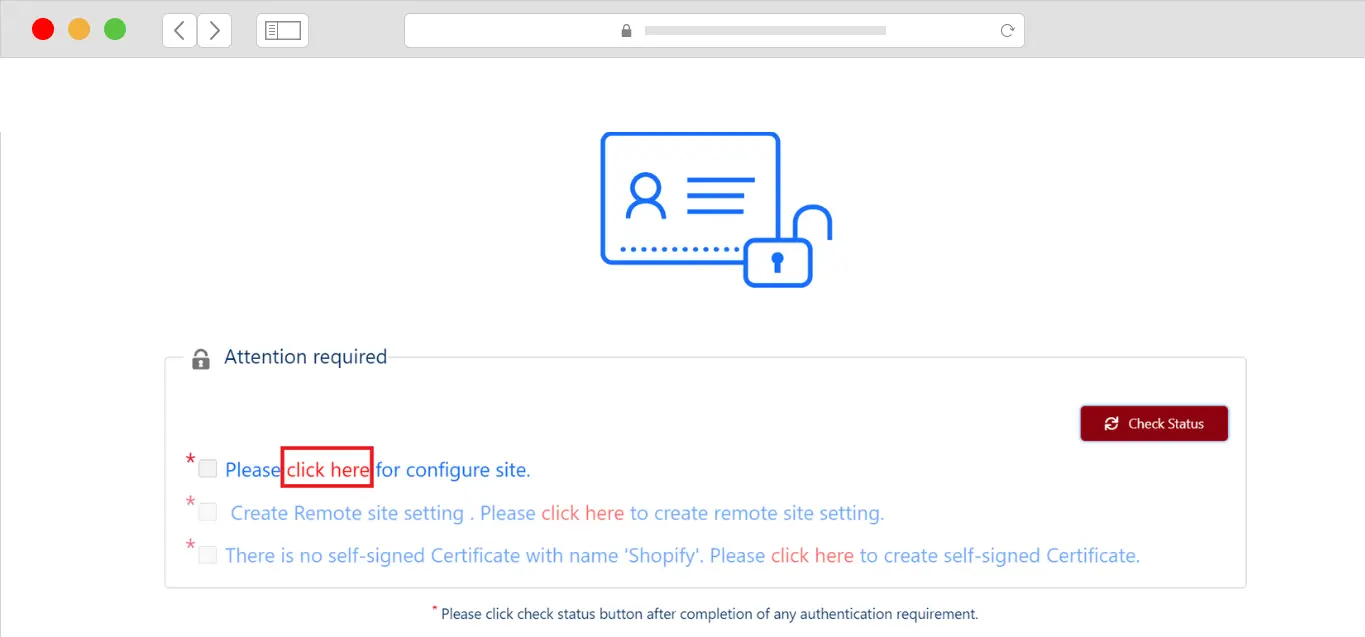
From the Setup of the Salesforce Shopify sync settings page, Now it should configure your site.
You can click on Check Status after completing the authentication required.
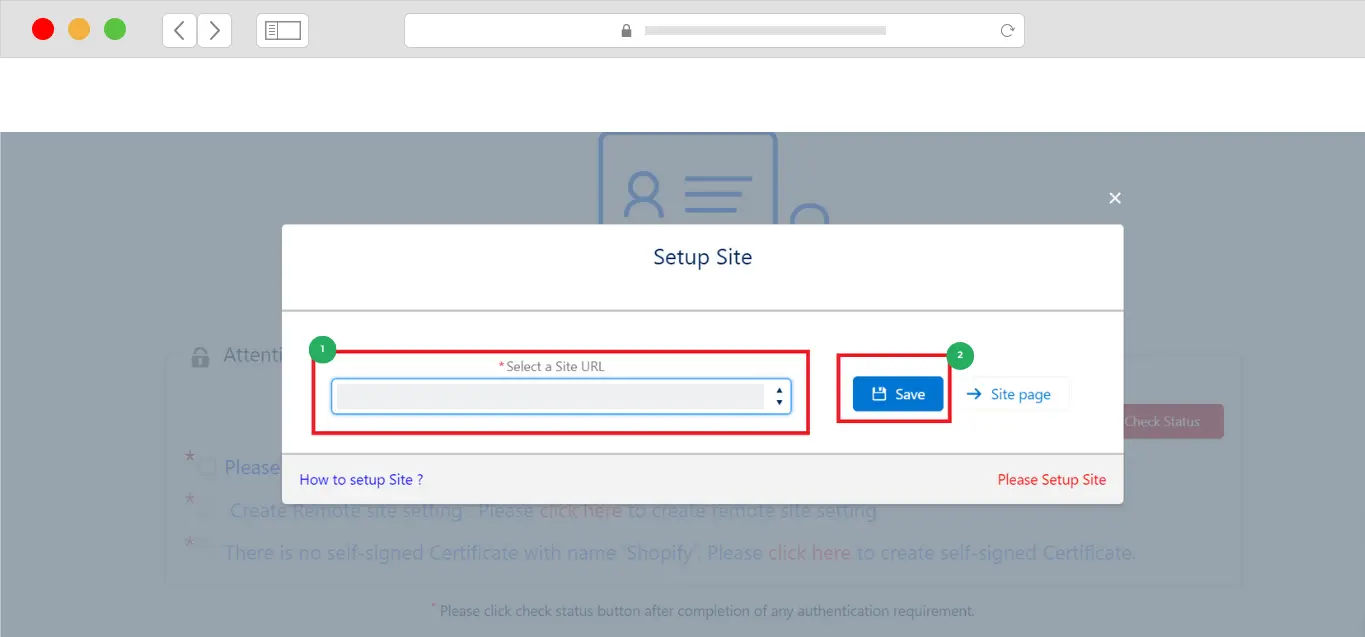
Now, click on ‘Click here’ to configure the site as shown in Figure 25
This will take you to the webpage to enter your site. Refer to Figure 26
Select your site URL from the dropdown and click on “Save”.
On the sync setting page, you can now click on “Check status”
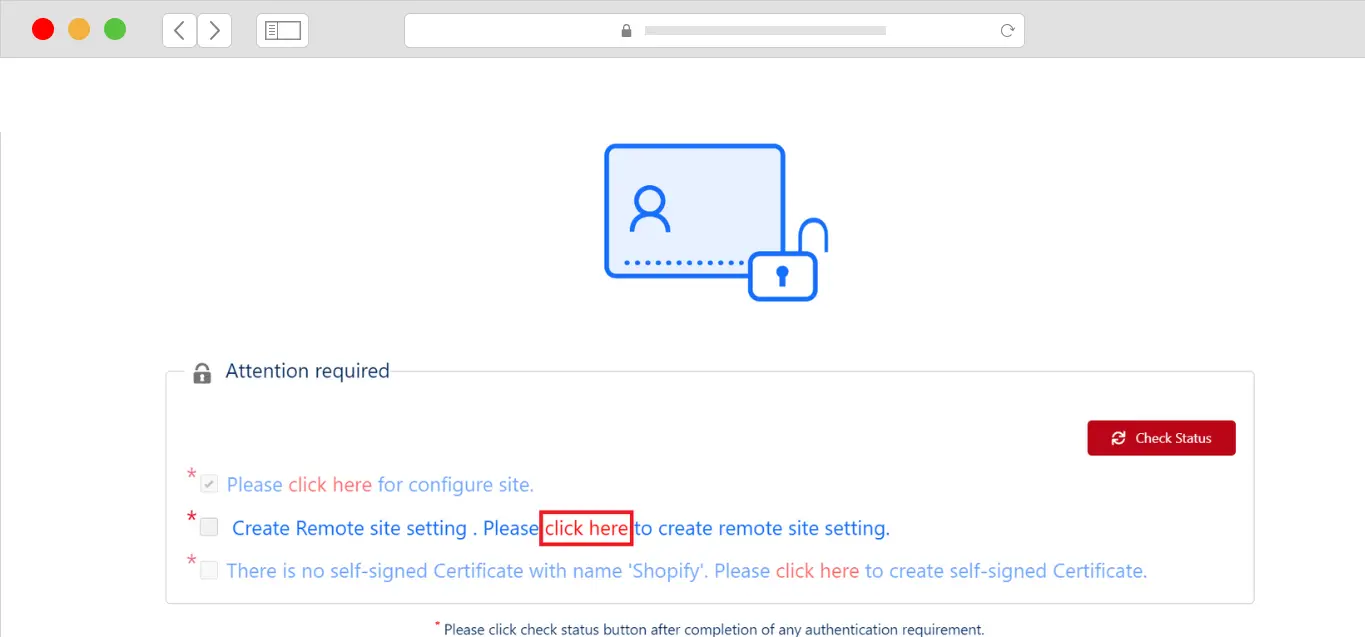
Remote Site Settings
On the Shopify Salesforce Sync Settings, the next step is to create remote site settings.
Click on “Click here” to create remote site settings as seen in figure 27.
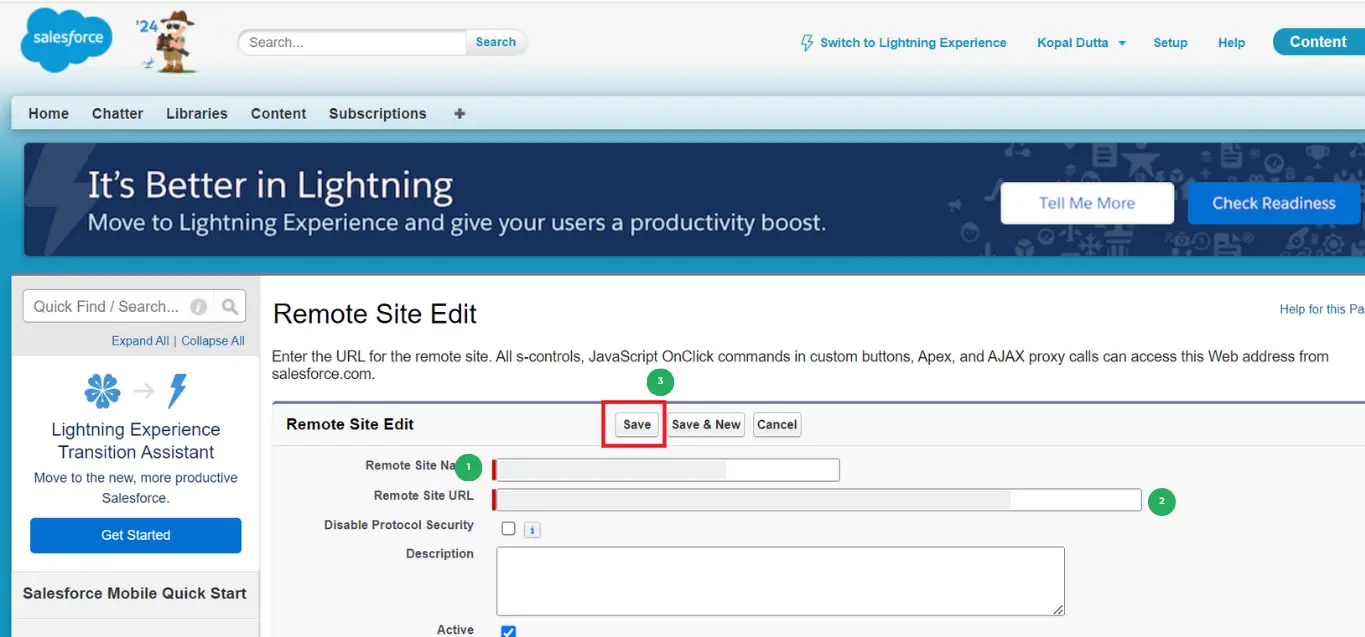
On this page, The remote site details and Site URL is filled in by default.
Click on “Save “ to save the remote site details as shown in Figure 28.
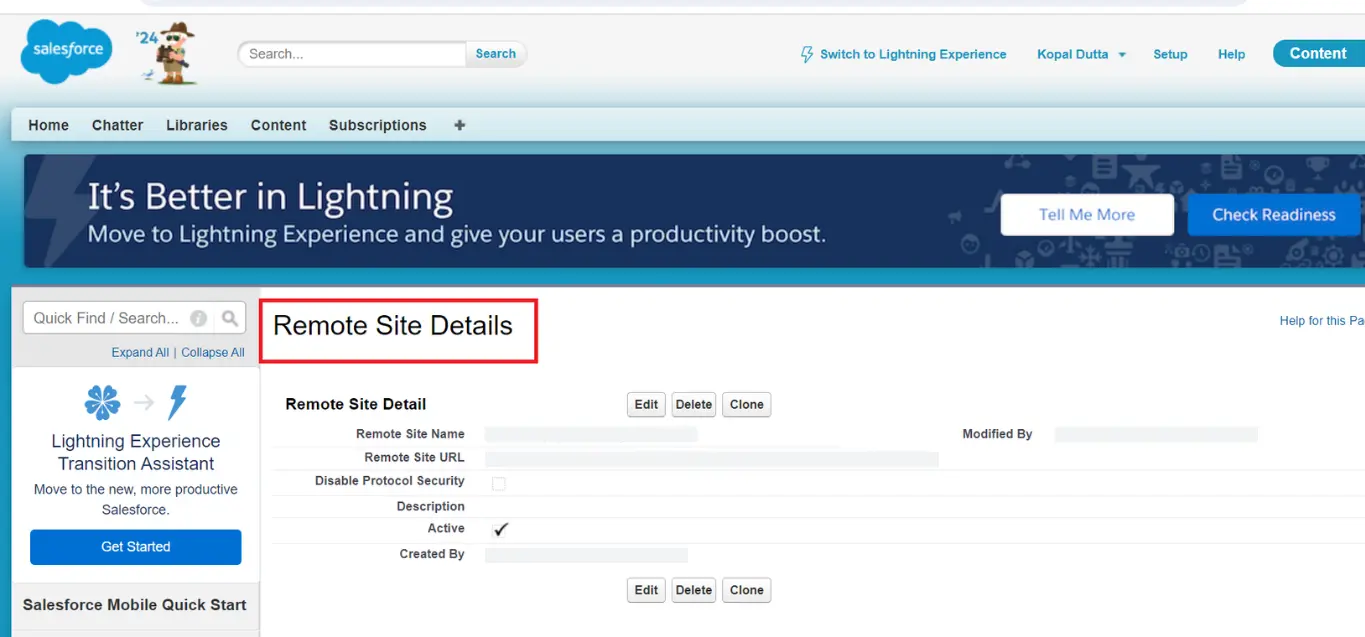
Now you can view your Remote Site Details as shown in Figure 29
Go back to the sync settings page and click on “Check Status” to see the authentication status as shown in Figure 30
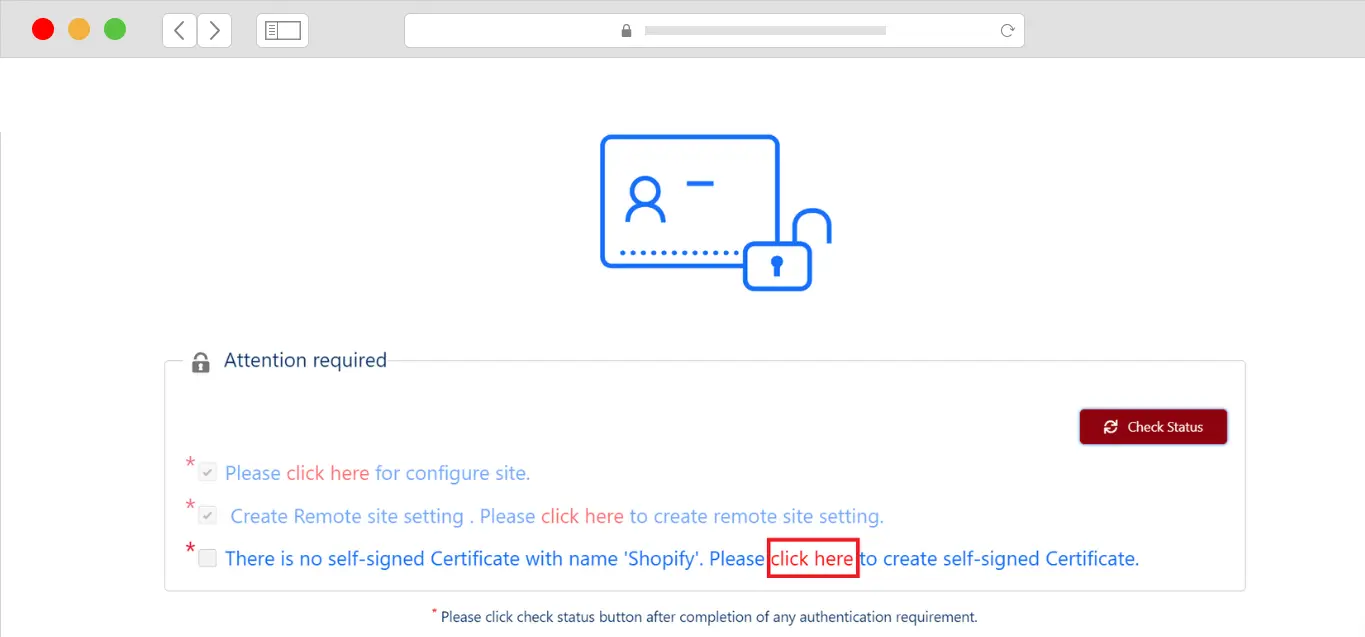
Generate Self-Signed Certificate
In this step, we will generate a self-signed certificate with the name “Shopify”.
Right from the Salesforce Shopify sync settings page, click on “click here”. See Figure 31
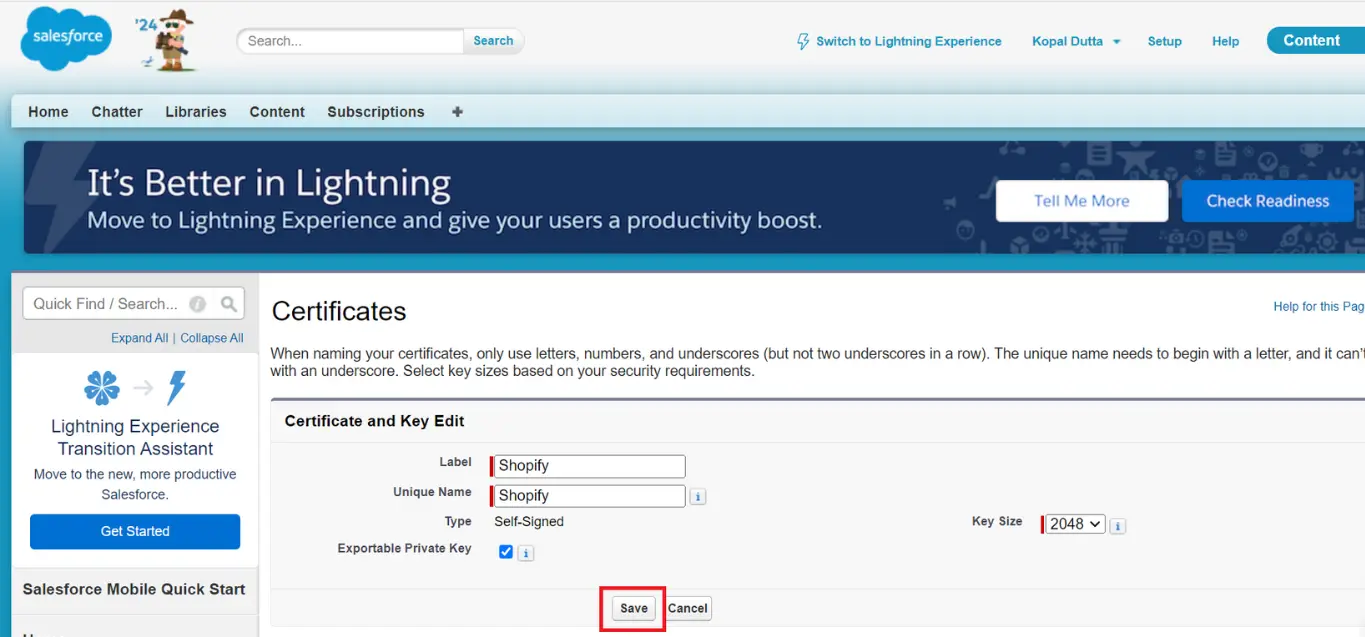
On the Certificate page, click on “Save” as seen in figure 32
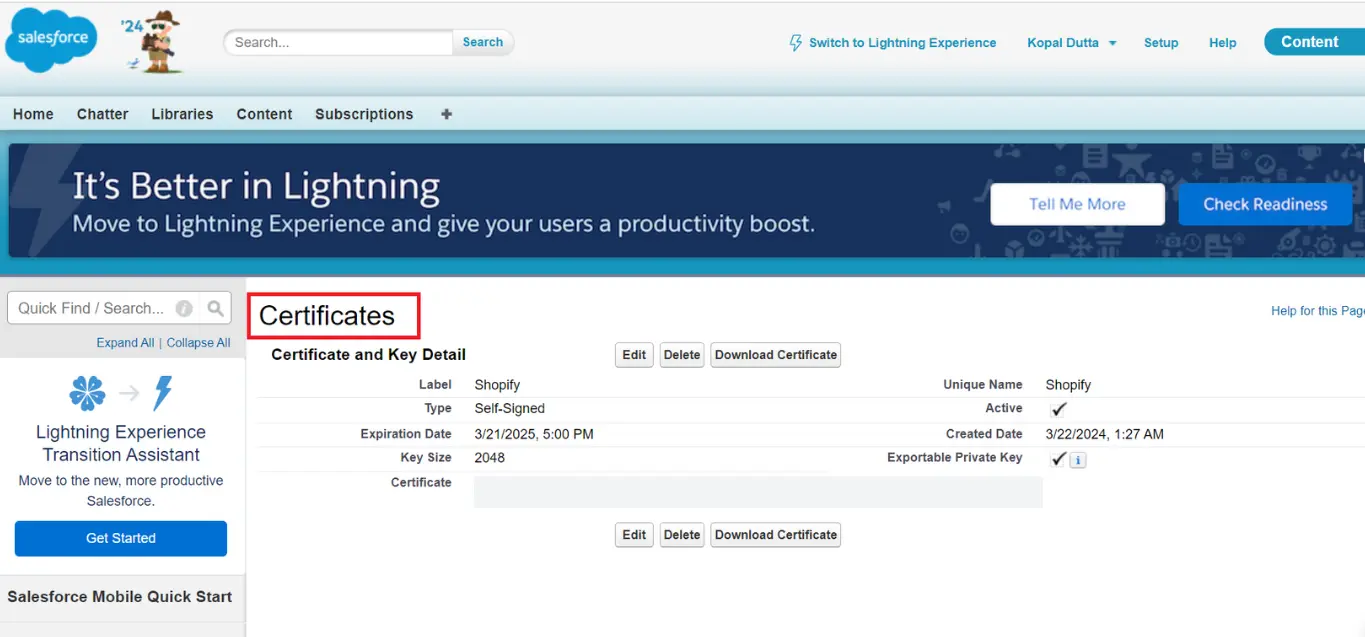
The next page will display the Certificate details. See Figure 33
Again, Go back to the sync settings page and click on “Check Status”.
Now you should now see the initialization page.
Click on “Initialize” as seen in figure 35
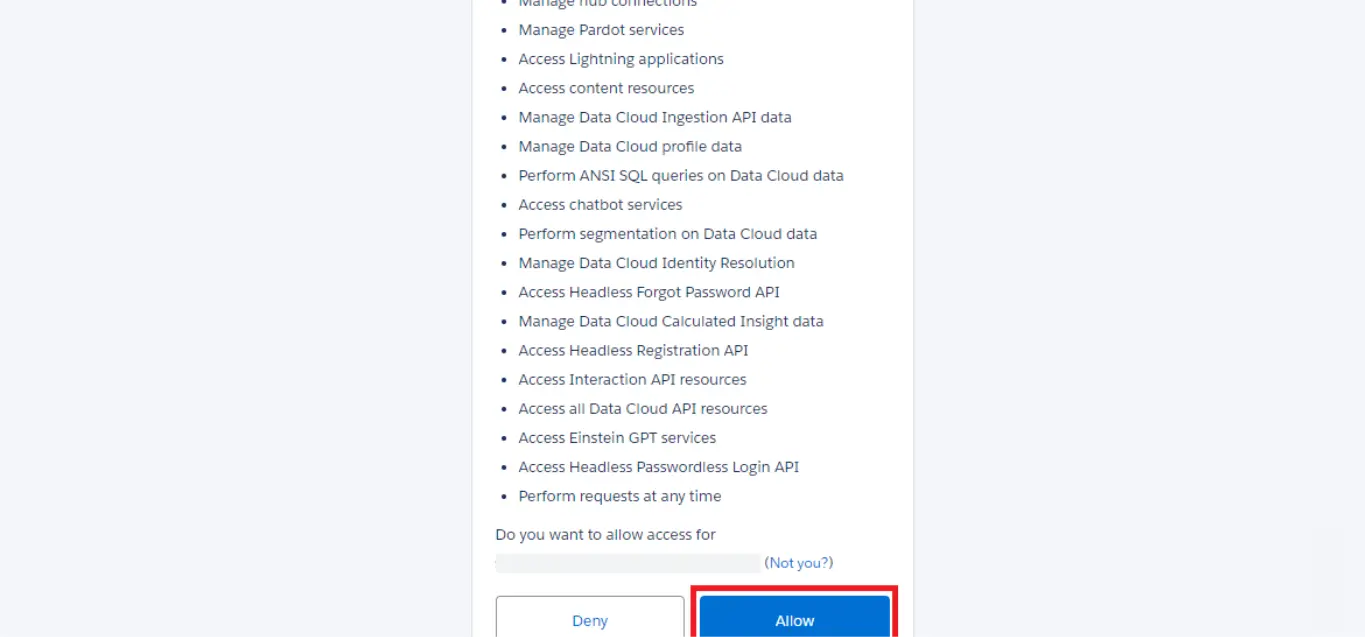
On the next page. Click on “Allow” to allow access See Figure 36
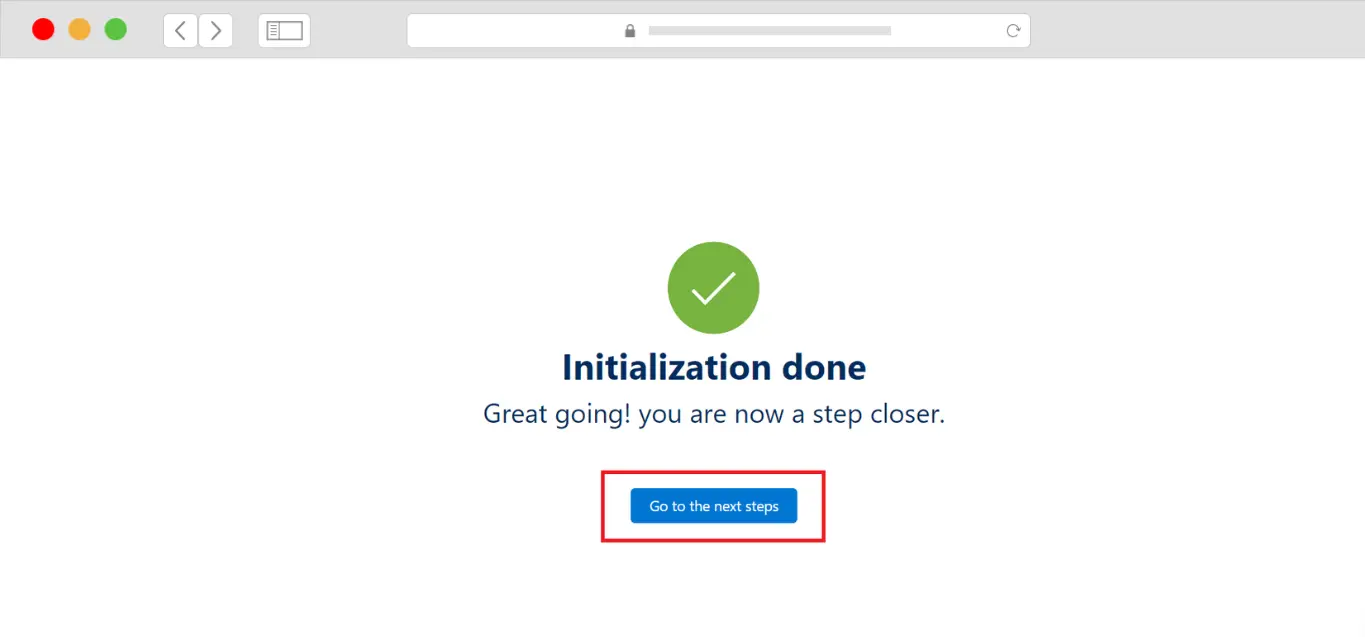
On this page, initialization is done, Now Click on “Go To Next Step”.
Retrieving Shopify store URL and Shopify Access Token
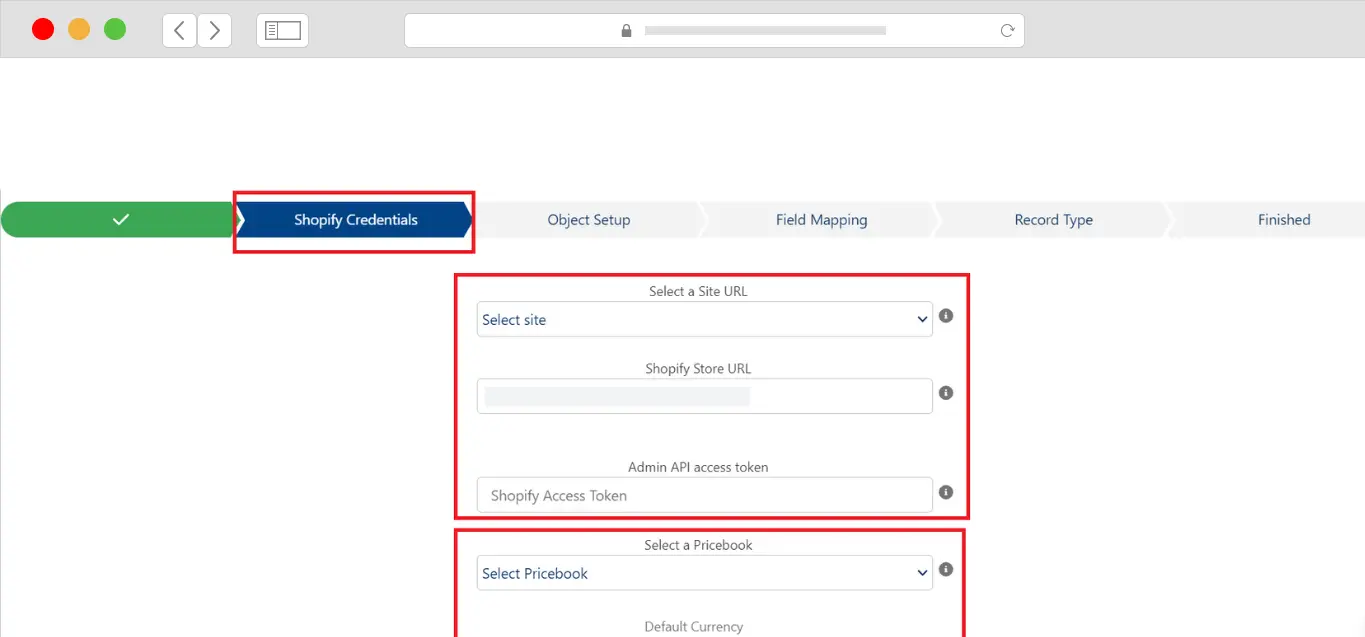
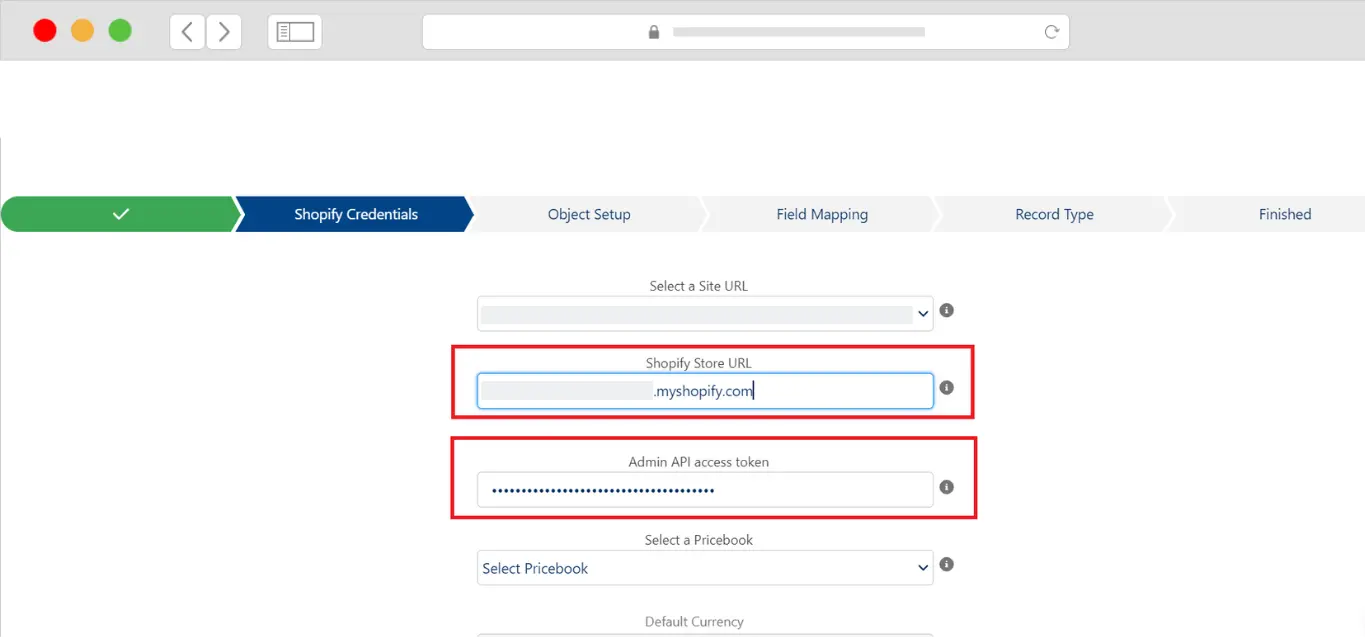
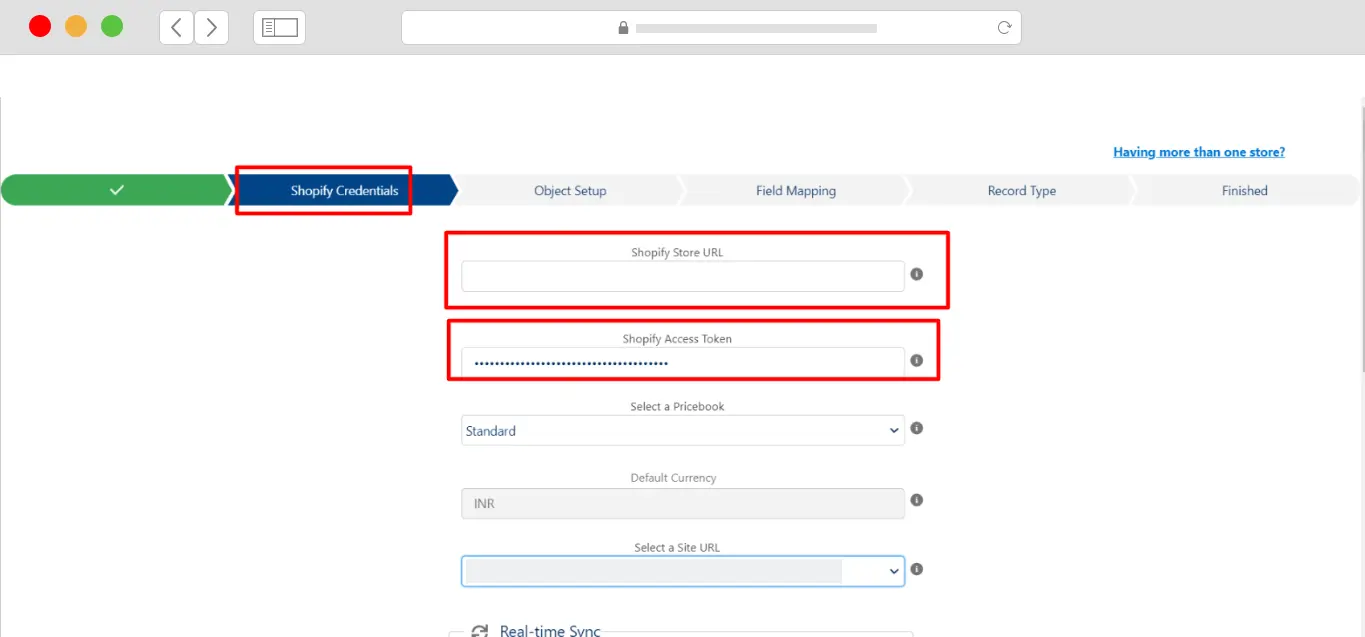
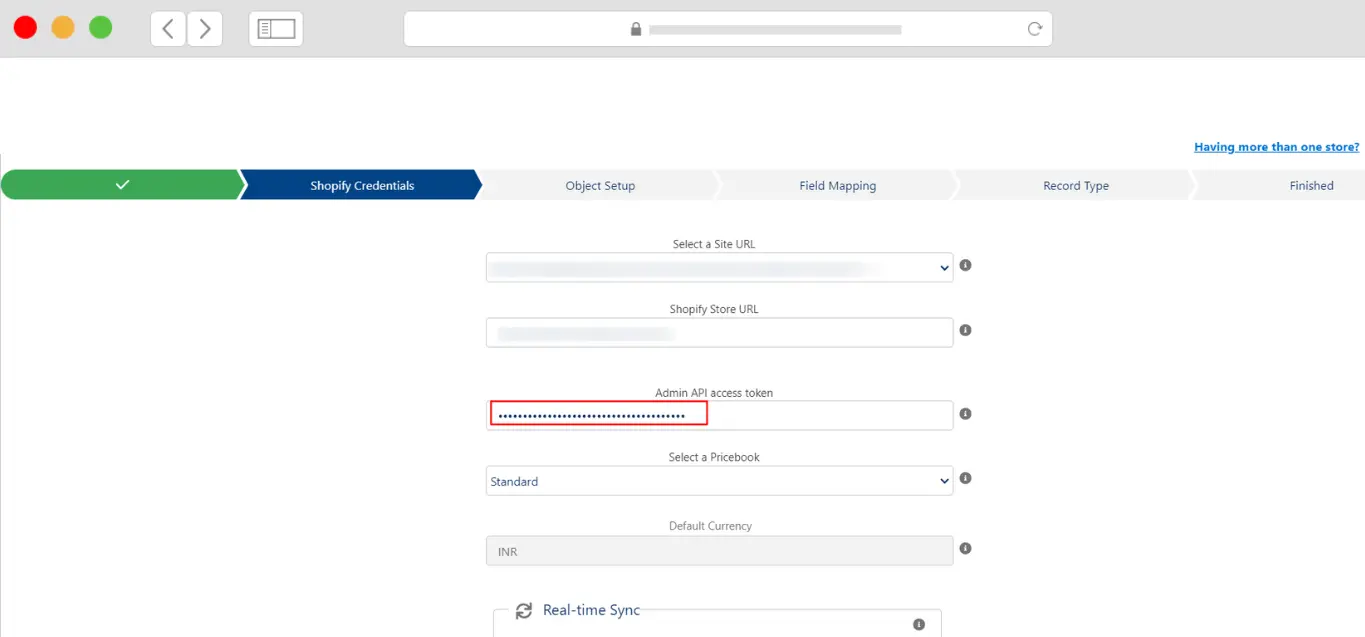
Here onwards, STEP 2 begins which is the Shopify Credentials page.
In Step 2, you will need Shopify Store URL and API Access token, as seen in figure 38
Shopify Store URL and Shopify Access Token
To retrieve Shopify Store URL and Access Token,
Open another tab, go to https://www.sync.com/, and log in using your store credentials.
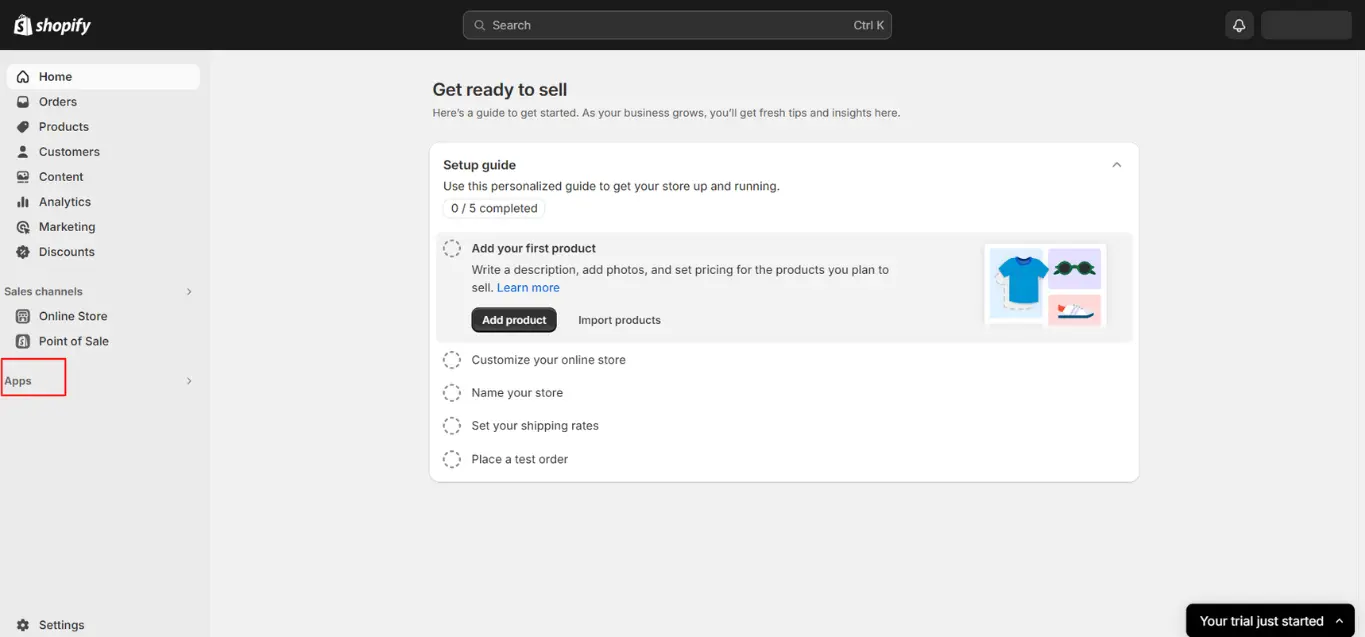
After logging in, you should be on the homepage of your store. From the same page, Go to Apps. Refer to Figure 39
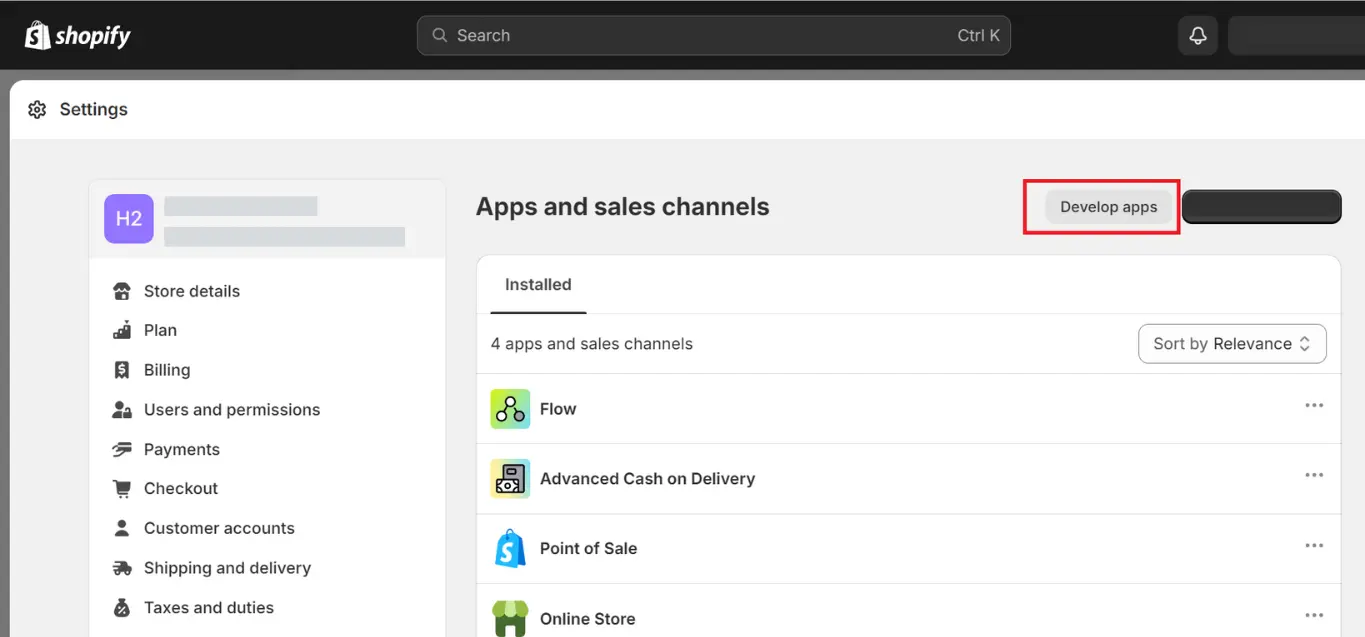
You should be now on the Apps page. Search for apps and sales channel insights in the search bar as shown in Figure 40
Once you are on this page, click on Develop apps. Figure 41.
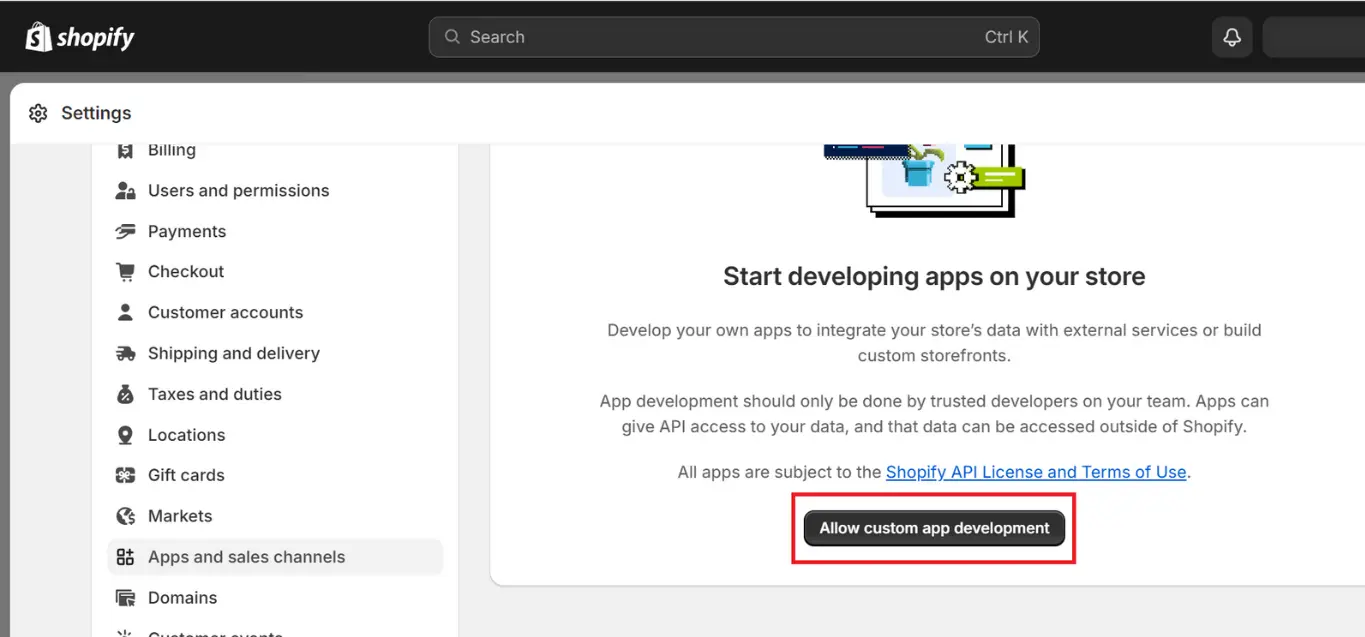
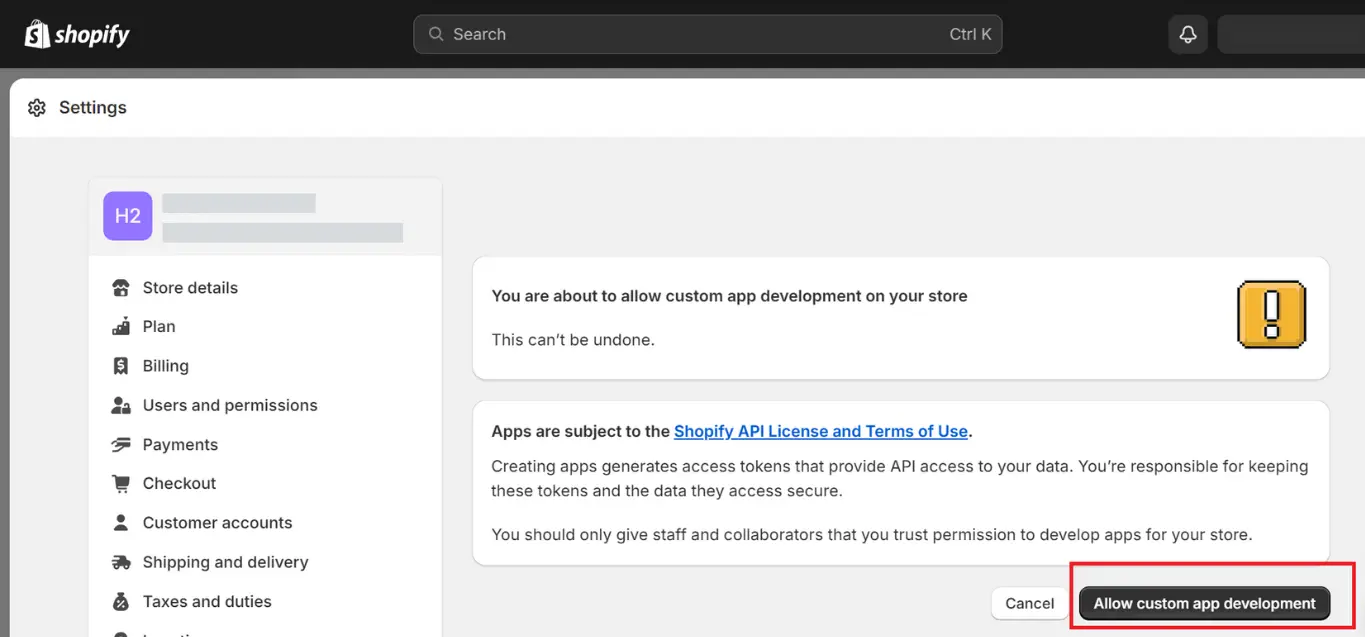
You should be now on the App Development page. Now click on “Allow Custom app Development” See figure 42 for reference
On the next page, again click on ‘Allow Custom App Development’ Refer to Figure 43
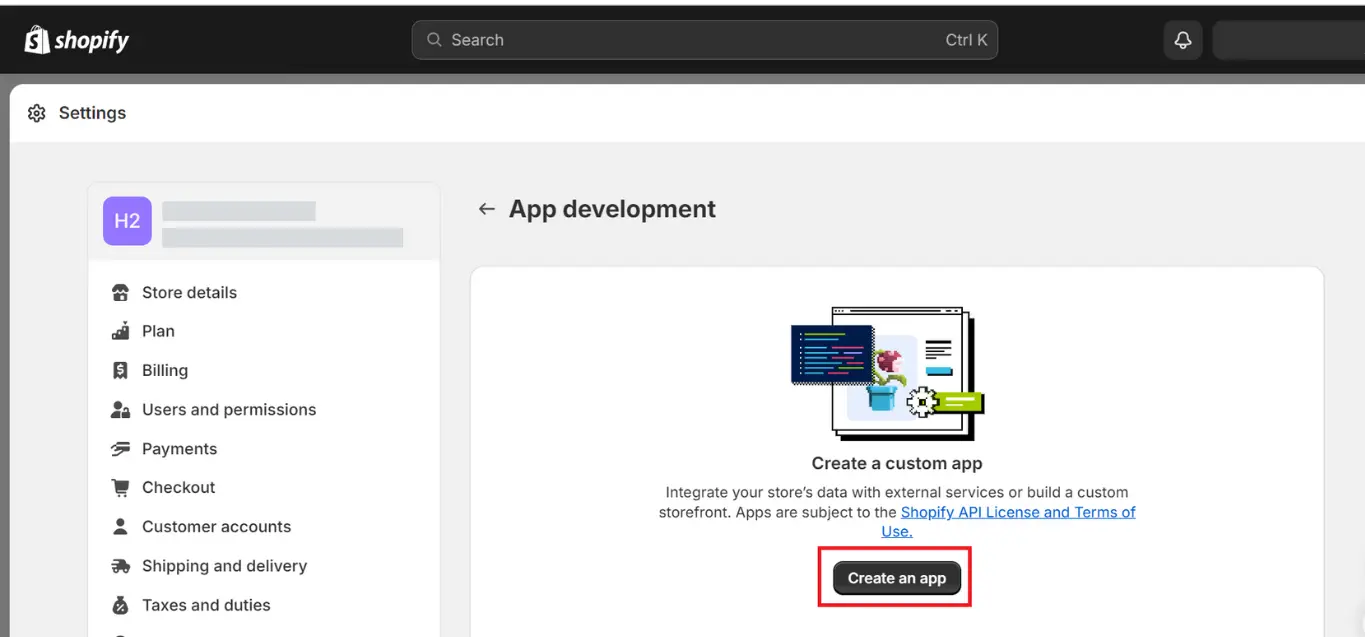
Once on the App Development page, click on “Create an App” as shown in figure 44
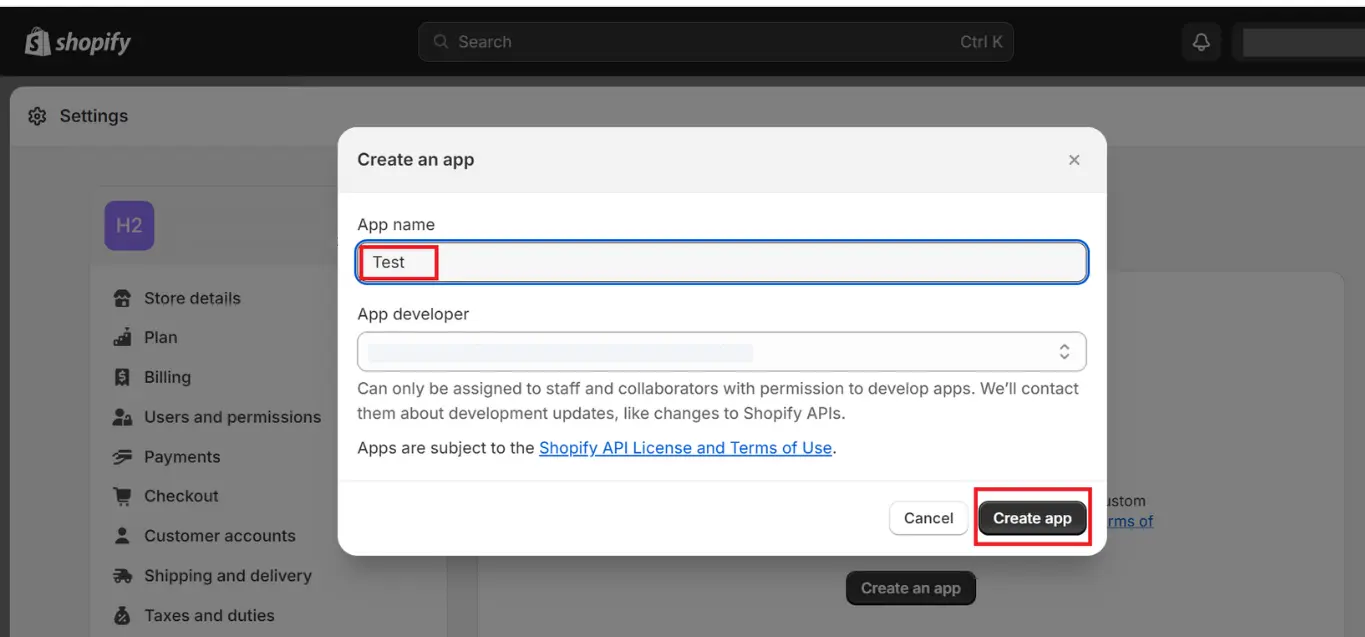
On the next page, you will need to name the app. The app developer’s email address is populated by default. Fill in the app’s name and click on “Create App’. See Figure 45 for reference.
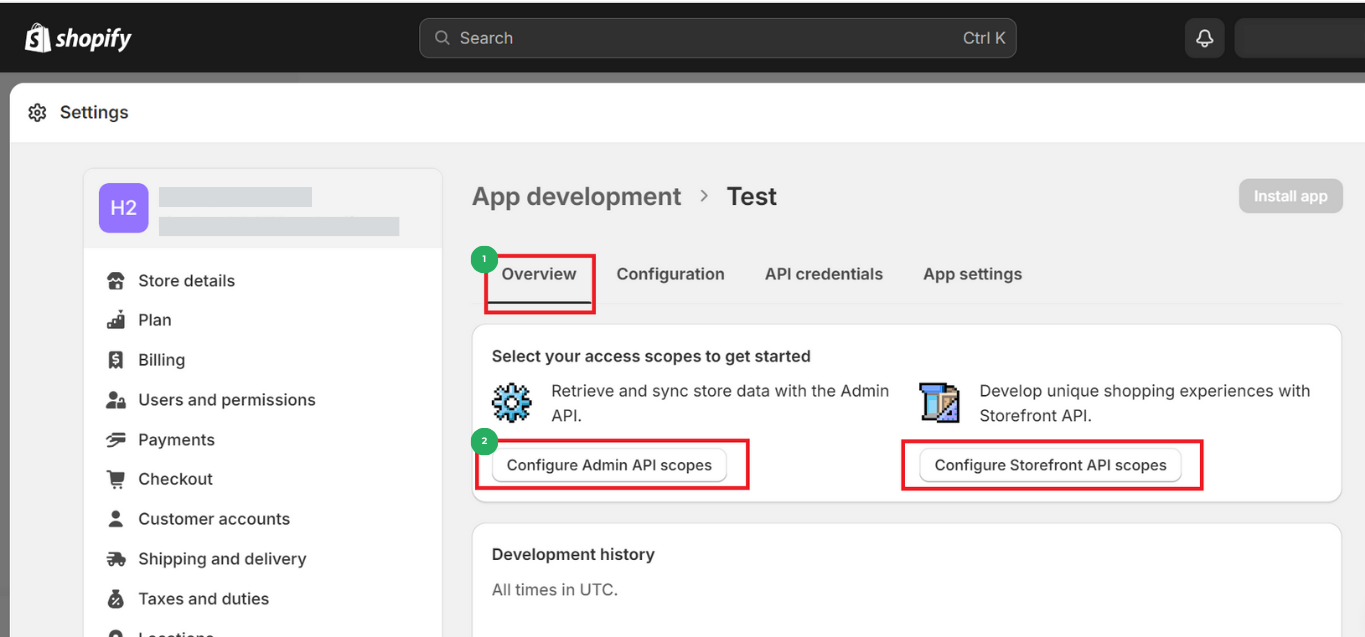
After the app is created, it is time to configure the app. So, from the overview section of the App development page Click on Configure Admin API Scopes. Figure 46 demonstrates the steps.
Now on the Configuration page, Click on Save. Refer to Figure 47
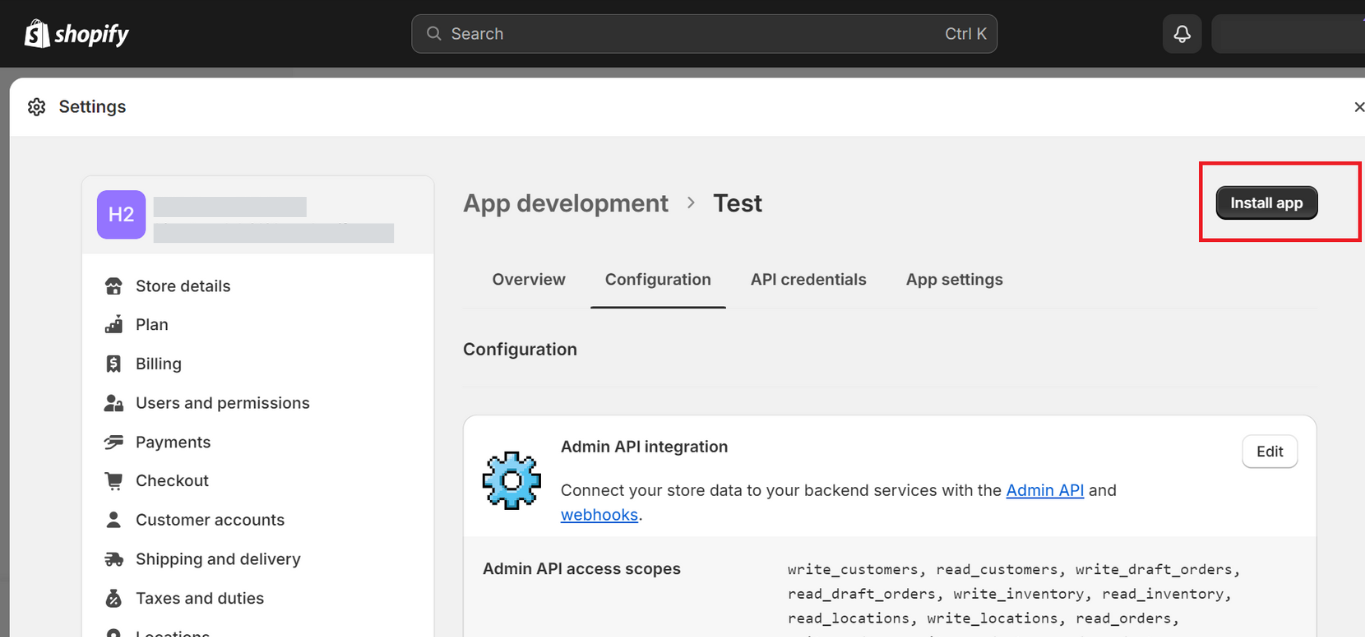
After you have saved your app configuration, Scroll up and Go to API Credentials. To access your API access token, you will need to install the app. Click on “Install app”. You may click on any of the install app buttons as displayed in Figure 48
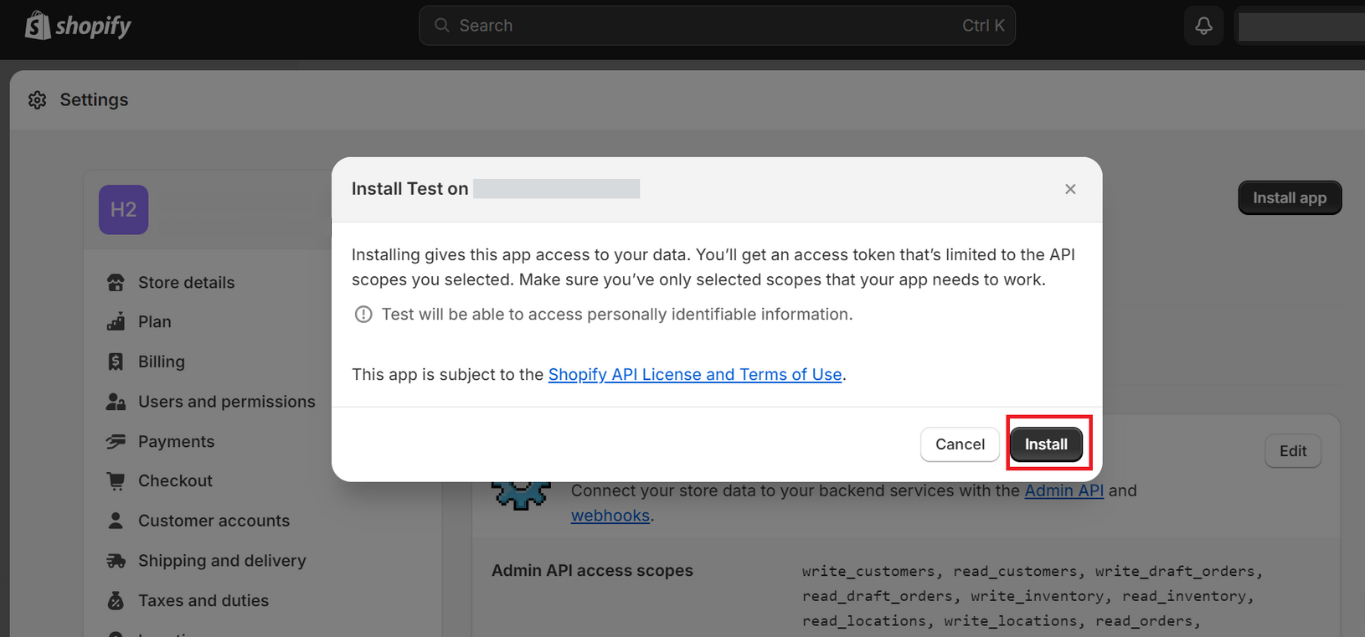
Once the confirmation window appears, click on Install to complete the app installation as shown in Figure 49
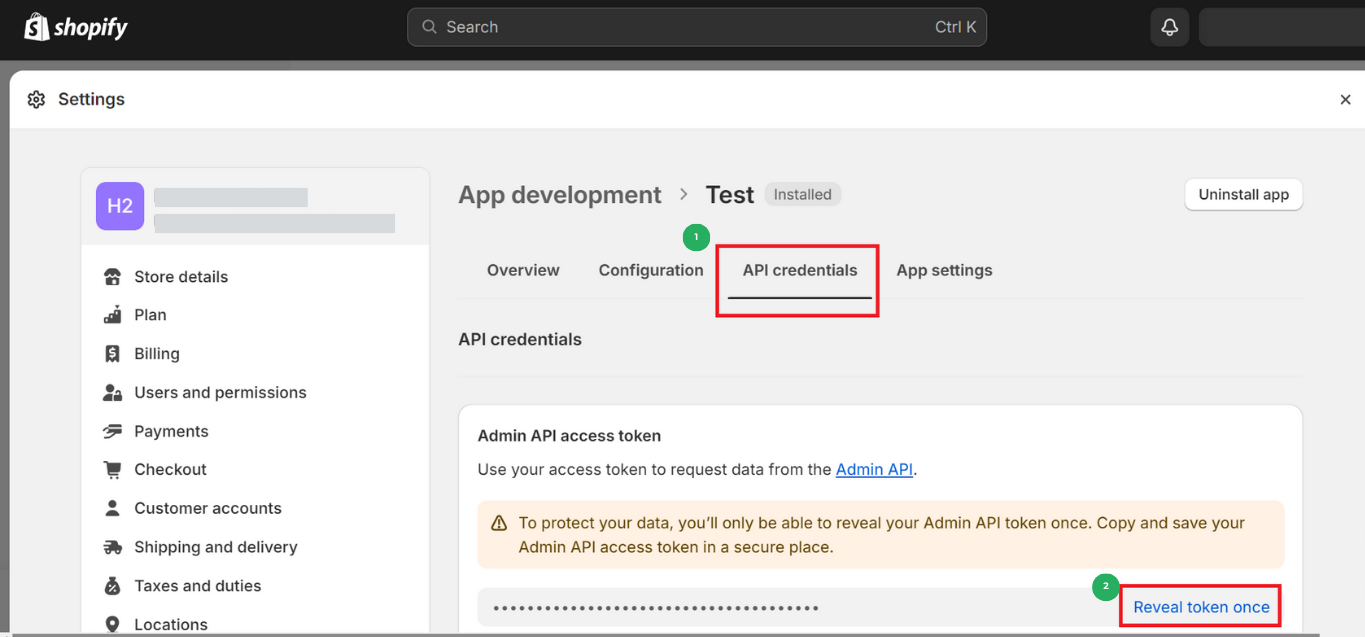
After the app is installed, you can view your Admin Shopify Access Token.
Please note that the Shopify access Token key can be viewed only once after revealing the token. Ensure to copy the Token key and save it in a secure place for later use.
To retrieve the Shopify Admin API Access Token, Click on ‘Reveal Token Once.’ See figure 50
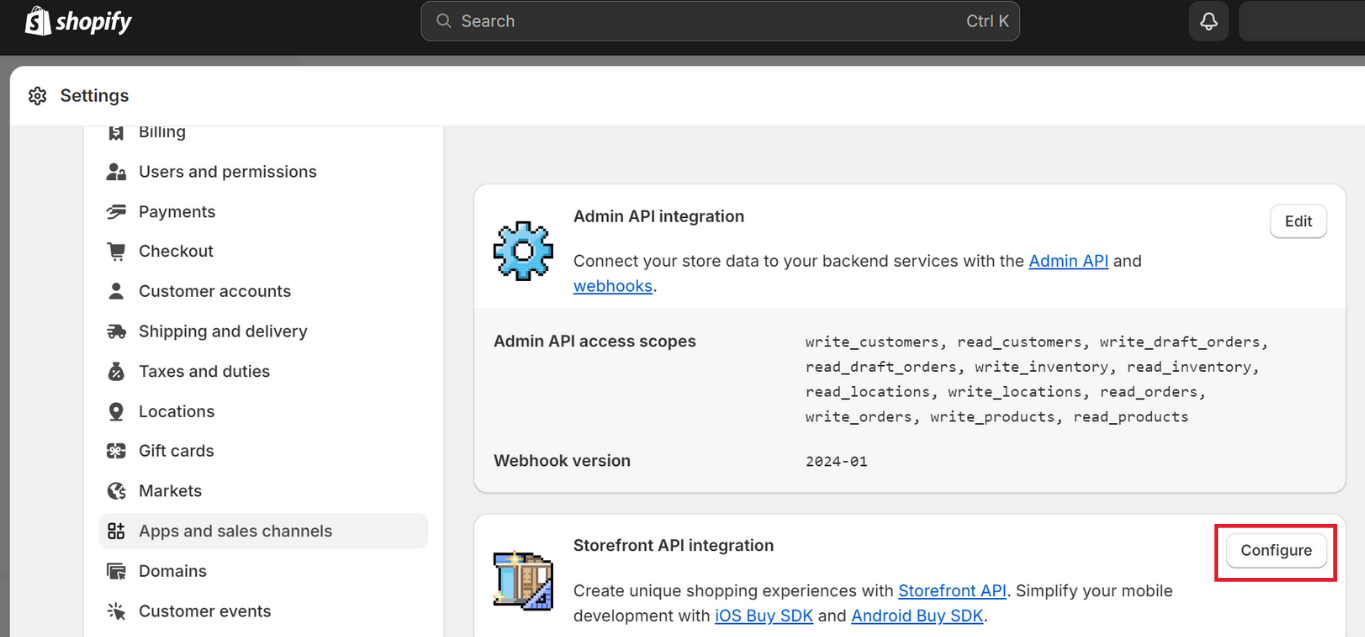
Now go back to the Configuration button on the same page to configure your Store Front API integration. Click Configure as shown in Figure 51
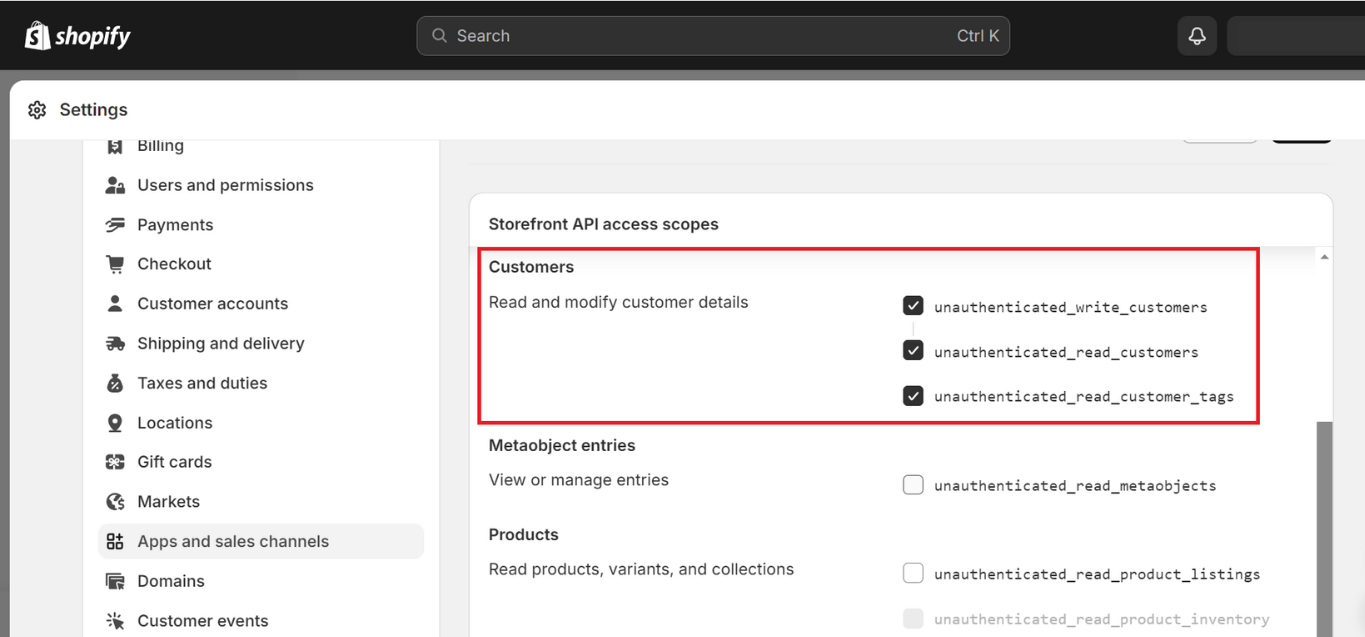
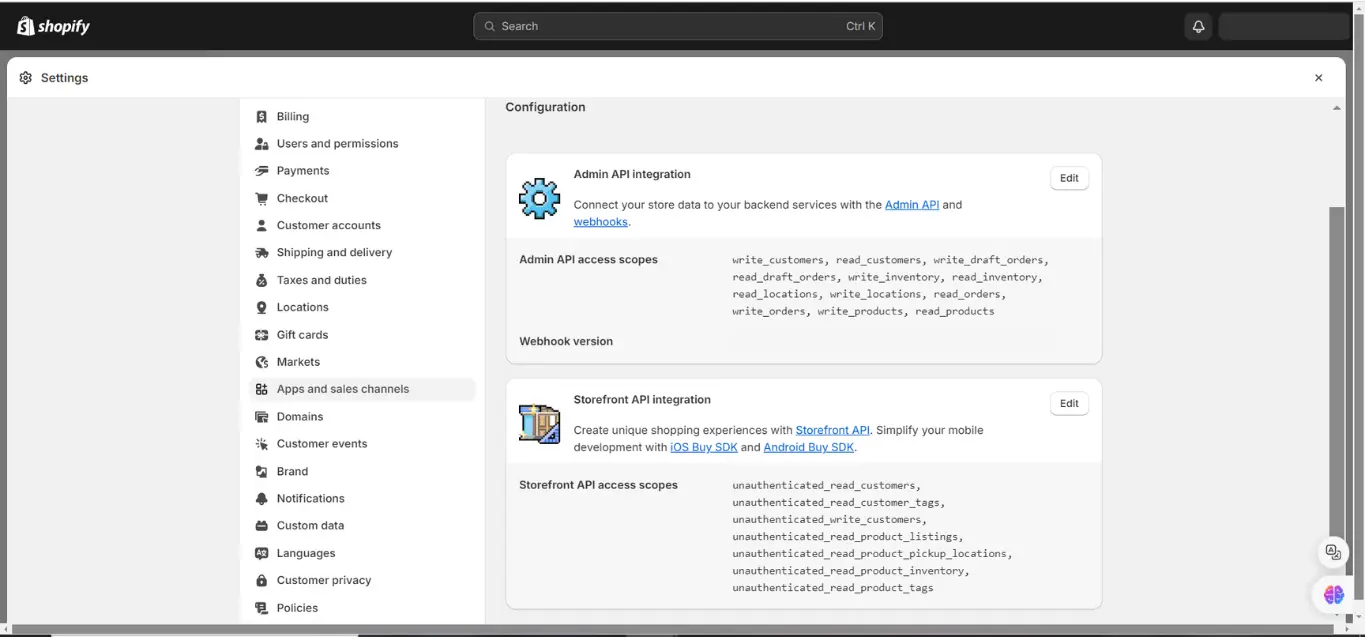
On the API Admin Integration page, get access to store data with the Admin API. You can select the scopes that your app needs. However, these mandatory scopes must be given access for the proper functioning of the app.
Customers
Draft Order
Location
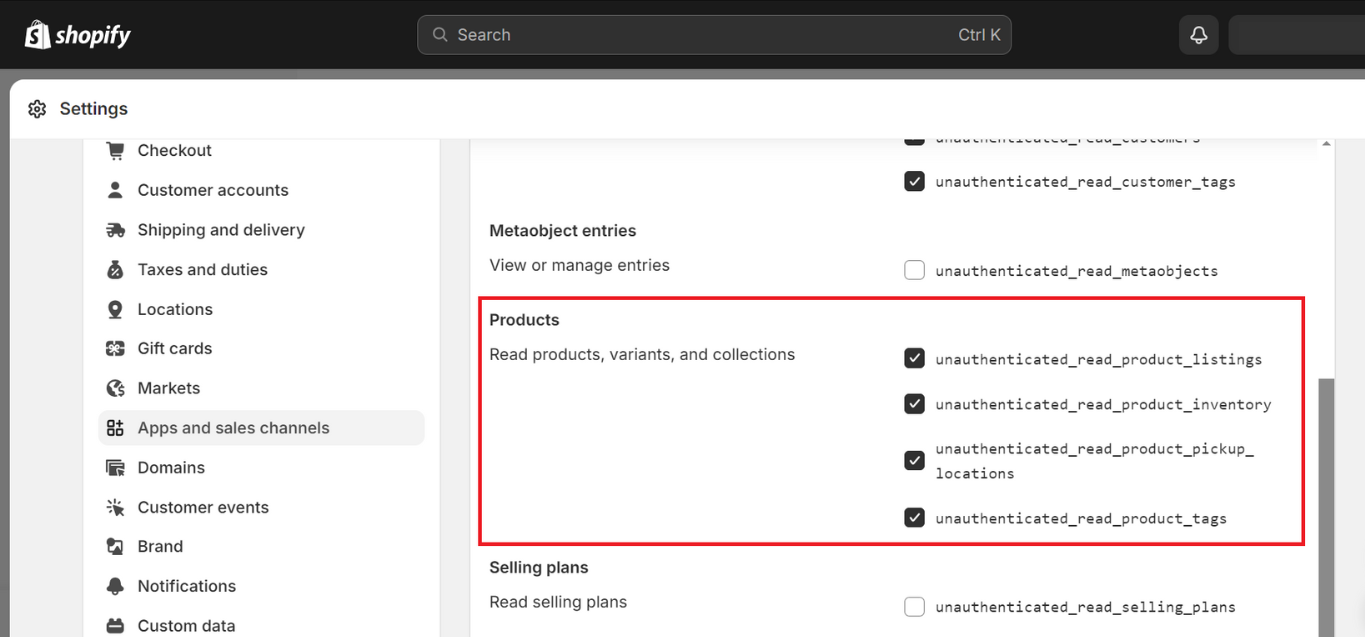
Product
Inventory
Order
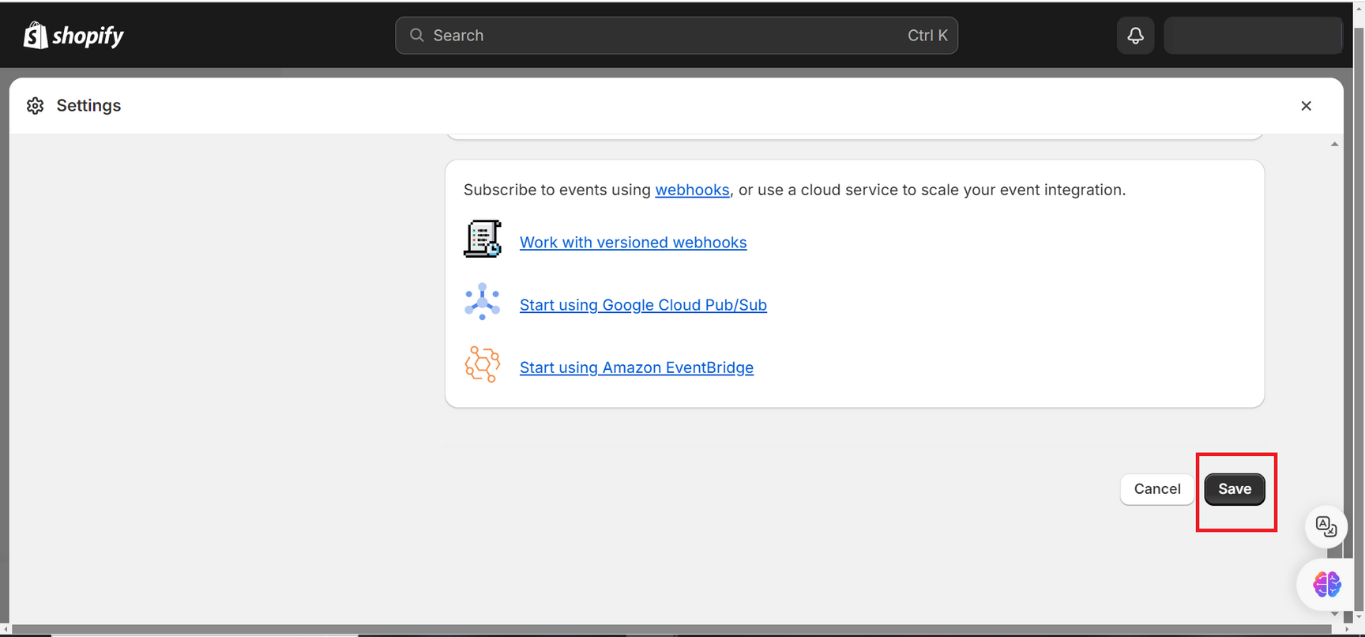
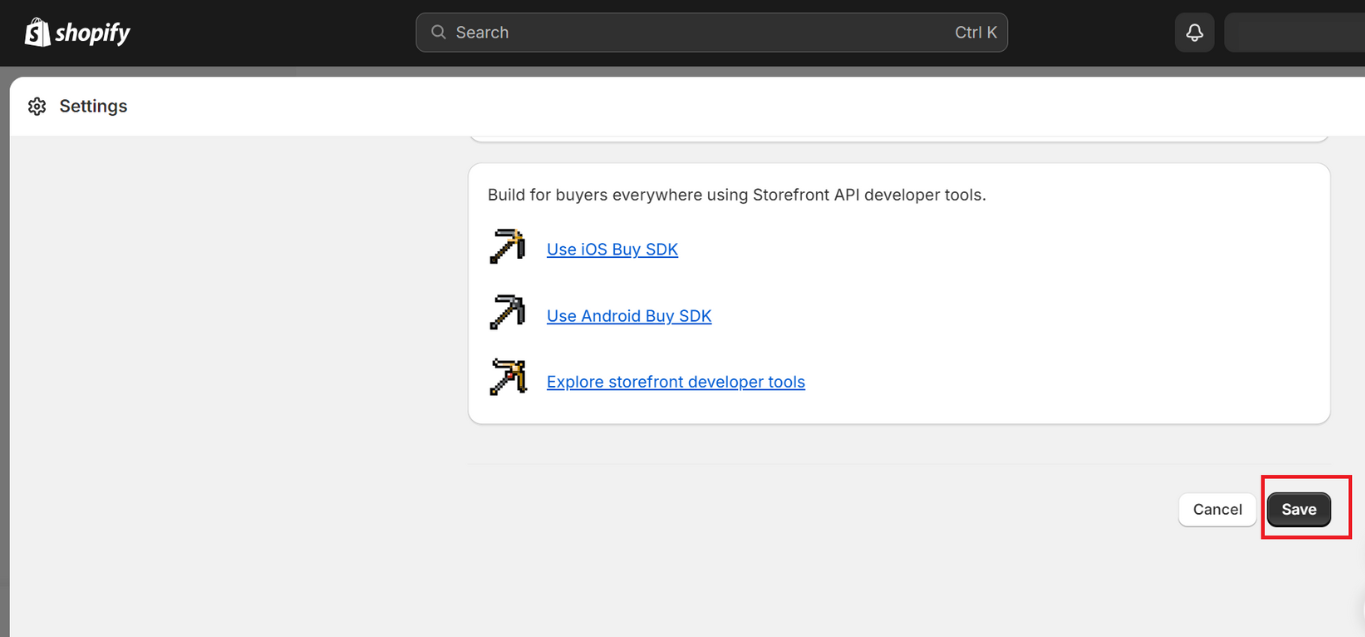
Drag down the slide bar to view the access scopes and tick on both Read and Write checkboxes. And then Click on Save. See Figure 52 for reference.
Now on the configuration page, you can view both your Admin API integration and Storefront API Integration and edit them too as seen in Figure 53
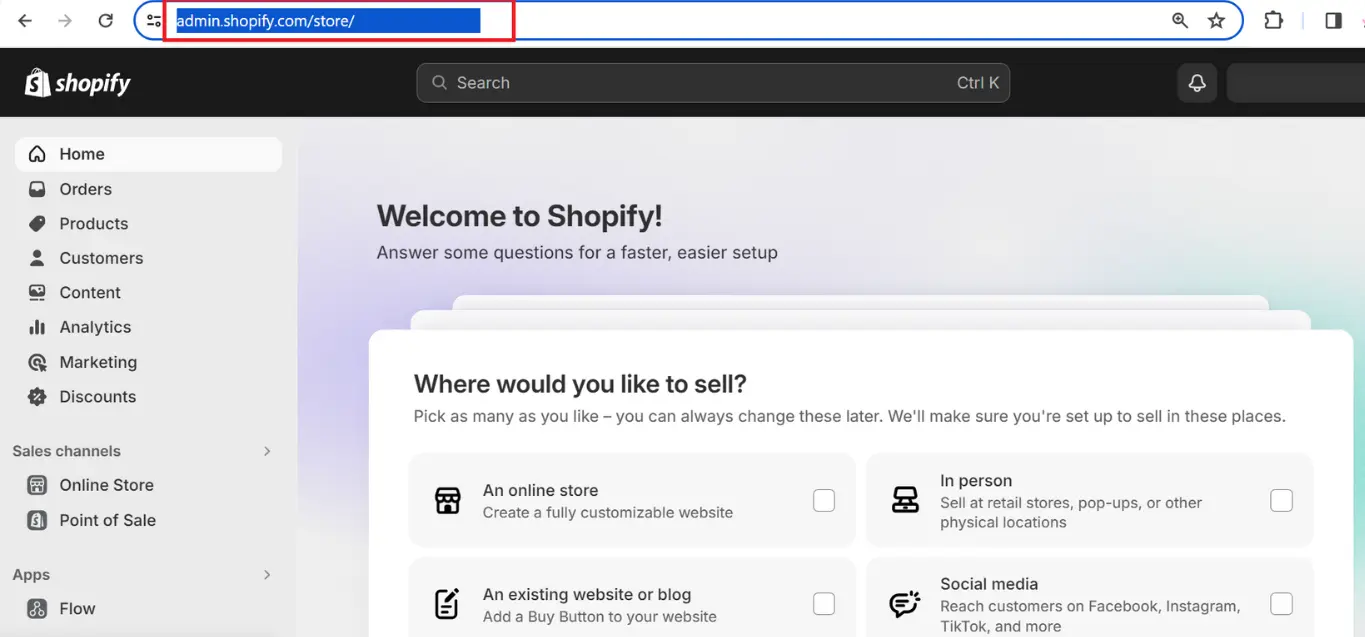
To get the URL of your Store, from the homepage Copy the Store name from the URL as shown in the below figure.
Now back on the Shopify Credentials page(step 2), paste this store name into the URL field. Your URL should follow this format: https://yourstorename.myshopify.com.
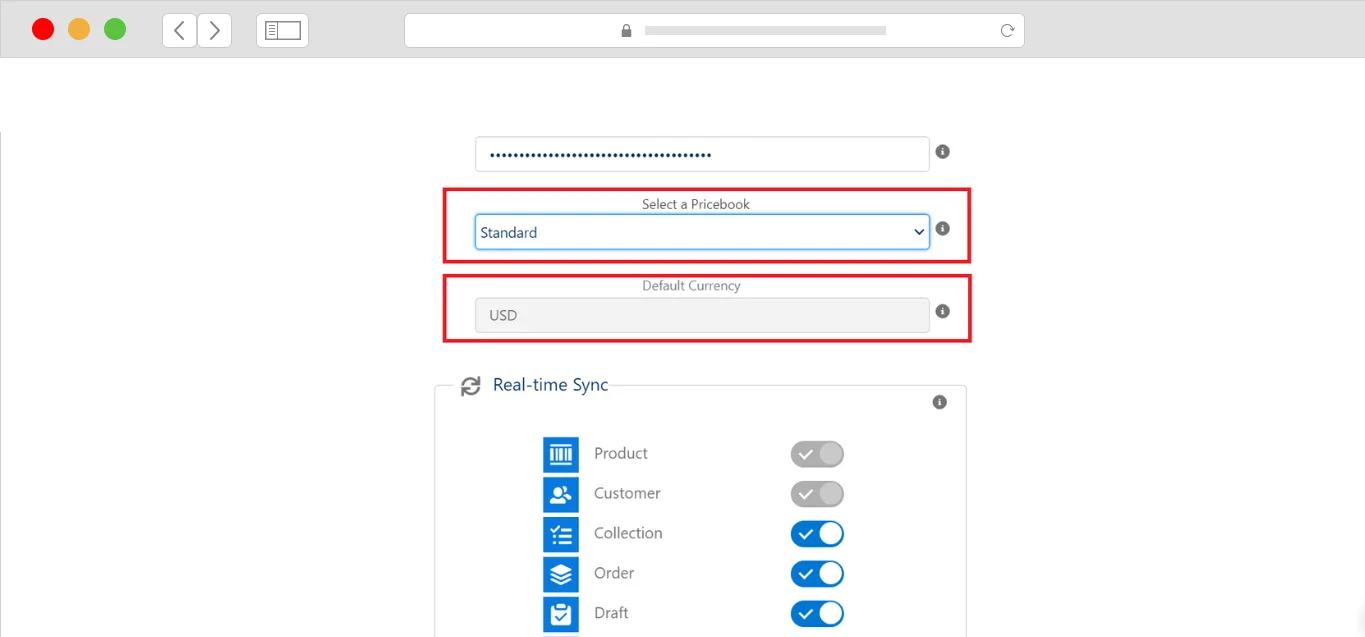
Now, insert the Shopify Access Token in the next field as shown below
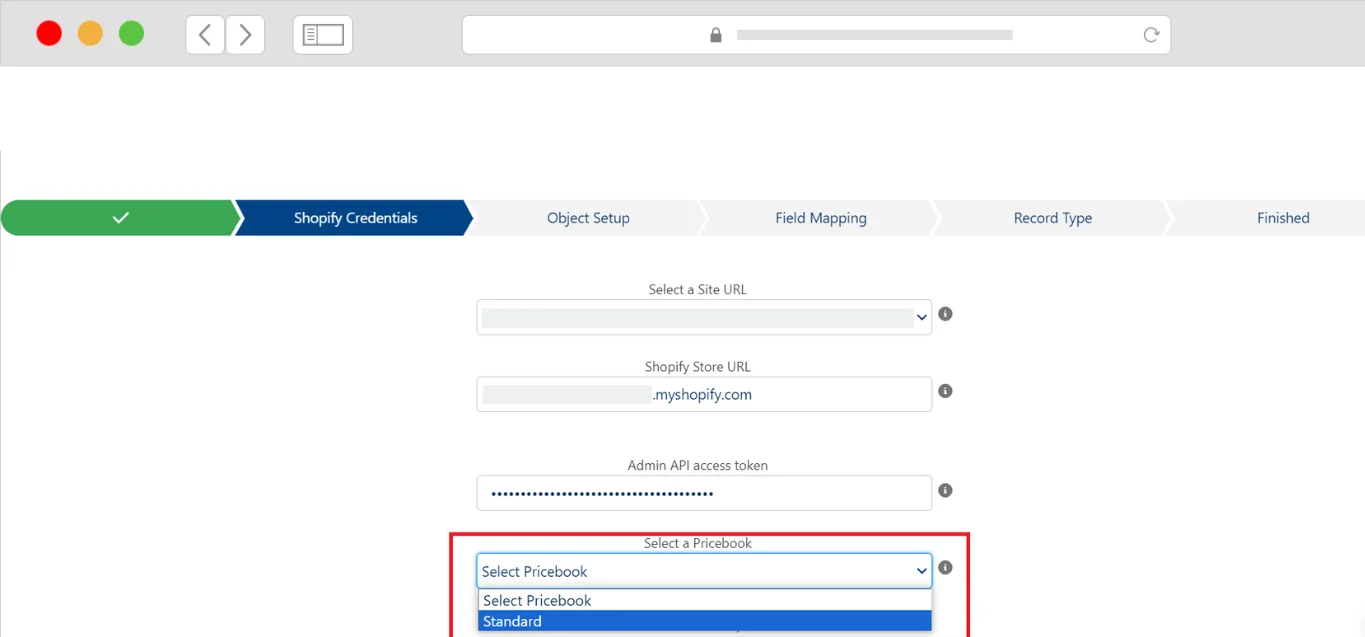
Next, Select Pricebook. If you have created any custom price book in your org then it will Show here, Otherwise select “Standard”.
For Multicurrency, you can choose any currency you want. If you have enabled the multicurrency in your org, then it will show all the currency you have created here. You can choose any currency you want but if you haven’t enabled it then it will show you the currency of your ORG(location) as Default Currency
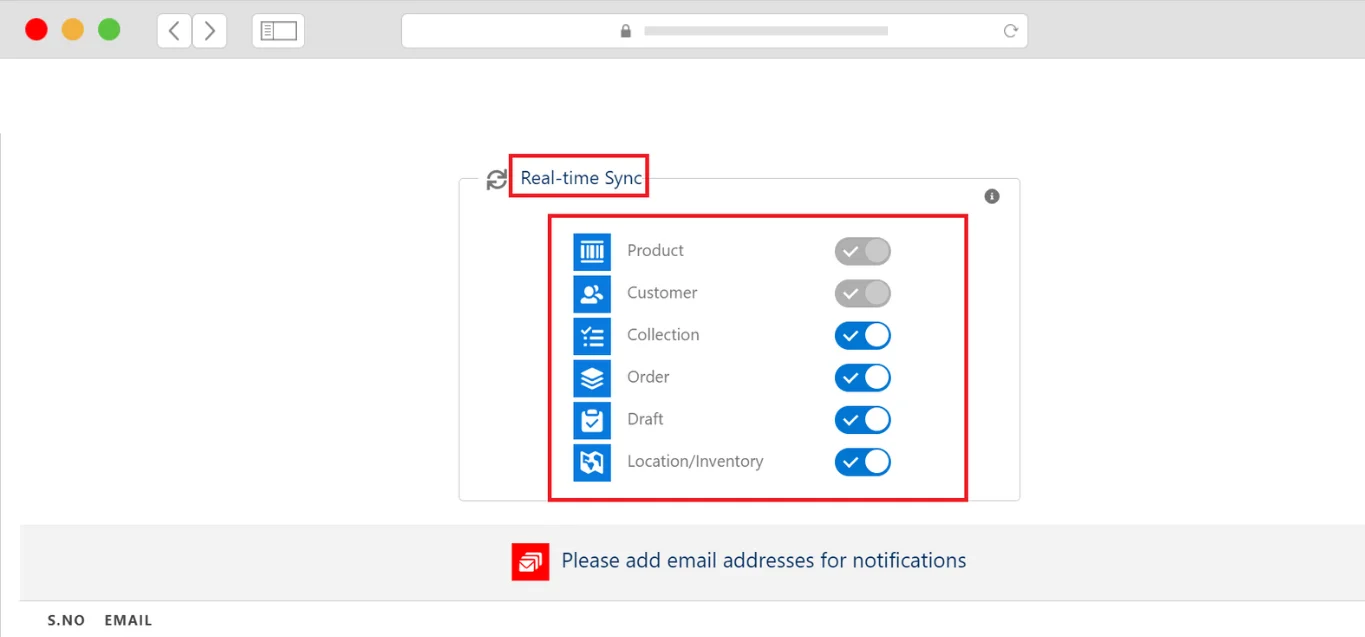
Now, the real-time sync:
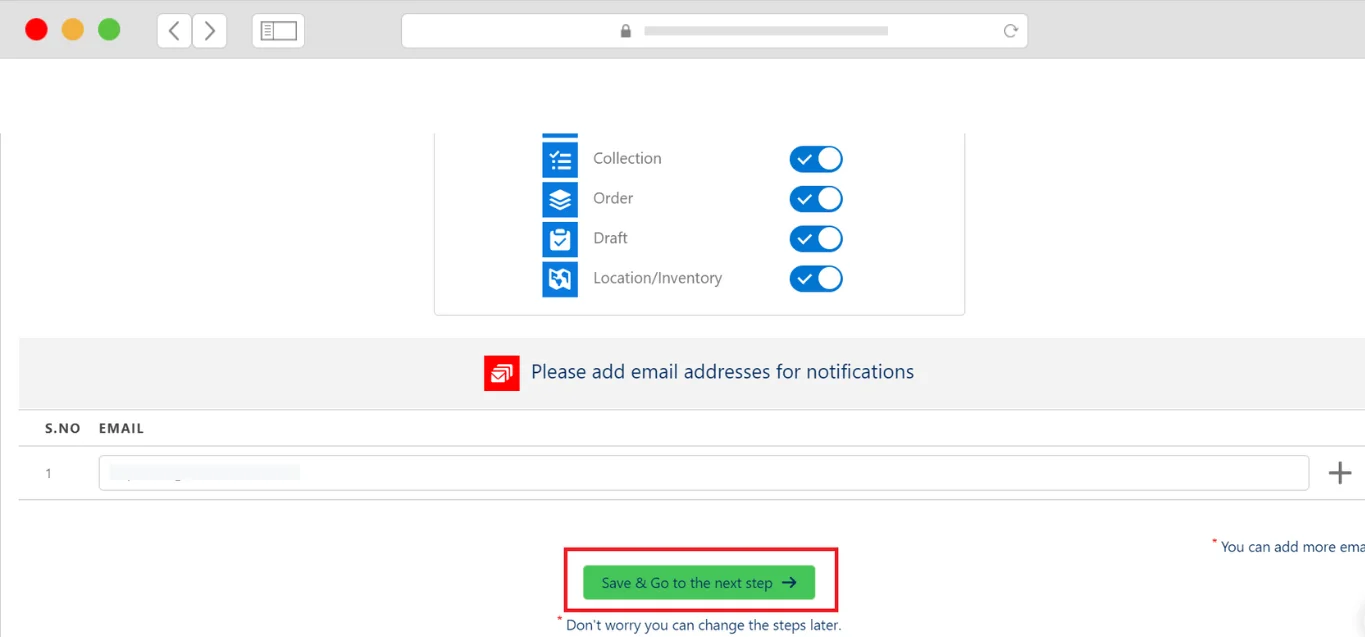
In this step, “Product” and “Customer” are default so you can’t change that but if you want to disable the sync of other objects you can do that by turning off the toggle button.
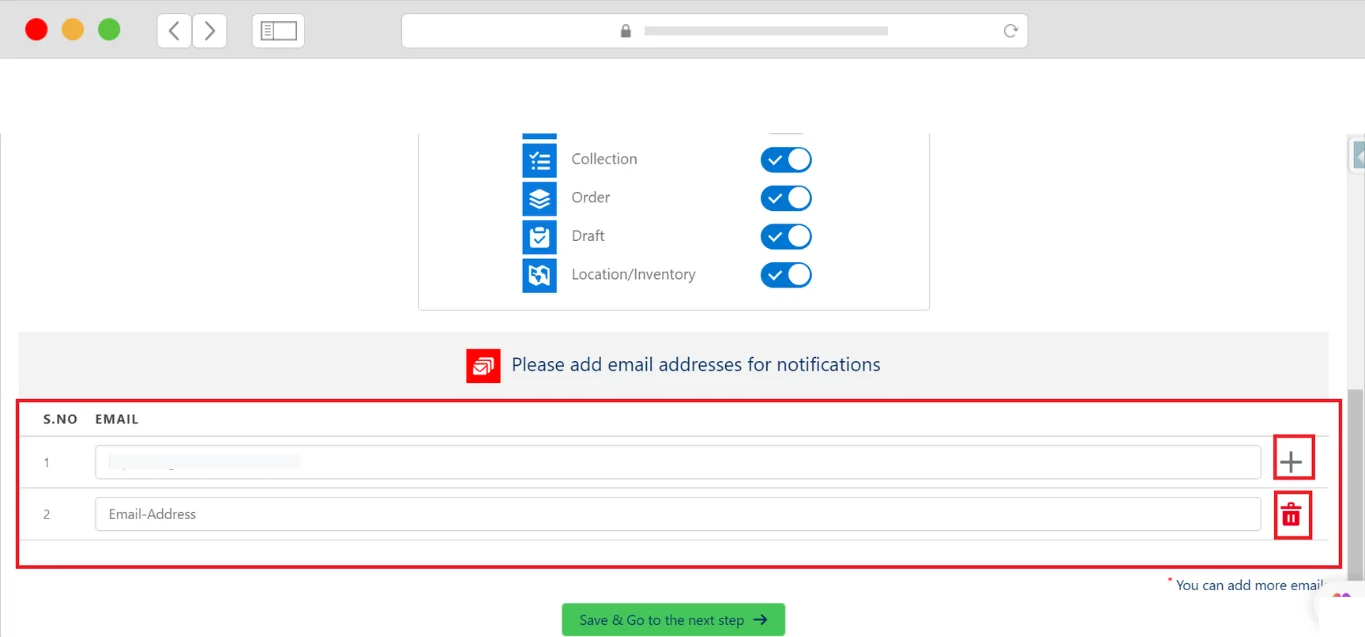
Scroll down on the same page and select email id. You can provide more than one email id by clicking the”+” button and clicking Save and Go to Next Step as in Figure
This completes step 2 and you should be now on step 3.
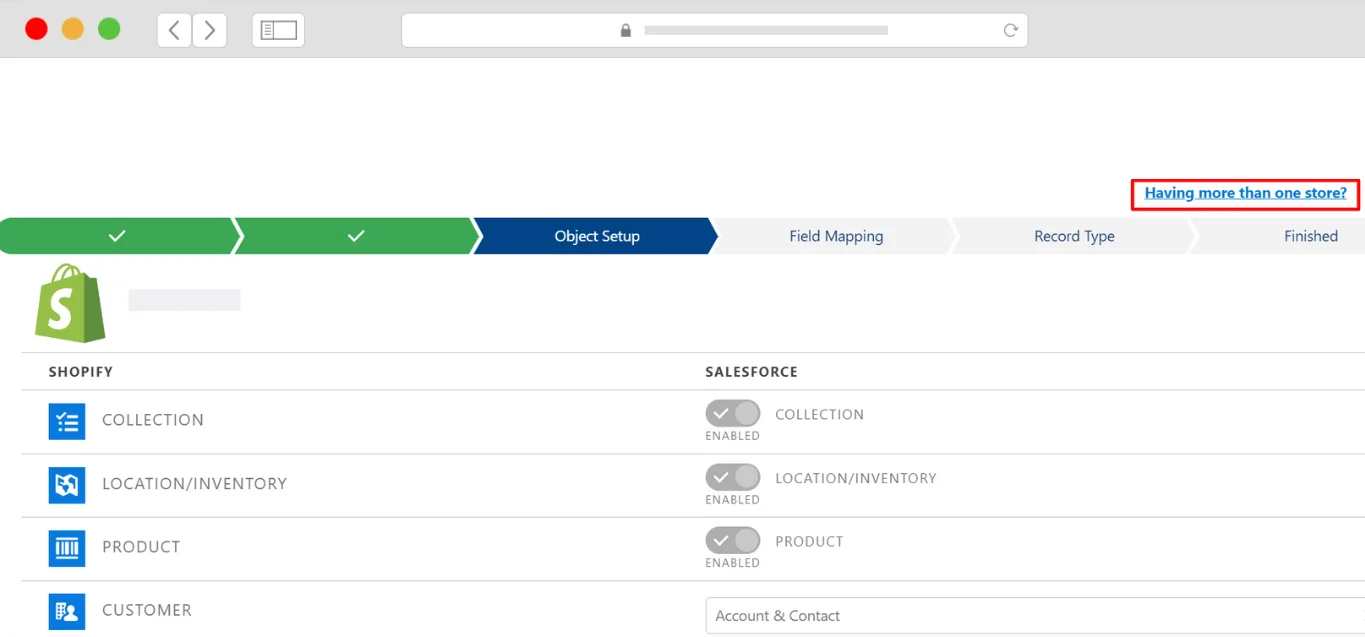
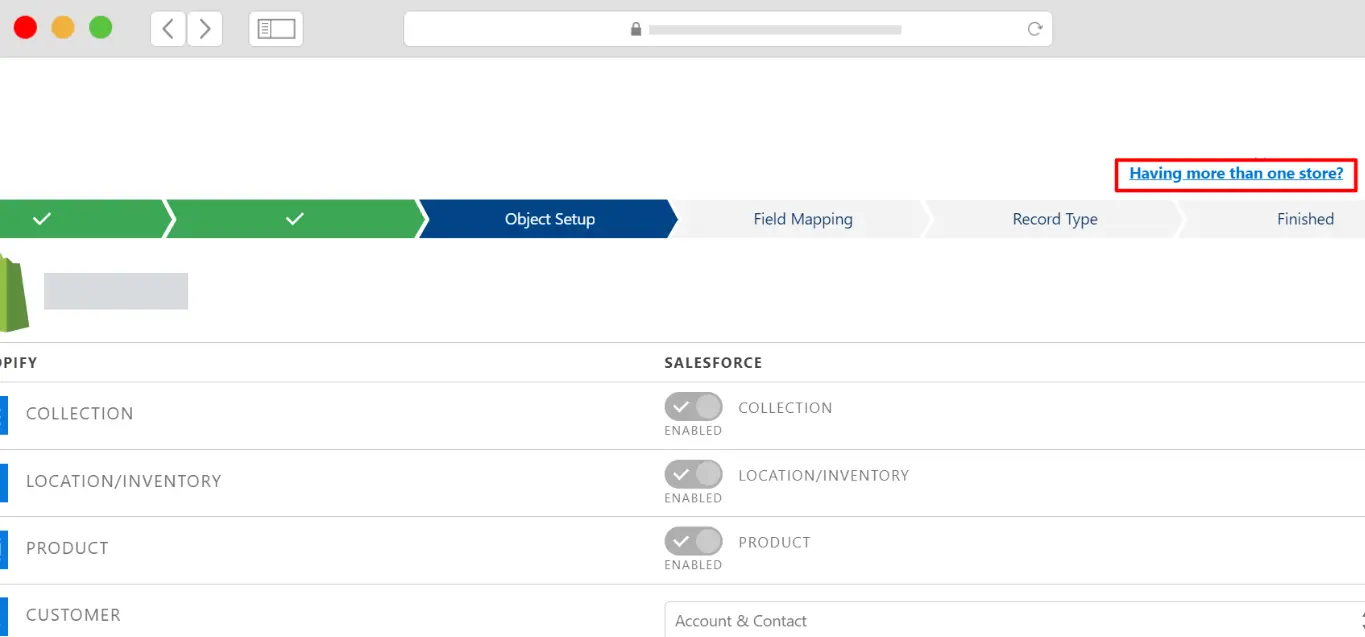
Multi-store sync functionality
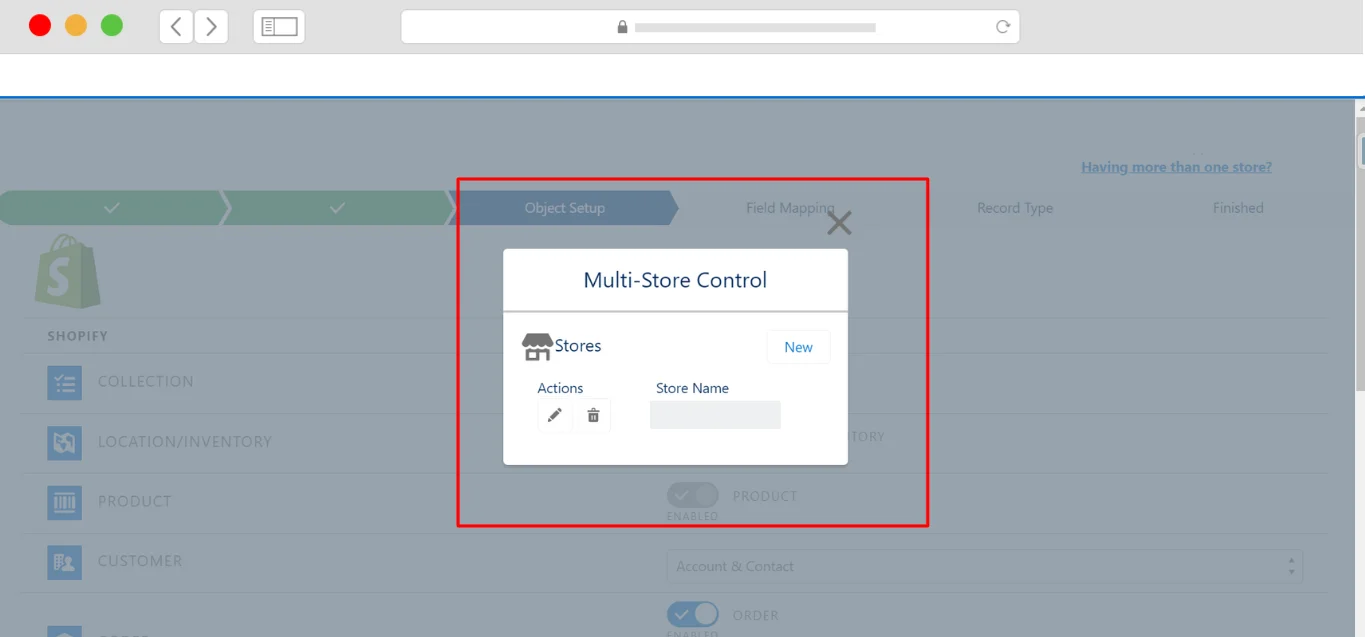
For syncing more than one Shopify store from this interface, click on “Having more than one store” in the right corner of the webpage.
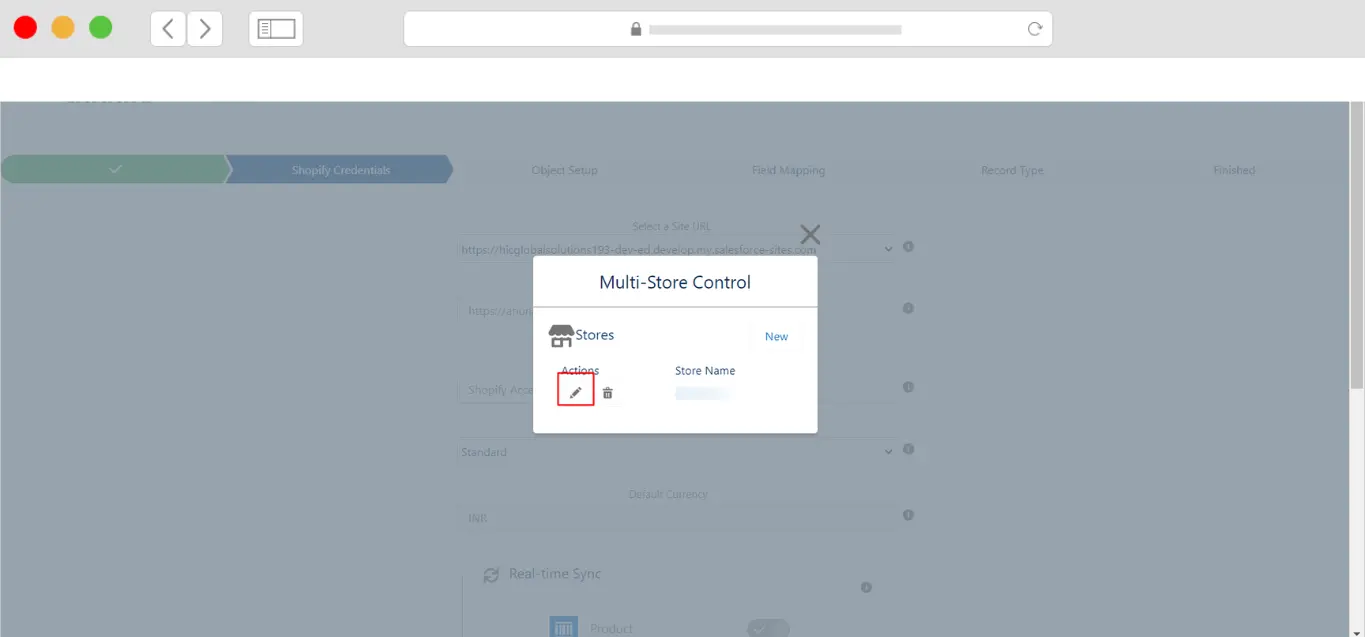
Choose your desired store from the Multi-Control store panel to start mapping.
Refer to images 57, 58, and 59 for multiple store synchronization.
Adding, Editing, and Deleting multiple stores
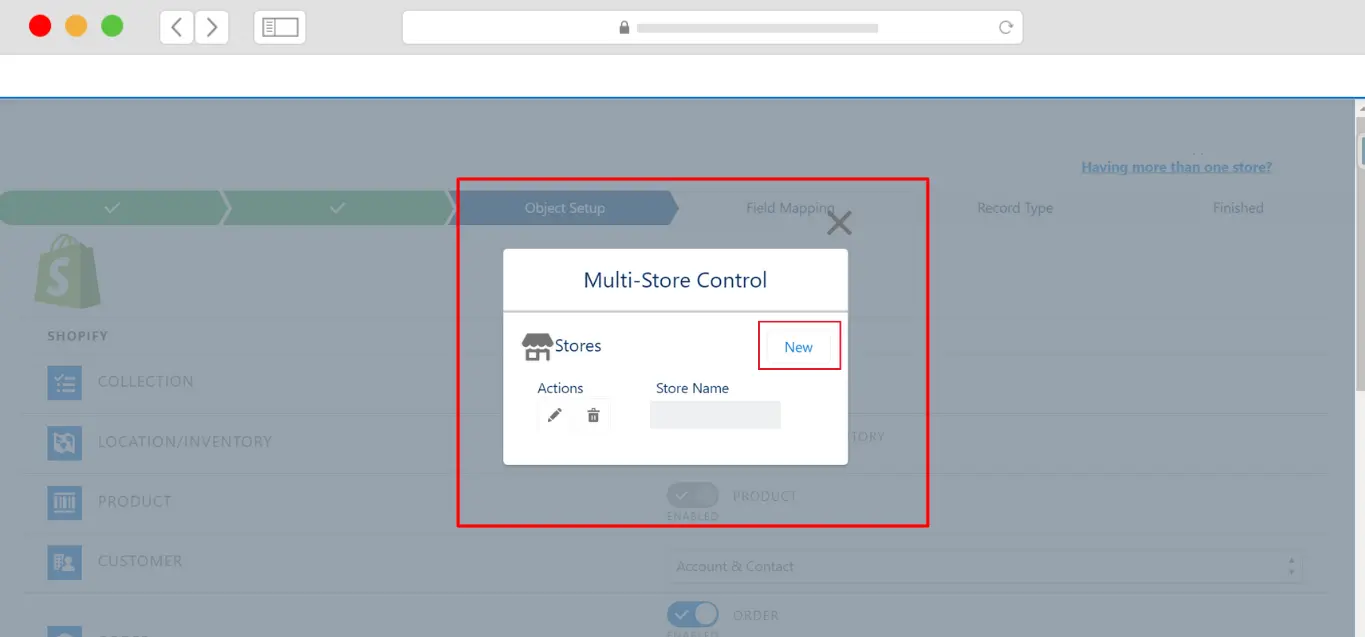
To add a new store to your Salesforce org, Click on Having More than Store. Now from the multi-store control panel, Click on ‘New”.
You would be redirected to the credentials page where you have to insert the new store URL and Shopify access token as shown in Figure 66
Go back to www. Shopify.com and log in using your store credentials. Now, follow the same process as mentioned in section 5.1 and retrieve your Shopify access token. As mentioned above, the access token once revealed can’t be accessed again. So, make sure to copy the token and kept it securely for later use.
Now back on the credentials page, insert the new store URL and access token in their respective fields. See Figure 67 for reference.
Scroll down and click on Save & Go to Next Step
The new store is now added. Refer to Figure 69
After step 5, you should be on the web page to start with the synchronization process. Click on Start sync As in figure 64
Step 1 - Editing the Store
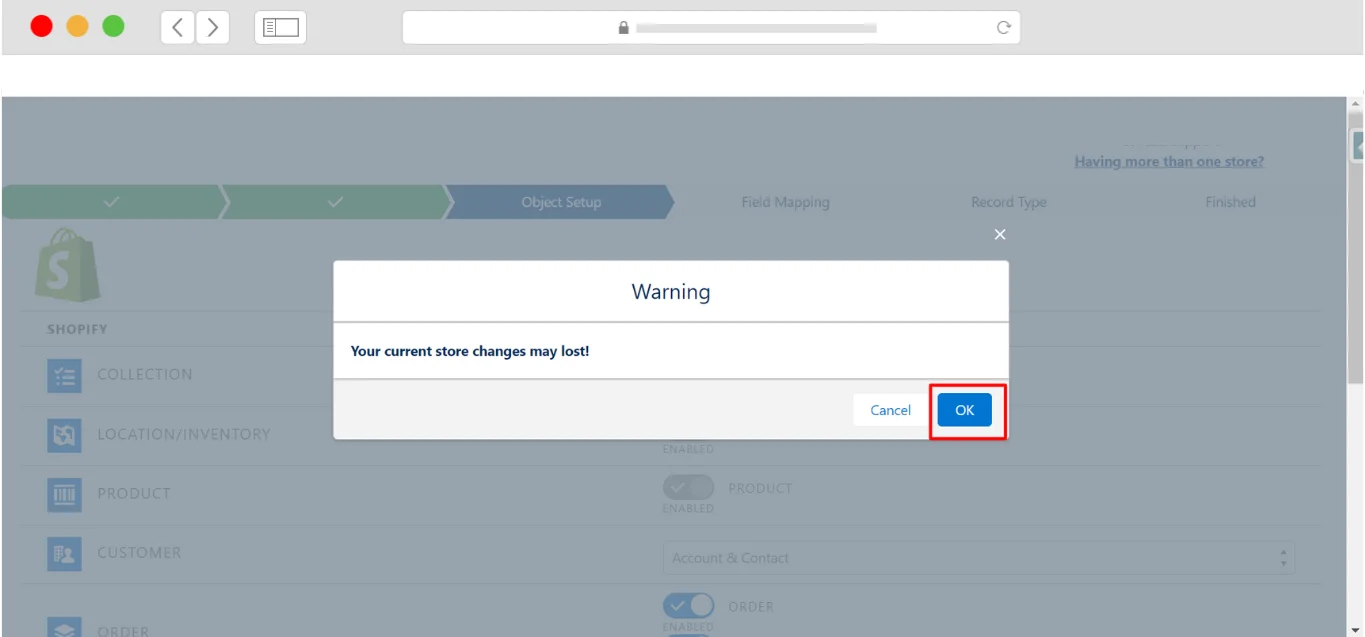
To modify the store, Click on ‘Having more than one store’ and then select ok on the warning dialogue box as shown in Figure 70
Now on the multi-store control panel, select the store you want to edit and Click on the edit button on its left. See Figure 71
You will be redirected to the credentials page and you can modify fields as you want and then click on Save & go to Next Page to save your changes. Figure 72
Likewise, to delete a store, simply go to the multi-store control panel, select the store you want to delete, and click on the trash icon next to it. See Figure 73
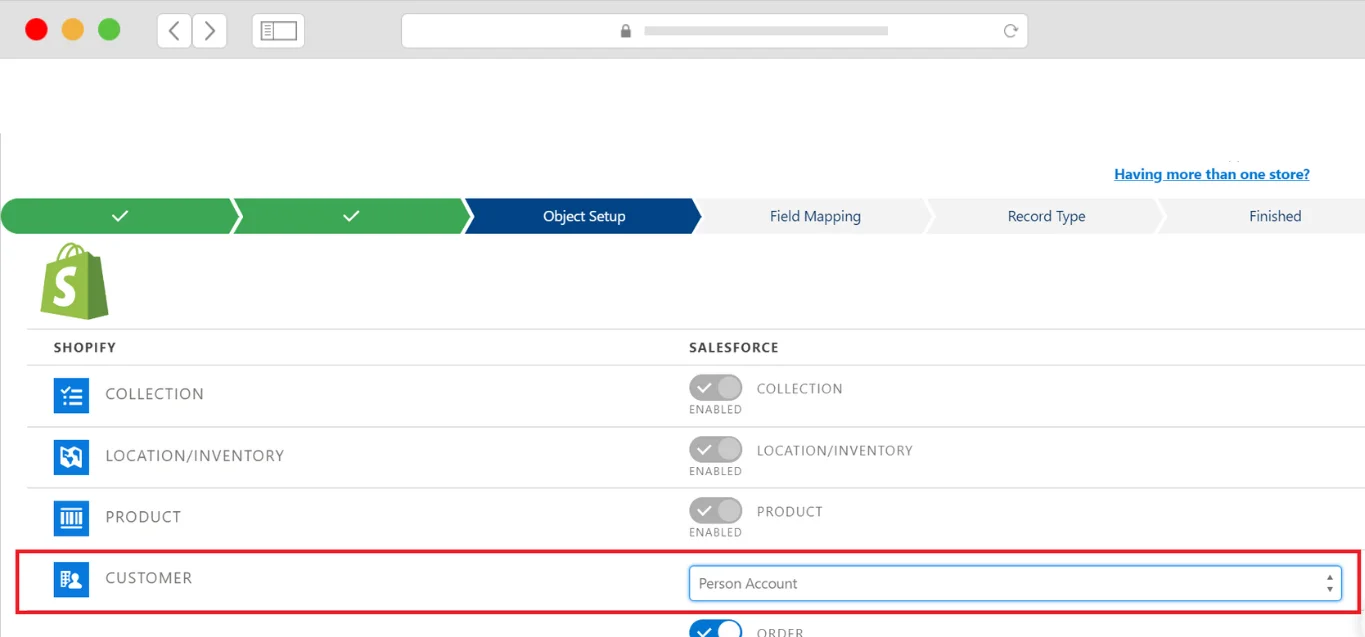
Step 2 - Object Setup
On this page, you can view what Salesforce object is mapped with your Shopify objects.
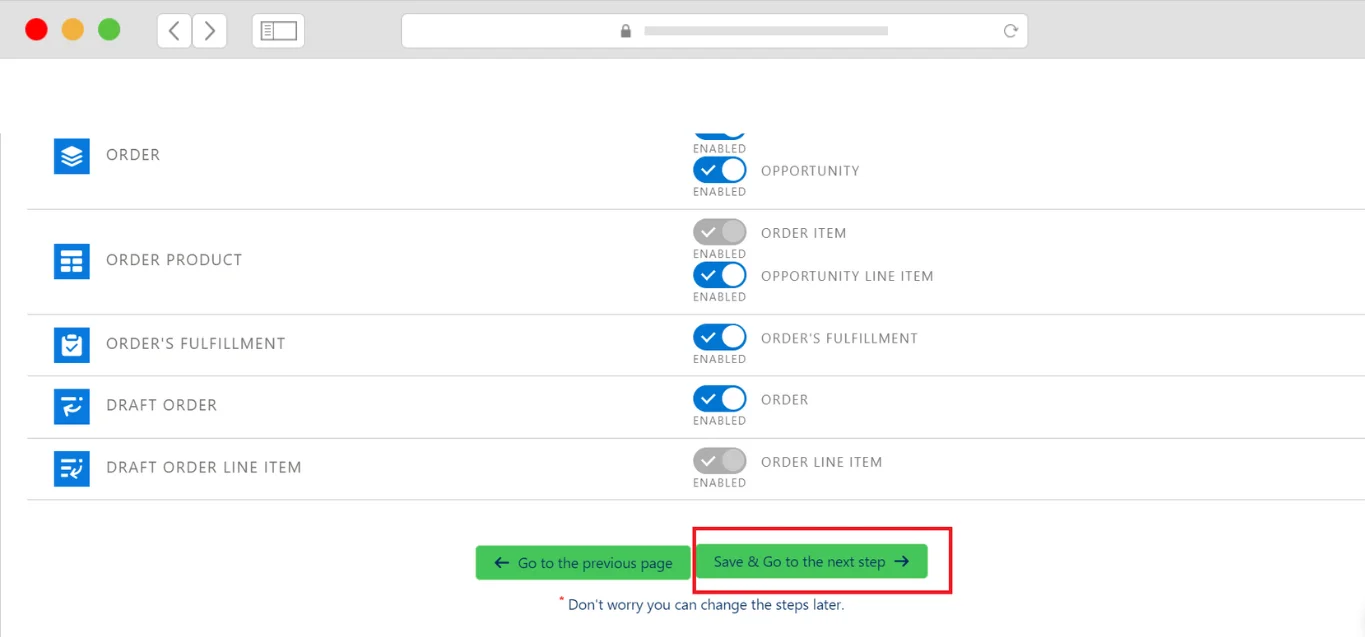
You can also select which account you want to make a “Person Account” or “Business Account”, and if you don’t want to create an “Opportunity” of orders or “Opportunity Line Item” or “Order Fulfillment” you can turn off the toggle button of these objects. If you want to use full functionality, you go with our default settings. See Figure 74
Now Click on Save and Go to the Next Step as seen in Figure 75
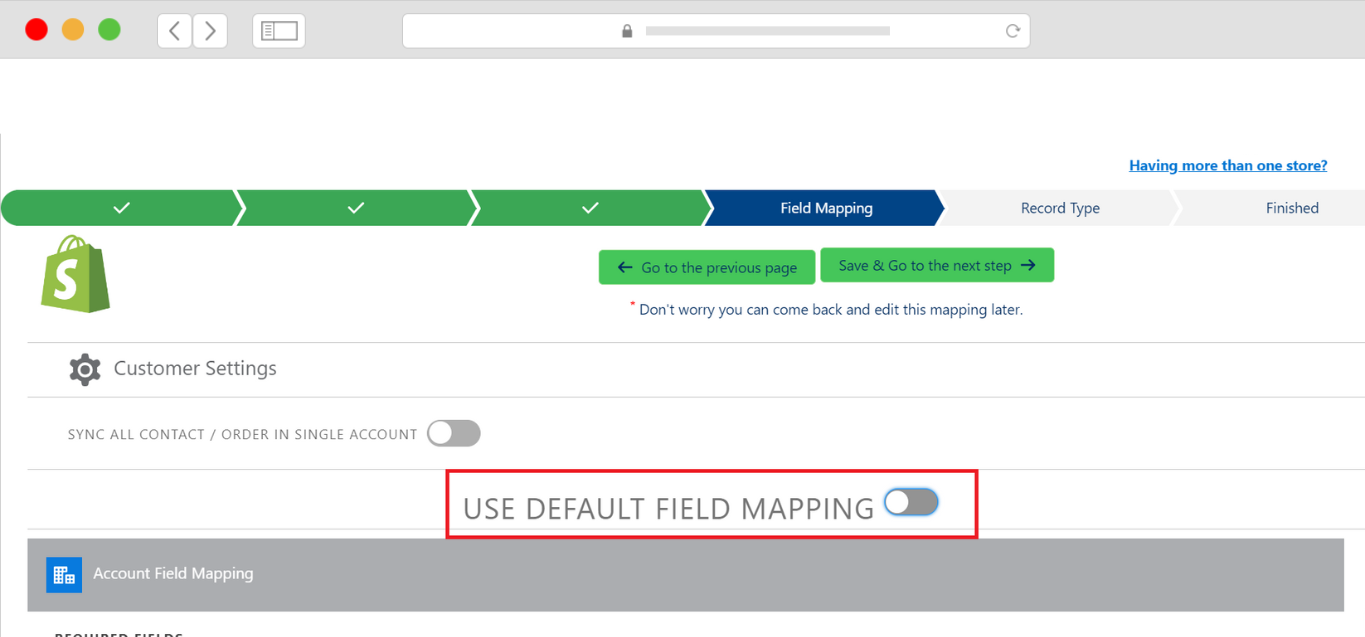
Step 3 - Field Mapping
On the Field Mapping page, you can choose to use the default Field Mapping. Click on Save and go to Next Step as in Figure 76
Sync Made Easy comes with default field mapping you can always use.
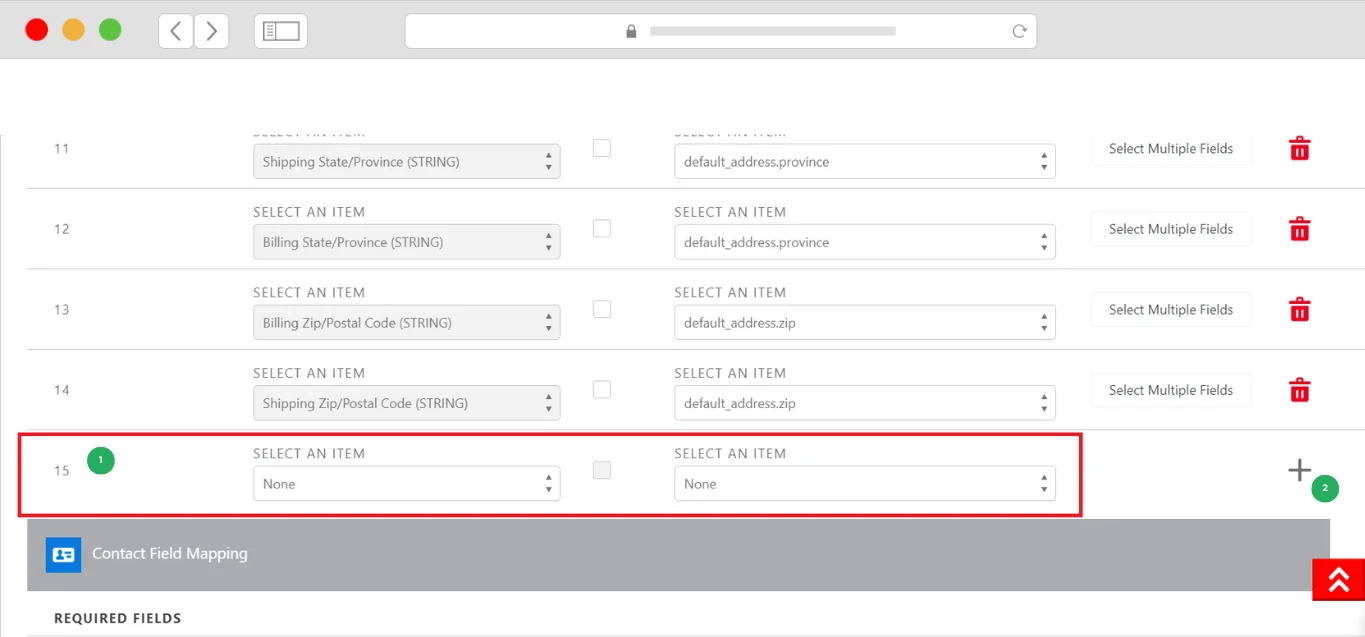
But if you want to customize the mapping, you can also do that by turning off the toggle button.
For Custom mapping go to the object in which you want to add custom mapping and then click on the plus button and add the field.
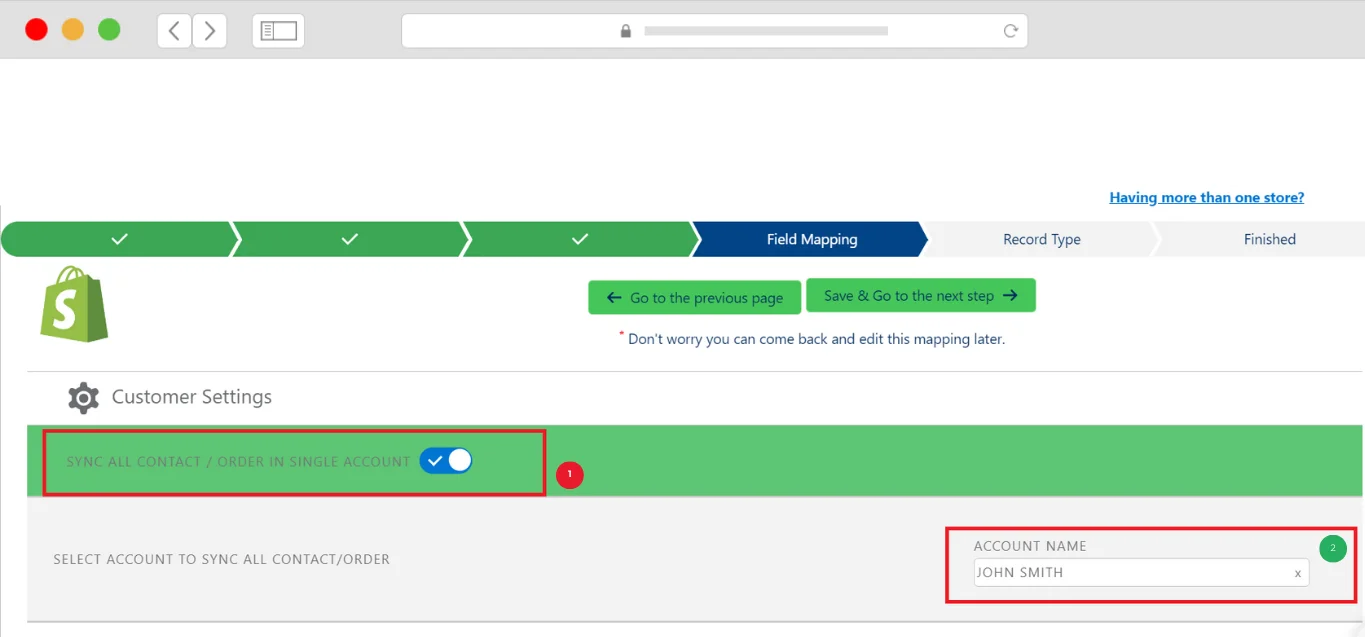
You can also “SYNC ALL CONTACTS/ORDER IN SINGLE ACCOUNT” by enabling the toggle button of “SYNC ALL CONTACTS/ORDER IN SINGLE ACCOUNT” and giving the name of the account you want to sync all your contacts/order.
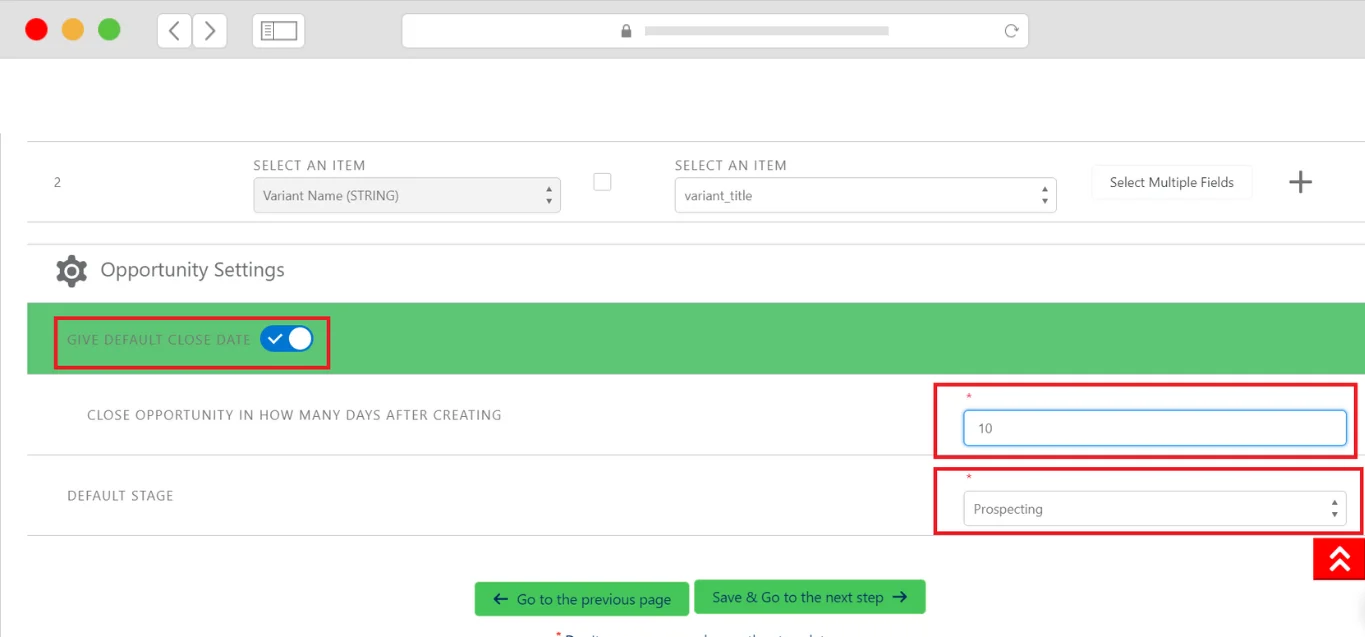
Step 4 - Final step of field mapping
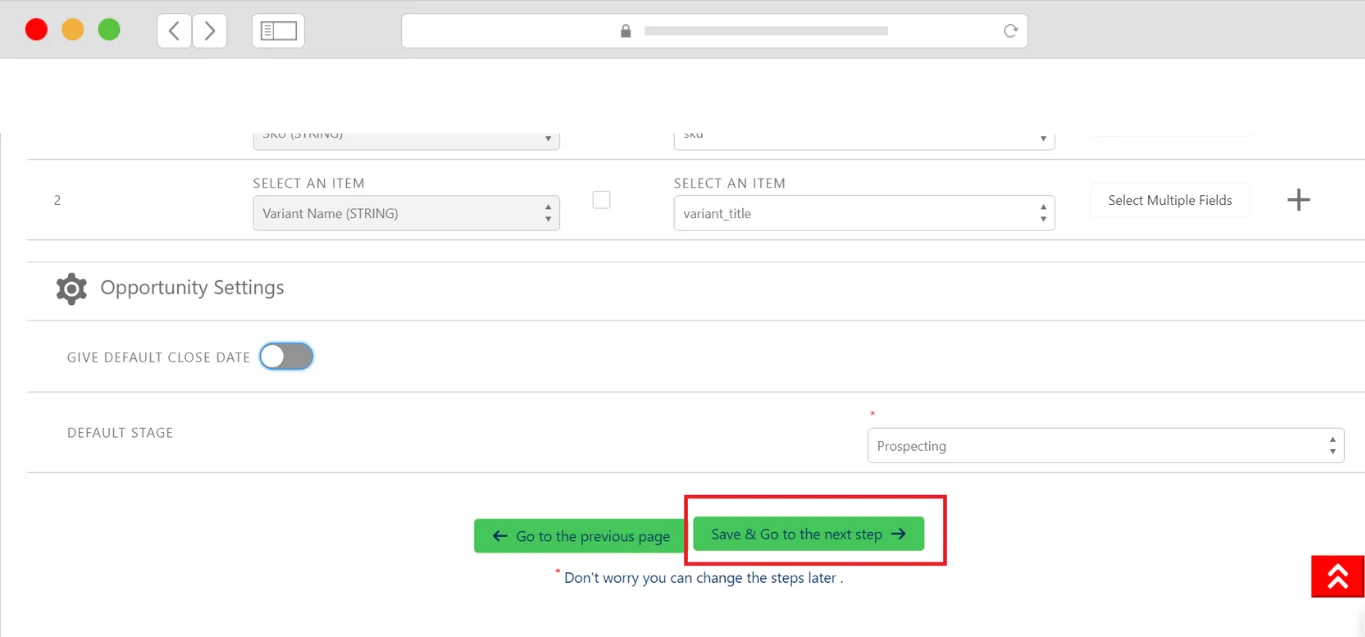
You can also give all your opportunities a “Default Date” and “Default Stage” by scrolling down to the bottom of the page to “Opportunity Settings”. Enable the toggle button and give the number of days you want and you can also select the stage by clicking on the stage.
Click Save and Go to the Next Step.
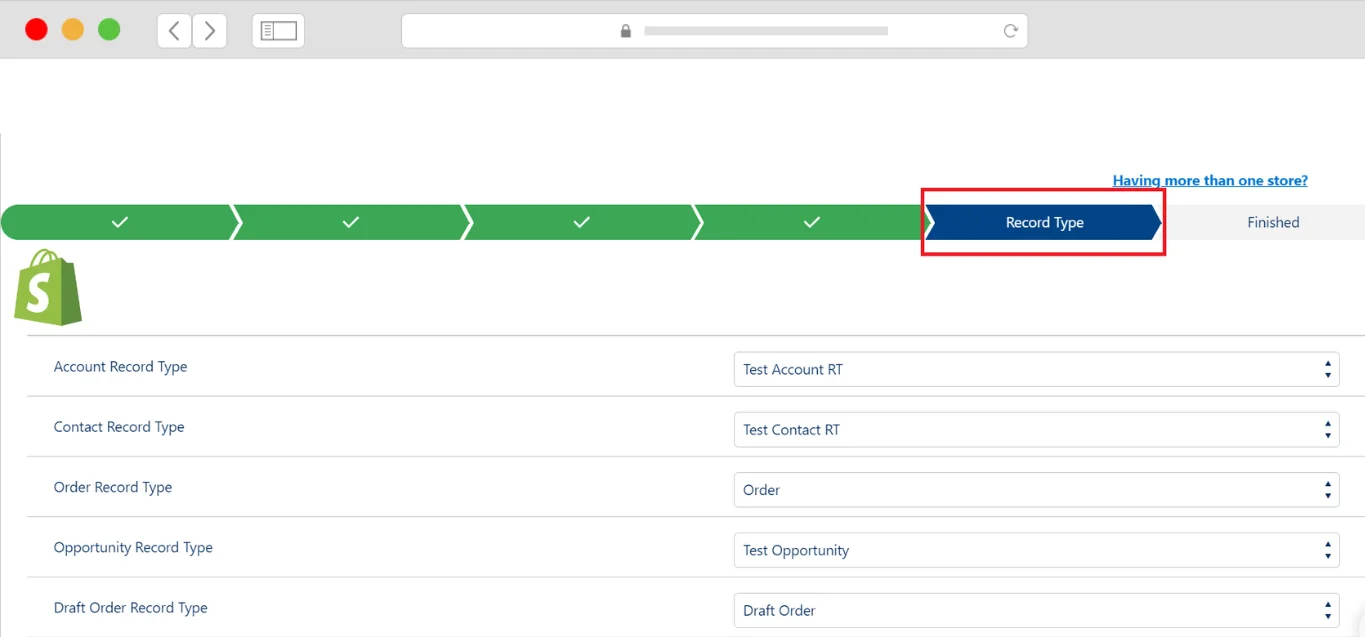
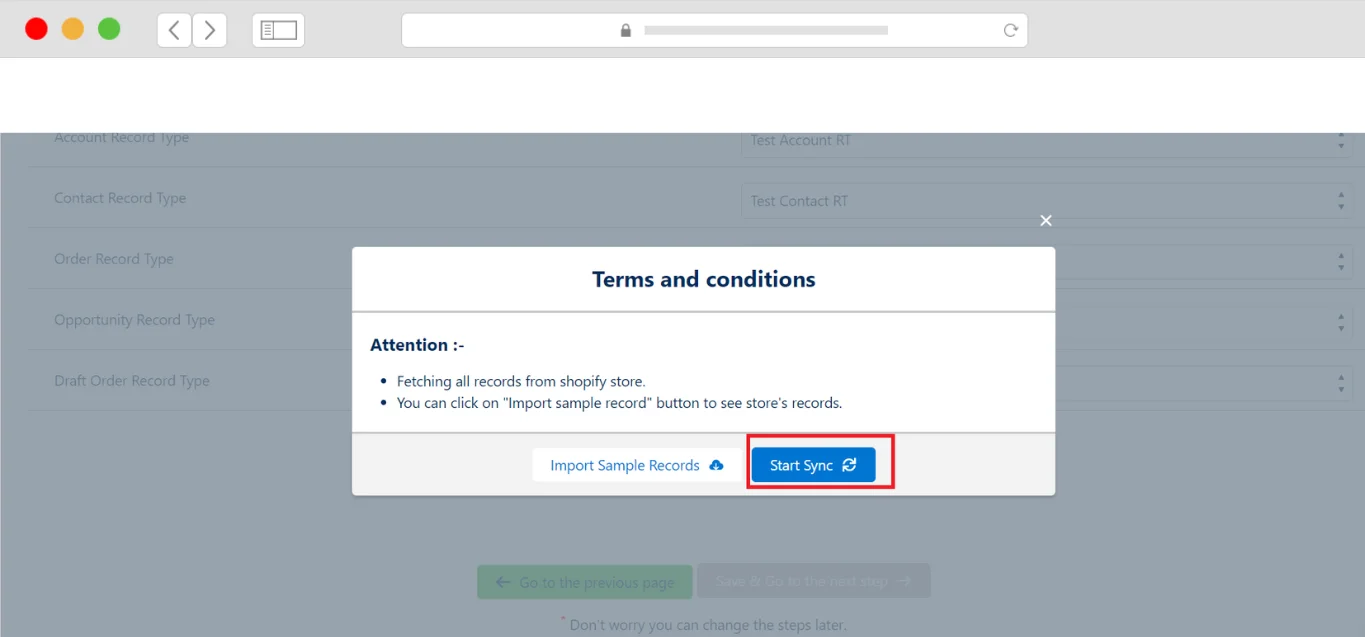
Step 5 - Record Type
In record type whatever record type you will select here, Record will be created by that record type only.
After Finishing all the configuration steps, when you click on the “Save & Go to next Page” it will go to the final step of the configuration where you have to sync all your shopify data with salesforce.
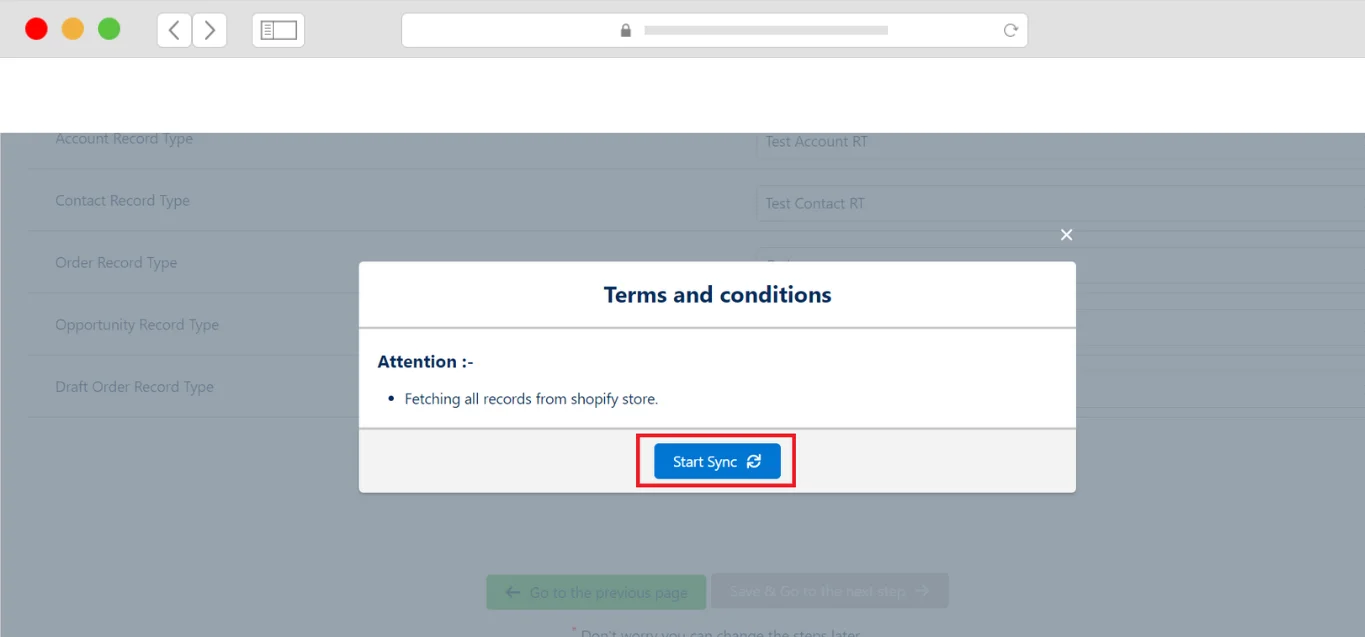
If you want to import “Sample Records” click on import sample records, or if you want to sync the click, tick the checkbox and click on “Start Sync”.
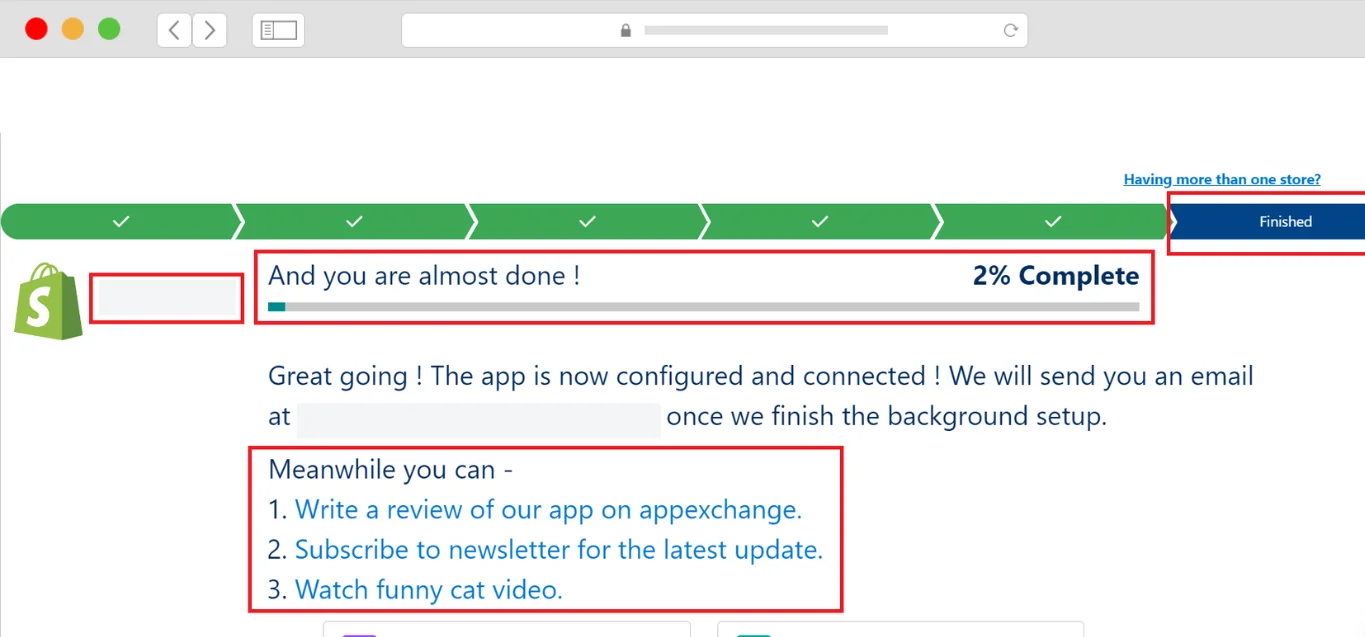
After you click on “Start Sync” the sync will get started and you can see the progress of your sync.
Support
For further assistance or installation-related queries, click on Contact Support at the top right of the page to Submit an issue like in Figure 85
You may view all the synced products, orders, variants, etc. on the Shopify Log. You may use the toggle button to see the list of logs updated. Also, can download them into a CSV file.